


 301 / 310

ELECTRICAL
11
4.4.2.3. PINOUT DETAILS:
PIN NO
DESCRIPTION
1
GND
2
SIGNAL
3
NC
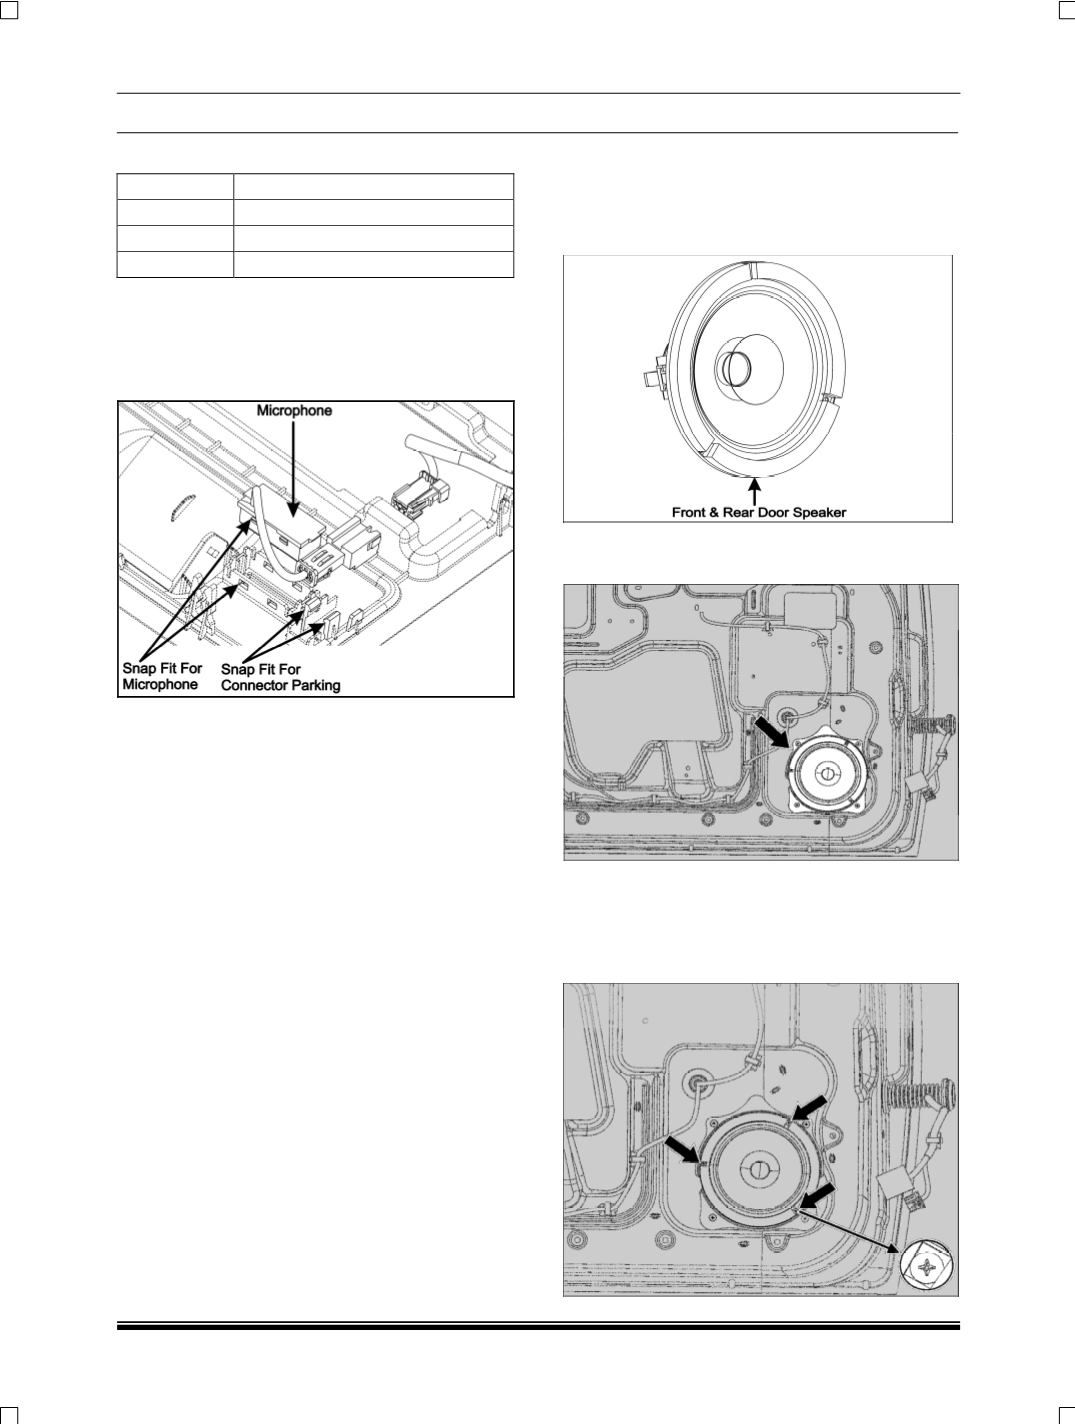
3.4.2.4. REMOVAL:
1.Pry out the front roof console.
2.Pry out the microphone from the cutout provided
on the front roof console.
3.Disconnect the electrical connection & take out
the connector from its parking position.
4.Remove the microphone.
4.4.2.5. REFITMENT:
1.Carefully press the microphone into the cutout.
(
Snap fitted
)
NOTE:
Microphone needs to be fitted only in the
orientation shown in the picture for the better
performance.
2.Connect the electrical connection.
3.Park the connector to given position (
Snap fitted
)
4.Carefully fit the front roof console (
Snap fitted
).
4.4.3 SPEAKERS:
4.4.3.1. FRONT & REAR DOOR SPEAKERS
Front door and rear door speakers are
component Speakers.
LOCATION:
Front & rear door speakers are
mounted on all four doors inner panel.
REMOVAL:
1.Remove the door trim (
refer body section
).
2. Loosen and remove the three mounting screws
of speaker.