
SUSPENSION
39
ASSEMBLY:
Note:
Check the condition of the components
before assembly and replace if found
damage.
1. Compress the spring with spring compression
tool part No.2702 5890 3202 to reduce length
as done during disassembly as shown in Fig.
61.
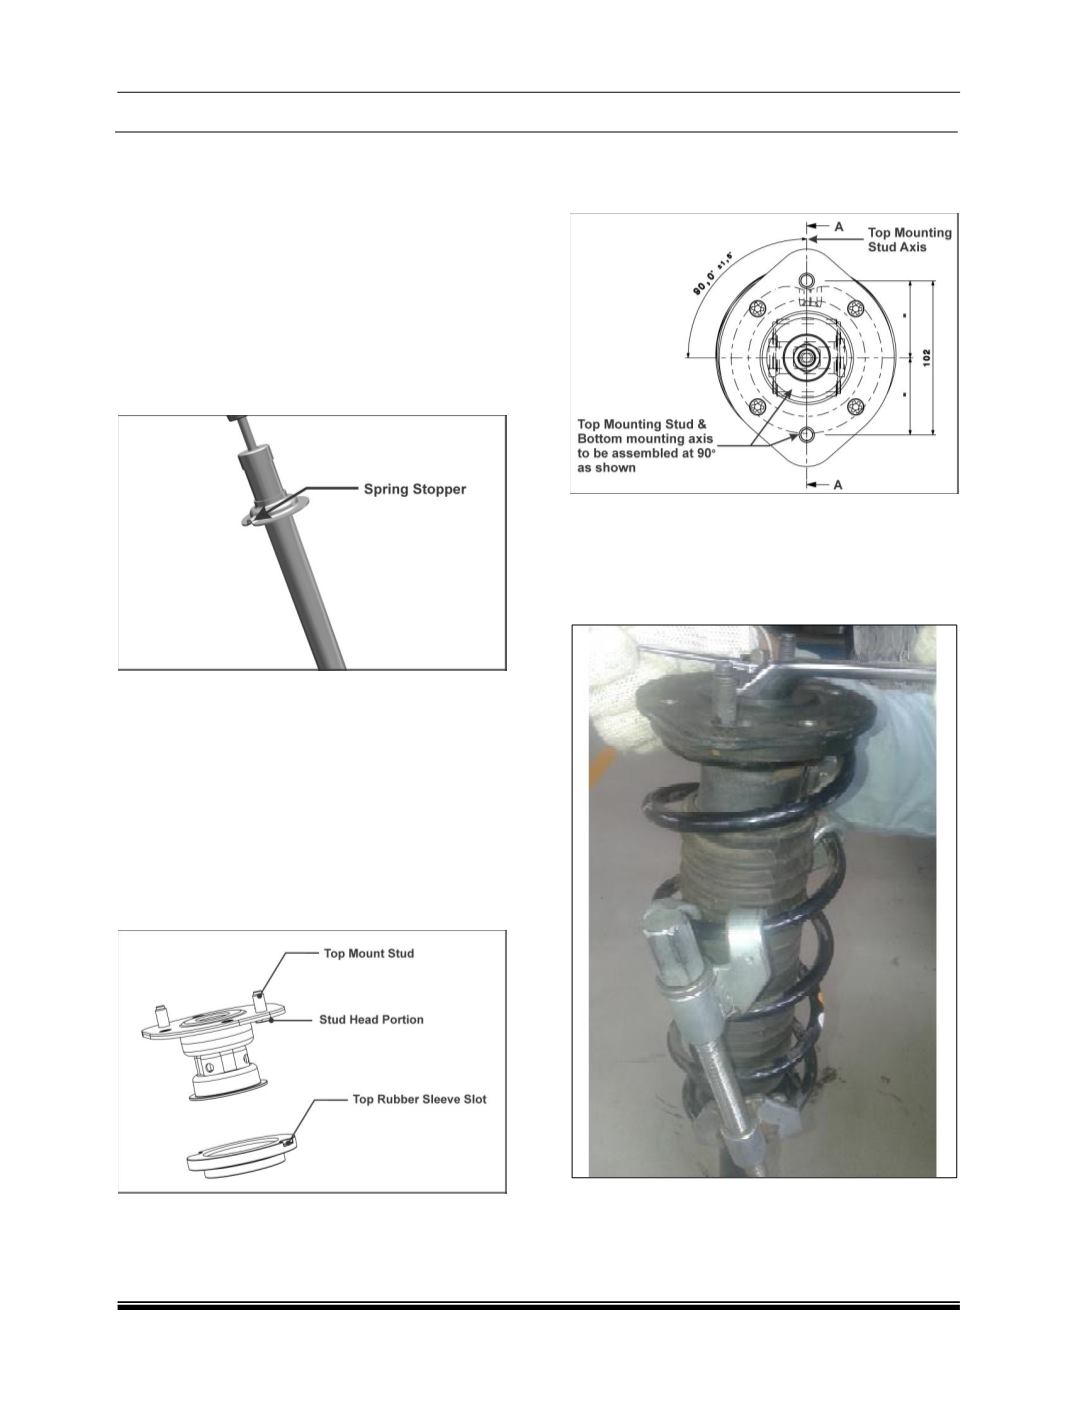
2. Insert the compressed spring on the damper
(Ensure that the spring end is resting with
stopper provided on spring seat lower).
FIG. 62
3. Insert Bump stopper on piston rod.
4. Assemble dust cover in the spring. (Ensure dust
cover is properly located in spring).
5. Insert special fastener on piston rod and tighten
it to 2 kg.m torque to ensure the location.
6. Assemble top mount with rubber sleeve
separately before placing on special fastener.
(Ensure top mount M10 bolt heads should be
placed in the rubber sleeve slots).
FIG. 63
7. Ensure the orientation of bottom eye axis with
top mount stud axis to 90 deg as shown in
Fig.64.
FIG. 64
8. Fit Nyloc Flange nut and tighten to 6-7 Kg.m
torque. Hold the piston rod by spanner/tool
(A/F: 6 mm) to stop piston rod rotation during
tightening of nut. Fig.65.
FIG. 65
9. Remove spring compression tool carefully.


