
SUSPENSION
38
5.9.
ON
VEHICLE
REPAIRS
REAR
SUSPENSION
5.9.1. DISASSEMBLY AND ASSEMBLY OF
REAR SHOCK ABSORBER FROM
VEHICLE
DISASSEMBLY
1. Lift the car using two post lift.
2. Remove Rear wheel.
3. Position the hydraulic jack below trailing arm
near strut mounting bottom bracket of twist
beam in such a way that it slightly compress
the rear strut
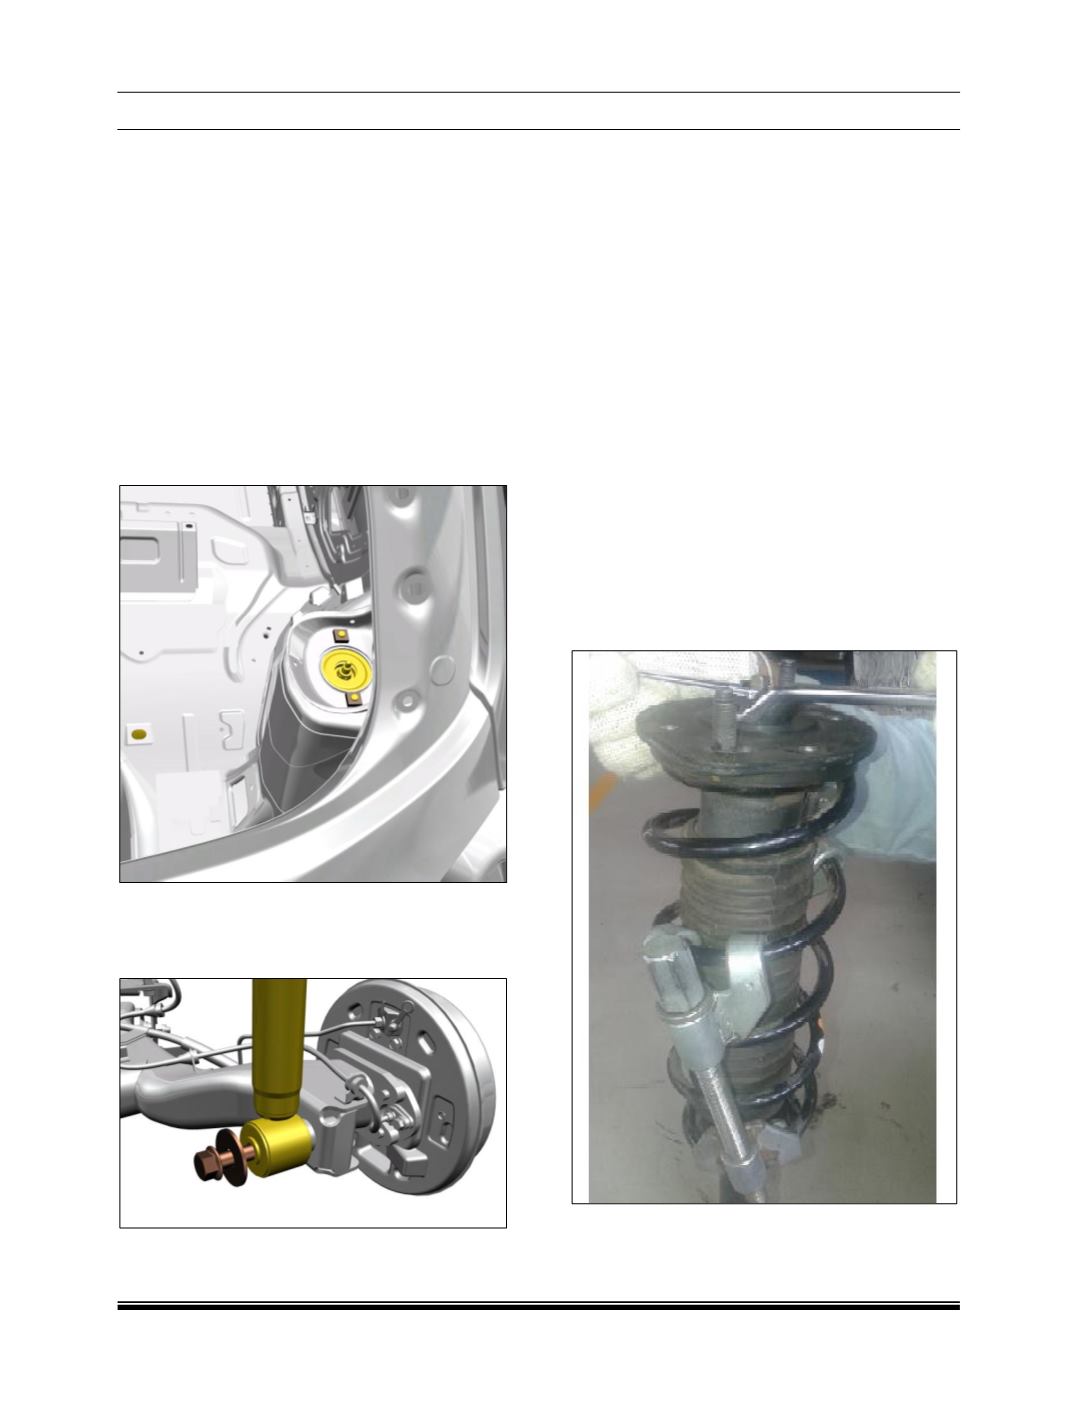
4. Using suitable spanner loosen the mount nut.
FIG. 59
5. Unscrew the strut holding bolts along with
washer as shown in fig.60.
FIG. 60
6. Remove both the shock absorber fasteners
holding the twist beam using hydraulic jack at
any one side as shown in fig.60.]
7. Now slowly release and hold the hydraulic jack
pressure & remove the strut.
INSTALLATION:
1
Carry out the above step in reverse order for
its
assembly.inappropriate sequence.
5.9.1
Note:
Ensure washer to be added on bolt before
tightening as shown in fig 60.
5.9.2. DISASSEMBLY AND ASSEMBLY OF
REAR SHOCK ABSORBER
DISASSEMBLY:
1. Compress the spring with spring compression
tool part No. 2702 5890 3202 until the spring
tension is released (i.e. becomes free in its
seating place). Hold the piston rod by
spanner/tool (A/F: 6 mm) to stop piston rod
rotation during loosening of nut. Unscrew nut
and dismantle the parts.
FIG. 61


