
SUSPENSION
34
5.7.8. PROCEDURE FOR CHECKING THE
BALL JOINT PLAY LOWER ARM:
It is recommended that the axial play on the ball
joints should be checked as per the procedure
given below before removal of the ball joints.
Note:
Please check tightening torque of all nut &
bolts on the ball joint mounting bracket and ball pin
nut before checking the ball joint play.
The front lower arm ball joints play should be
checked at every 10,000 kms as per the procedure
given below.
Procedure:
a) Apply the parking brakes and remove front
wheel by jacking up the car with the help of a
floor jack or by lifting it on a two pole hoist
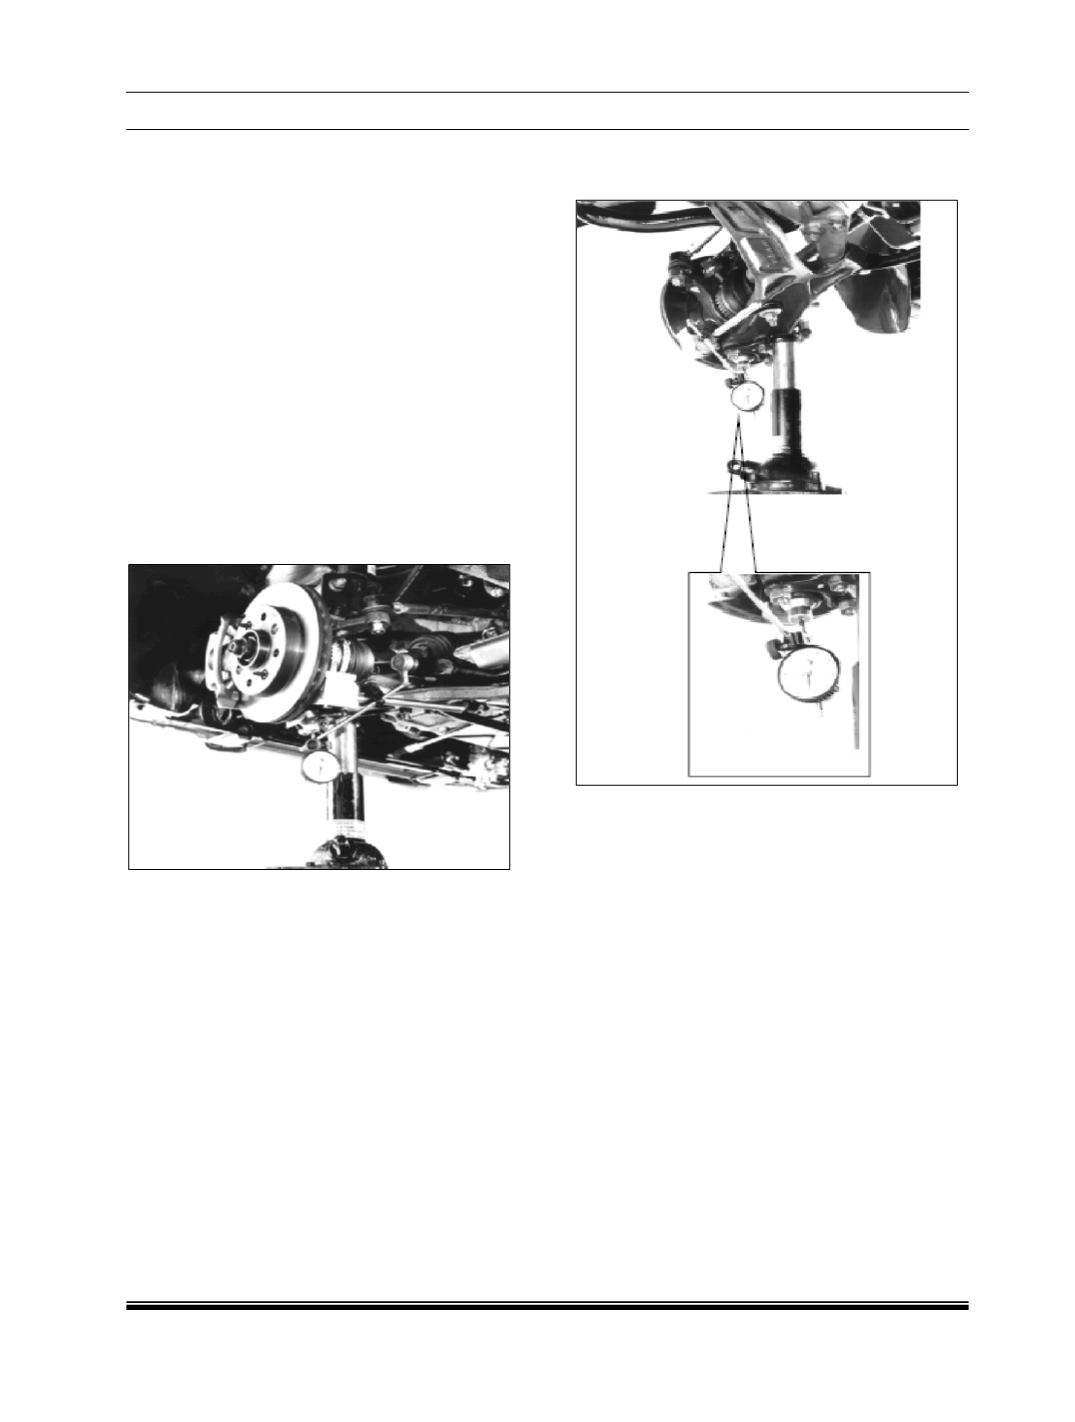
b) Mount the dial gauge with magnetic stand on
the brake disc as shown in Fig.54.
FIG. 54
Important:
Note that the Dial Indicator plunger
axis should be perpendicular to the ball joint
bottom face for the correct reading.
c) The tip of the dial gauge should be in contact
with the lower arm ball joint bottom plate. (With
preloading of about 1mm on the dial gauge).
d) Place another jack under the lower arm by
gently lifting up the lower arm. The jack is to
be placed under the lower arm as shown in
Fig. 55.
FIG. 55
e) As the jack is lifted slowly spring in the ball
joint gets fully closed (solid) at a load of about
100 kg. And then the dial gauge needle will
start moving and indicate the play in the ball
joint.
f) Keep on increasing the load by lifting up the
lower arm till the needle stops moving further.
Note the reading. This should not be more
than 0.5 mm. Do not further load the ball joint
after the needle movement stops.
g) If the reading found is in excess, replace ball
joint.


