


 869 / 1906

TRANSMISSION
54
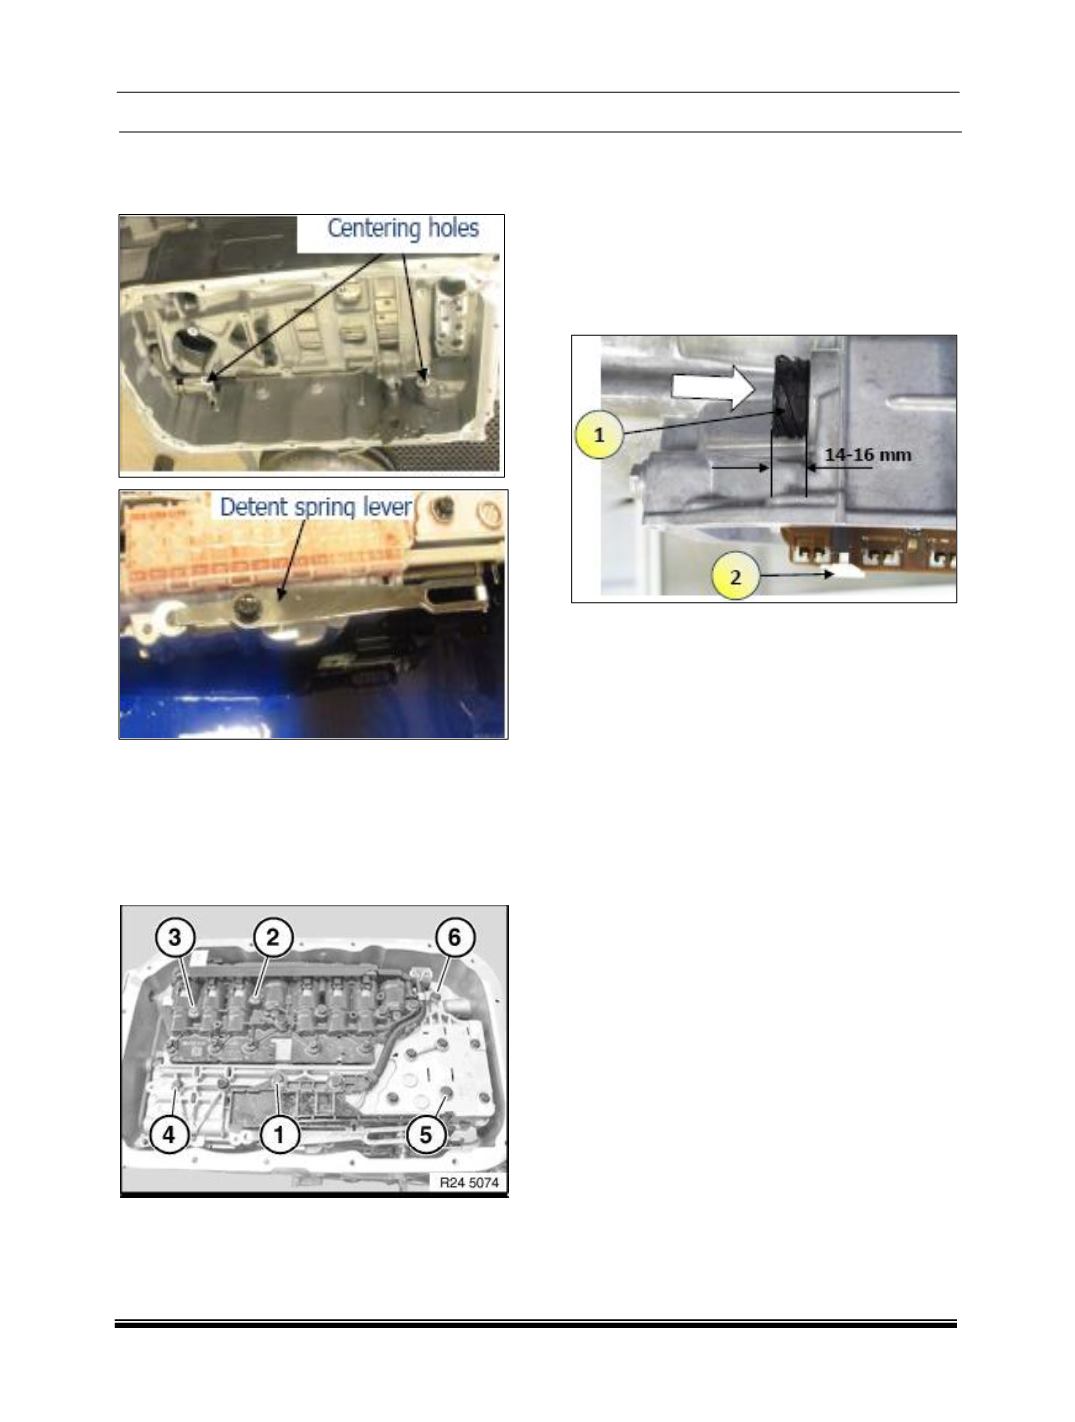
8. Align & install the control valve body
assembly on the main case helping by two
centering holes.
NOTE:
When installing new Mechatronic, don’t forget to
install Detent spring lever from previous
Mechatronic with H10 wrench. Tighten to 12 Nm.
9. Install bolts (1 to 6) securing the control valve
body assembly to the case assembly.
10. Tighten the bolts to 7-9 Nm according to
following torque sequence as shown.
Quantity: 6–M5X73.
11. Reinstall the electrical connector passage
sleeve (1). Push the sleeve straight into the
case bore & connector. Do NOT rotate the
sleeve at any time. Ensure the sleeve is fully
seated into the case. When the sleeve is
properly installed, the distance from the case
surface to the end of the sleeve should be
14–16mm. Push down the electrical
connector slide lock (2).
12. Reinstall the oil filter and oil pan following the
repair procedure 2 and 7.
13. Connect the
vehicle harness. See
Mechatronic Removing Procedure.
14. Program the transmission module.
15. Enter the VIN into the transmission module
using the diagnostic tool.
16. Clear any fault codes generated by the
programming / replacing operation.
17. Road test the vehicle and perform the
transmission adaptation procedure.