


 850 / 1906

TRANSMISSION
35
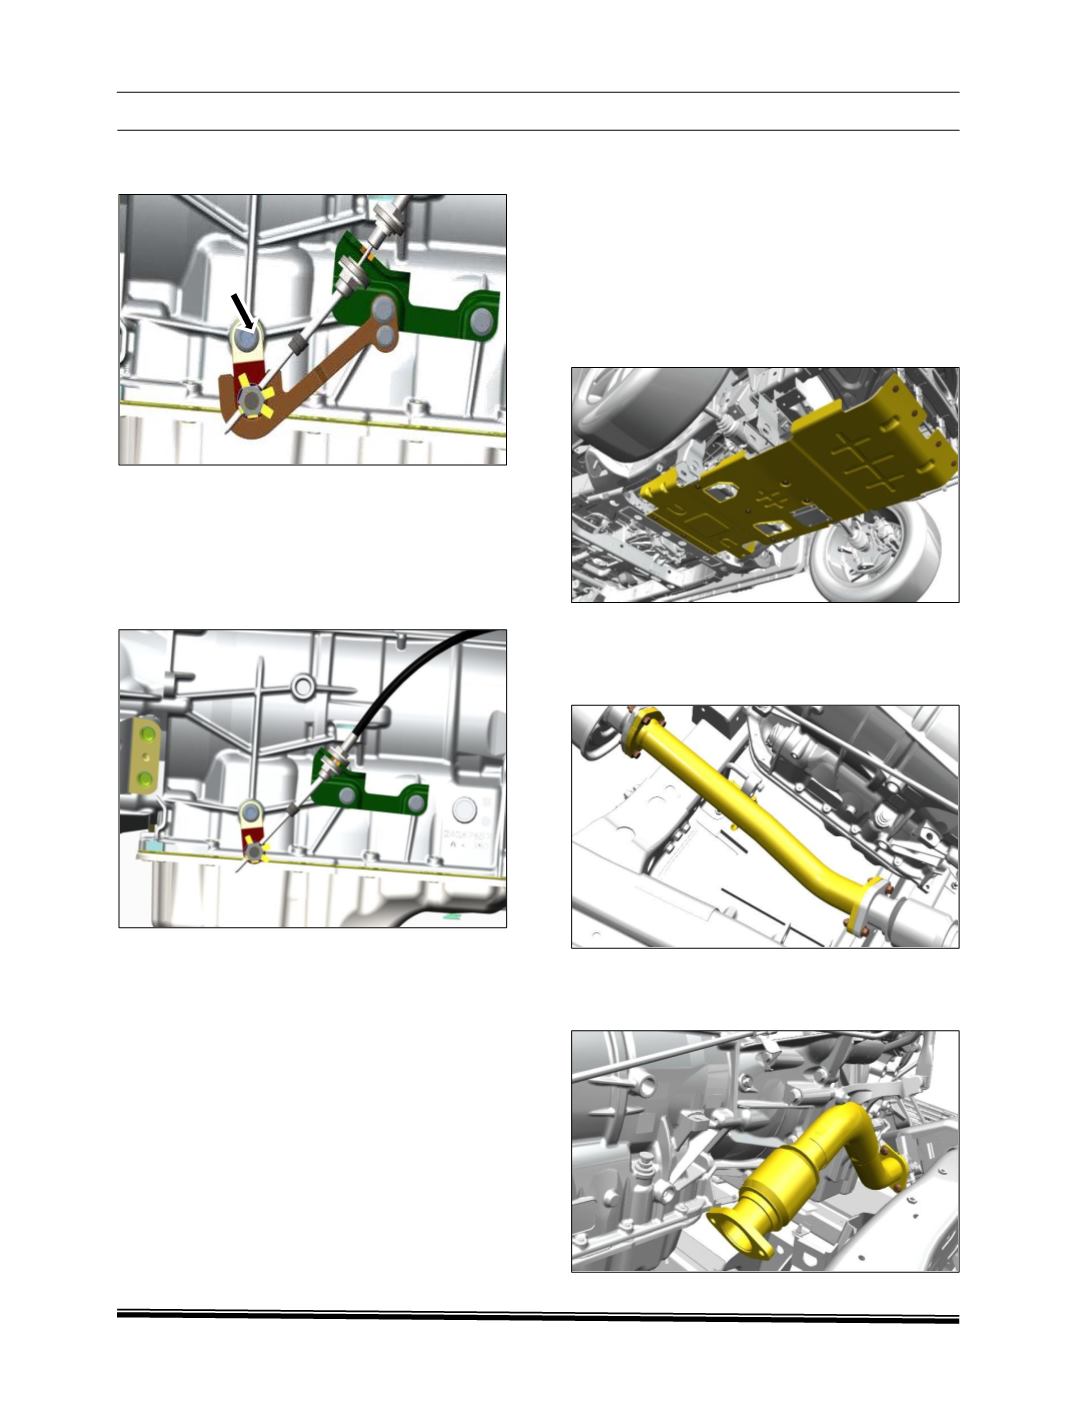
43. Tightened the Hexagonal M12 thin nut torque
4.0 to 4.5kgfm.
WARNING:
Do not bend the shift cable when opening the shift
linkage adjustment nut.
44. Then remove the M8 screw for removal of
fixture plate and then give the tightening
torque 2.0 to 2.5kgfm M8 nut.
45. Remove the support transmission jack.
39. If a new transmission is installed, no need to
follow the step below, go to point 45.
40. Perform the fluid level. See Transmission Oil
Level after repairs procedure.
41. Program the transmission module.
42. Enter the VIN into the transmission module
using the diagnostic tool.
43. Clear any fault codes generated by the
programming / replacing operation.
44. Road test the vehicle and release to
customer.
All-Wheel Drive Transmission Removing
Procedure:
1. Place Vehicle on Hoist in hand brake applied
condition.
• Transmission Selector in Park Position –P –
• Ignition “OFF”
2. Lift the vehicle to access to the transmission.
3. Remove the main transmission protection.
4. Loosen the 2 bolts at the middle and the 3
bolts at the rear of the exhaust system by
using a H12 wrench, and remove the middle
exhaust system.
5. Loosen the 2 bolts at the front of the catalyst
by using a H12 wrench and remove the
catalyst.