
1.05L REVOTORQ ENGINE
93
B. ENGINE INSTALLATION :
1. Engine installation is generally reverse of
removal. Make certain all hardware is
tightened to appropriate torque specification.
2. Prior to installing the engine, inspect the
condition of the rubber on the engine mounts.
Replace the engine mounts if the rubber is
damaged.
3. Install the starter motor, AC Compressor,
alternator along with its mounting brackets.
4. Mount the transaxle back onto the engine.
Tighten the bolts with specified torque.
5. With the vehicle raised on the vehicle lift
hoist, place the engine underneath the
vehicle,
aligned
with
the
engine
compartment.
CAUTION
Use care when lowering the vehicle body to
the engine and transaxle assembly. Verify
all the engine and other components will
not make direct contact or vehicle damage
will occur.
6. Slowly and carefully lower the vehicle body
over the engine.
7. Connect the lifting crane to the engine with a
chain / belt. Raise the hoist slightly to apply
lifting tension to the engine.
8. With the engine attached to the crane,
remove the support stand.
9. Secure the engine in the vehicle by attaching
the "C", "A" and "B" mounting brackets.
Tighten the mounting bracket hardware at
specified torque.
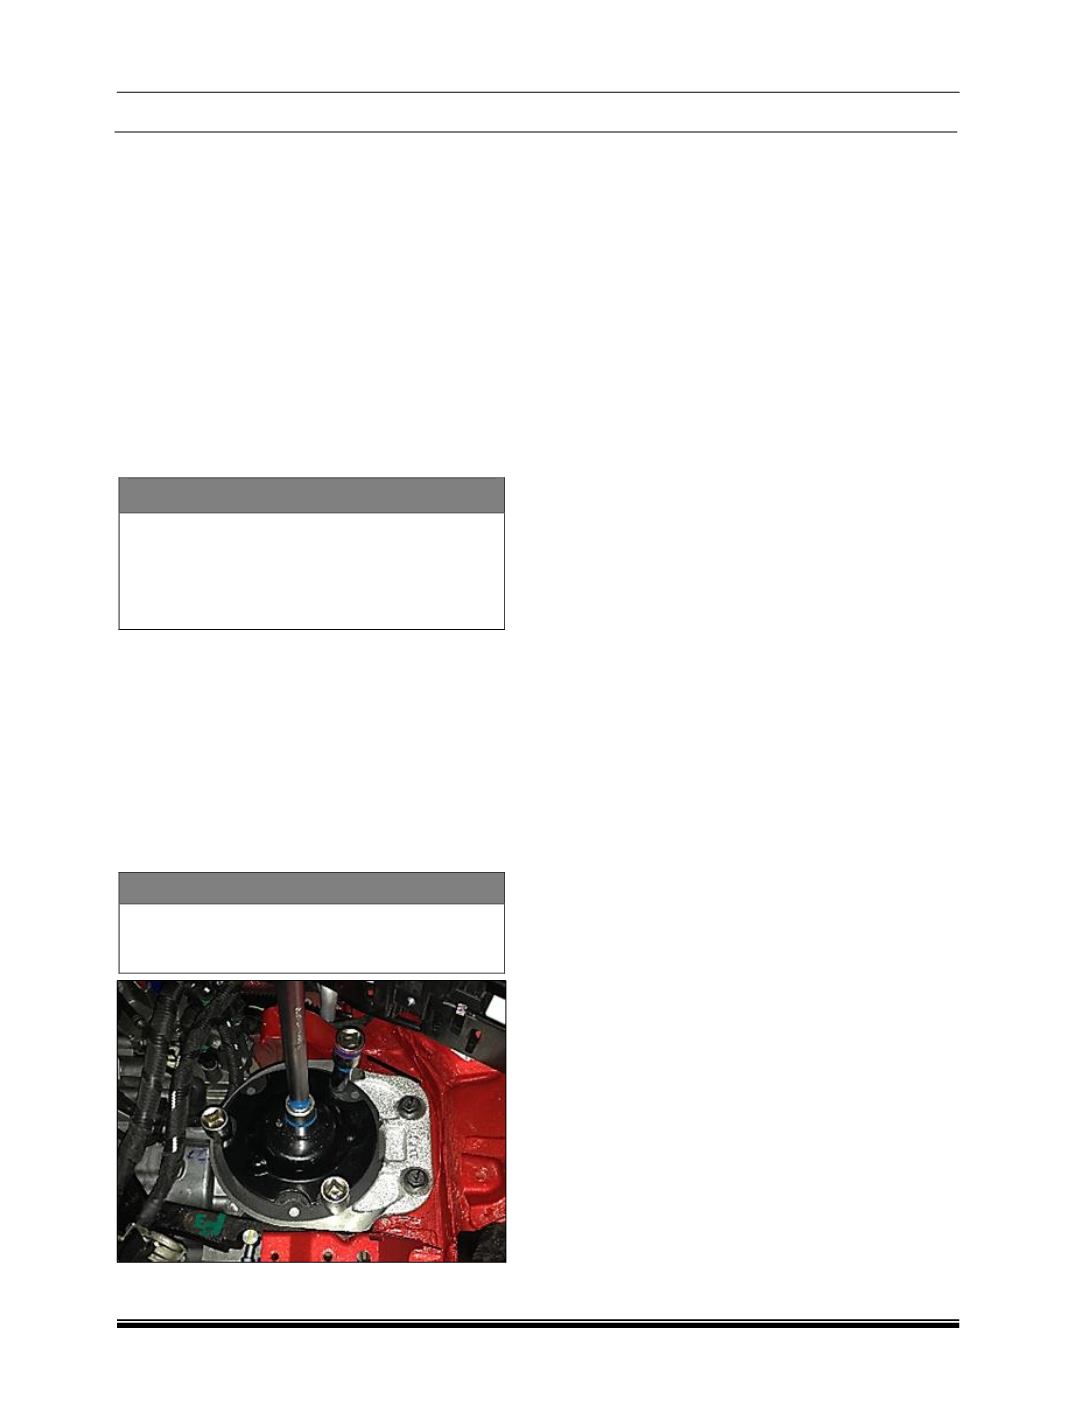
NOTE
While tightening of B mount, use 12 mm 3
no’s of sockets on consecutive 3 mounting
bolts as shown in fig.
10. Remove the chain / belt after engine mounts
are secure.
11. Install the left and right driveshaft assemblies.
12. Connect the gearshift linkage, clutch cable to
the engine and transaxle.
13. Connect the engine wiring harness.
14. Connect the cooling system reservoir hoses.
Verify the cooling system drain is closed on
the radiator. Install the cooling system hoses
to the engine, radiator and heater core.
15. To connect the exhaust front pipe tighten the
flange near Catcon and connect at rear end.
16. Install the air filter assembly and intake
system hoses to the engine.
17. Connect the vacuum hose connected
between brake booster to vacuum pump.
18. Connect all the hoses connected between
radiator and engine.
19. Connect the fuel lines to the engine.
20. Install the Battery Plate, Battery and ECU.
21. Connect the engine wiring harness
connection with ECU.
22. Add the appropriate quantity of Engine oil,
Transaxle oil and coolant with respective
systems.
23. Connect the battery positive cable and then
the battery negative cable.
24. Crank the engine several times without
allowing the vehicle to start. This allows the
oil and coolant to flow through engine.
25. Start the engine and verify the oil pressure
light on the instrument cluster goes out. Stop
the engine immediately if the light fails to
extinguish.
26. Allow the engine to run for several minutes,
checking for fluid levels and leakage.


