


 163 / 745

KRYOTEC ENGINE
155
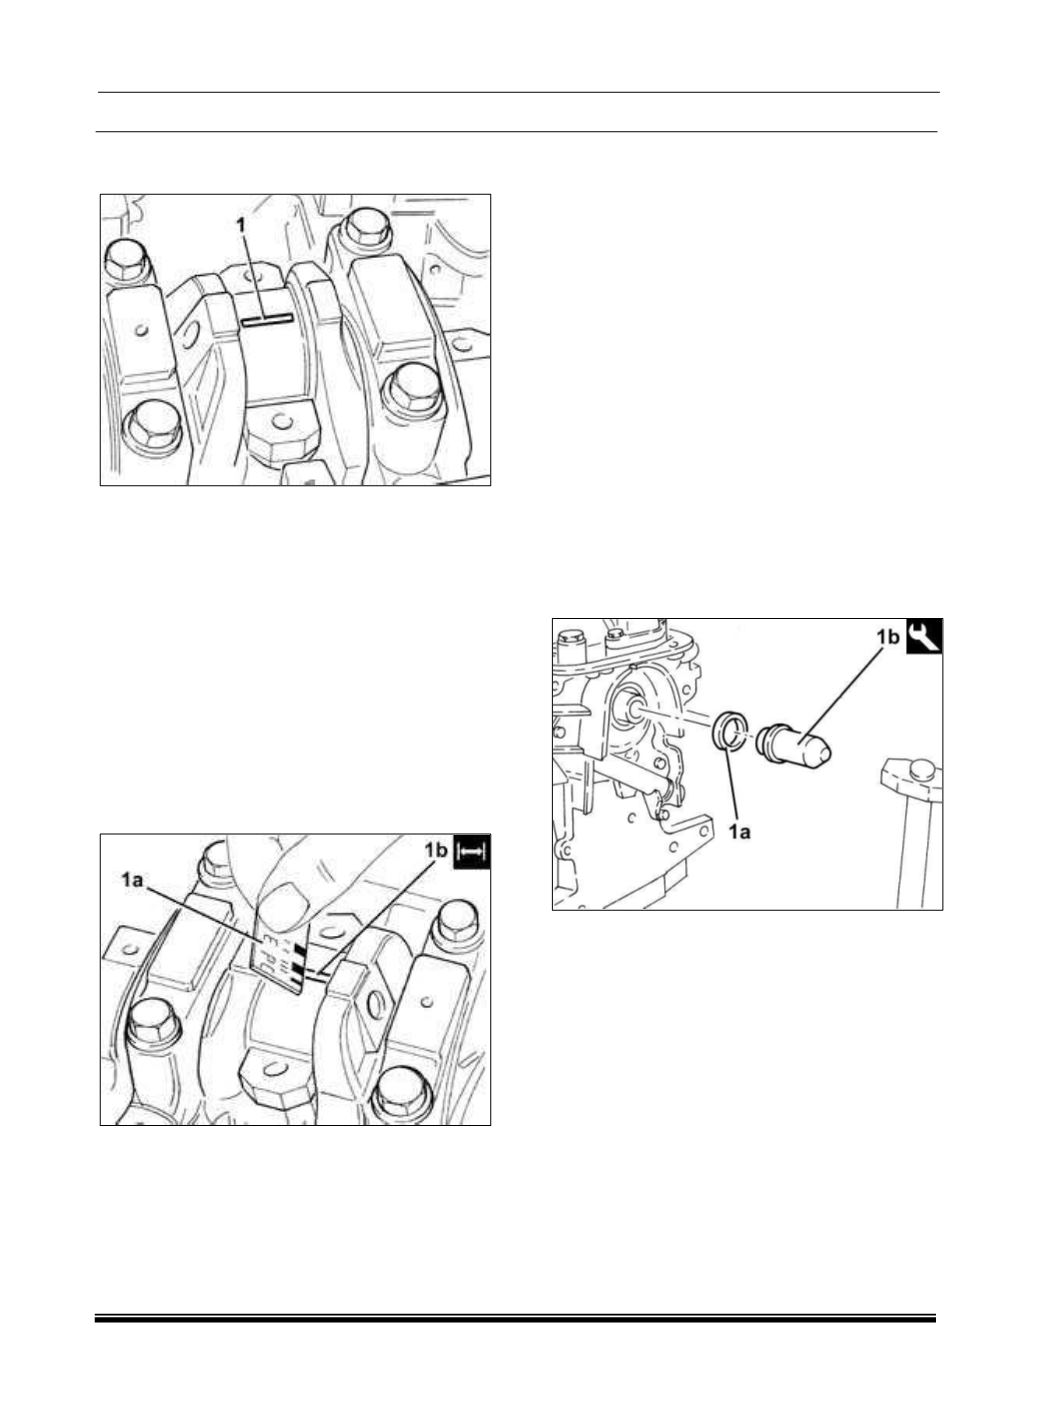
52. Apply the calibrated wire (Plastigage) across
the surface of the bearing journals (1).
NOTE
The connecting rod caps must be assembled so
that the number stamped on them is facing the
same side as the one stamped on the big end
(intake side).
53. Fit the bearing caps complete with bearing
shells.
54. Tighten the bearing cap bolts using a suitable
angle tightening tool to the proper (Torque
Specifications).
55. Remove the bearing caps previously installed
and using the graduated measuring guide (1a)
determine the bearing clearance indicated by the
calibrated wire (1b).
NOTE
If the measured value is not within specification,
replace the bearing shells with the proper
dimension of the appropriate class. Perform the
measurement on the remaining journals taking
care not to rotate the crankshaft.
The connecting rod caps must be assembled so
that the number stamped on them is facing the
same side as the one stamped on the big end
(intake side).
56. Fit all bearing caps complete with bearing
shells.
57. Tighten all bearing cap bolts using a suitable
angle tightening tool to the proper (Torque
Specifications).
58. Remove the 1860815000 crankshaft rotation
tool.
59. Using the tool with dial gauge, check the gear
clearance of the engine balancing shaft unit to
determine the thickness of the corresponding
spacers.
60. Install the front crankshaft oil seal cover with
gasket and tighten the screws to the proper
(Torque Specifications).
61. Install the front crankshaft oil seal (1a) in the
cover with the 1860816000 tool (1b).
62. Install the crankshaft position sensor and
tighten the screw to the proper (Torque
Specifications).
63. Install the timing belt tensioner and tighten the
bolts to the proper (Torque Specifications).
64. Install the rear crankshaft oil seal retainer and
tighten the screws to the proper (Torque
Specifications).
65. Apply silicone sealant around the entire
perimeter of the engine oil pan.
66. Install the engine oil pan.
67. Tighten the side oil pan bolts with tool
1860834000 to the proper (Torque Specifications).
68. Tighten the front and rear oil pan bolts with tool
1860833000 to the proper (Torque Specifications).