


 640 / 1119

SUSPENSION
26
2.
Tighten all bolts and nuts to specified torque
mention in Torque table.
3. Apply ADH thread locker wicking grade
ANABOND 124 at nut end and bolt thread.
Ensure that the threads are free from oil/grease.
CAUTION:
1. Ensure that brake hose does not damage
during installation.
2. Strut having the same color code mark on the
spring should be assembled on the left hand
and right hand side.
9.2 ON BENCH FRONT STRUT REMOVAL AND
ASSEMBLY
REMOVAL
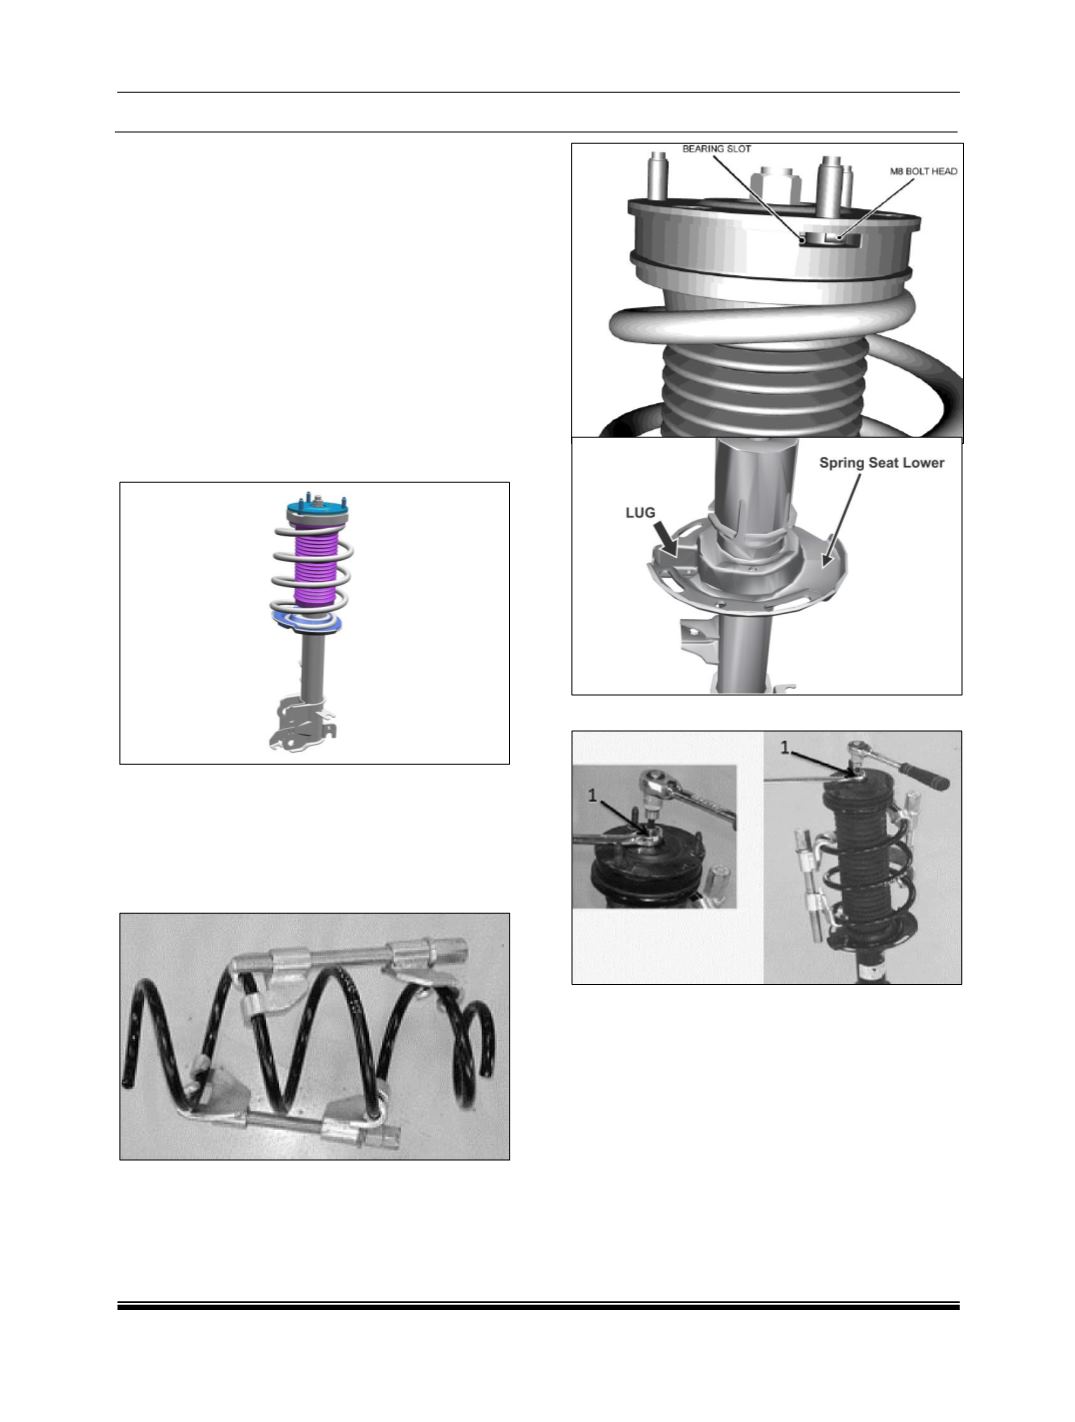
Compress the spring with spring Compression tool
part No. 8855 2702 0040 until the spring tension is
released (i.e. becomes free in its seating
place).Hold the piston rod by Allen key (A/F: 6 mm)
to stop piston rod rotation during loosening of nut.
Unscrew nut (1) and dismantle the parts.
ASSEMBLY
Check the condition of the components before
assembly and replace if found damage.
1. Compress the spring with spring compression
tool part No. 8855 2702 0040 to reduce length
as done during disassembly.
2. Insert the compressed spring on the strut
(ensure that the spring end is located at Lug in
spring seat lower).
3. Pull strut piston rod up to full extended length.
4. Insert bump stopper.