


 1885 / 1906

HVAC
71
ASSEMBLY
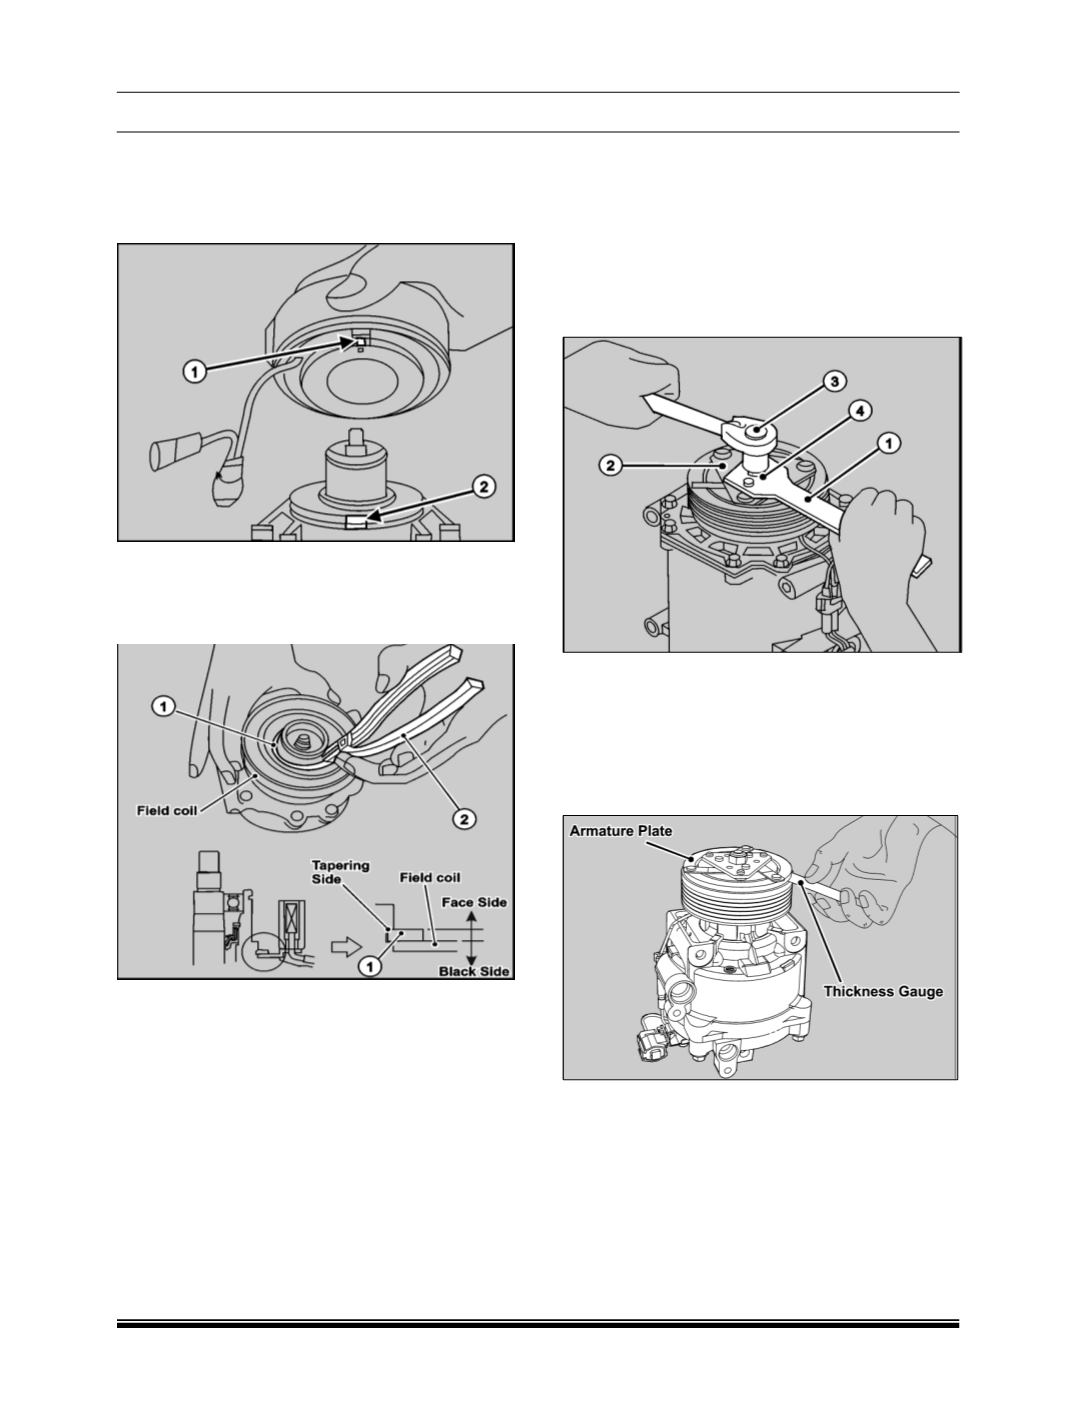
1. Align the projection of the field coil
(1)
to the pin
hole of the compressor body
(2)
and then install
the field coil.
2. Using snap ring pliers insert the snap ring to the
field coil in correct orientation and check that it is
properly installed.
(Position tapered side to the
face outside and put it in the groove.)
3. Fix wiring with the clamp.
NOTE
Apply torque of 0.196 Kg-m
4. While turning by hand, install the rotor gently.
5. Install the shim to the shaft.
6. Press-fit armature plate on to the shaft by taking
care of the mating marks. Turn the rotor by hand
to check for contact noise and smooth rotation.
NOTE
The rotor should be free from abnormal noises
when being turned by hand.
The rotor shall be free from backlash.
7. Using the armature plate fixing tool
(1),
tighten
the self-lock nut
(4)
by socket
(14mm) (3)
to the
armature plate
(2).
NOTE
Apply torque of 1.57 Kg-m
8. Check the air gap of the clutch using thickness
gauge. If the air gap exceeds the range, of 0.2 to
0.45mm then remove the armature plate again
and readjust the gap using shims.
NOTE
AIR GAP: 0.2 to 0.45mm
9. After gap adjustment, replace the self-lock nut
with a new one and tighten it to the specified
torque