


 1070 / 1906

REAR AXLE
21
Do not use the toner ring if found damaged,
this may malfunction the ABS system.
CHECK AFTER ASSEMBLY OF AXLE SHAFT
1. Bearing is properly pressed on axle shaft.
2. No damage on axle shaft flange face.
3. Bearing is not damaged or no grease is spilling
out from bearing.
4. Lock washer is properly bent into the locknut.
5. Toner ring is free from damage and pressed
properly.
6. Wheel bolt threading is not damaged.
7. Brake assembly bolt threading is not damaged.
II. DIFFERENTIAL CASING
DISMANTLING
NOTE
Liquid gasket is used for sealing of carrier section
with banjo beam. Scrap this sealant and clear it.
1. Remove bearing caps by removing bearing
cap bolts.
NOTE
Identification marks are punched on bearing cap;
this is to ensure correct bearing cap is installed on
correct side. Ensure correct bearing caps used
while reassembly.
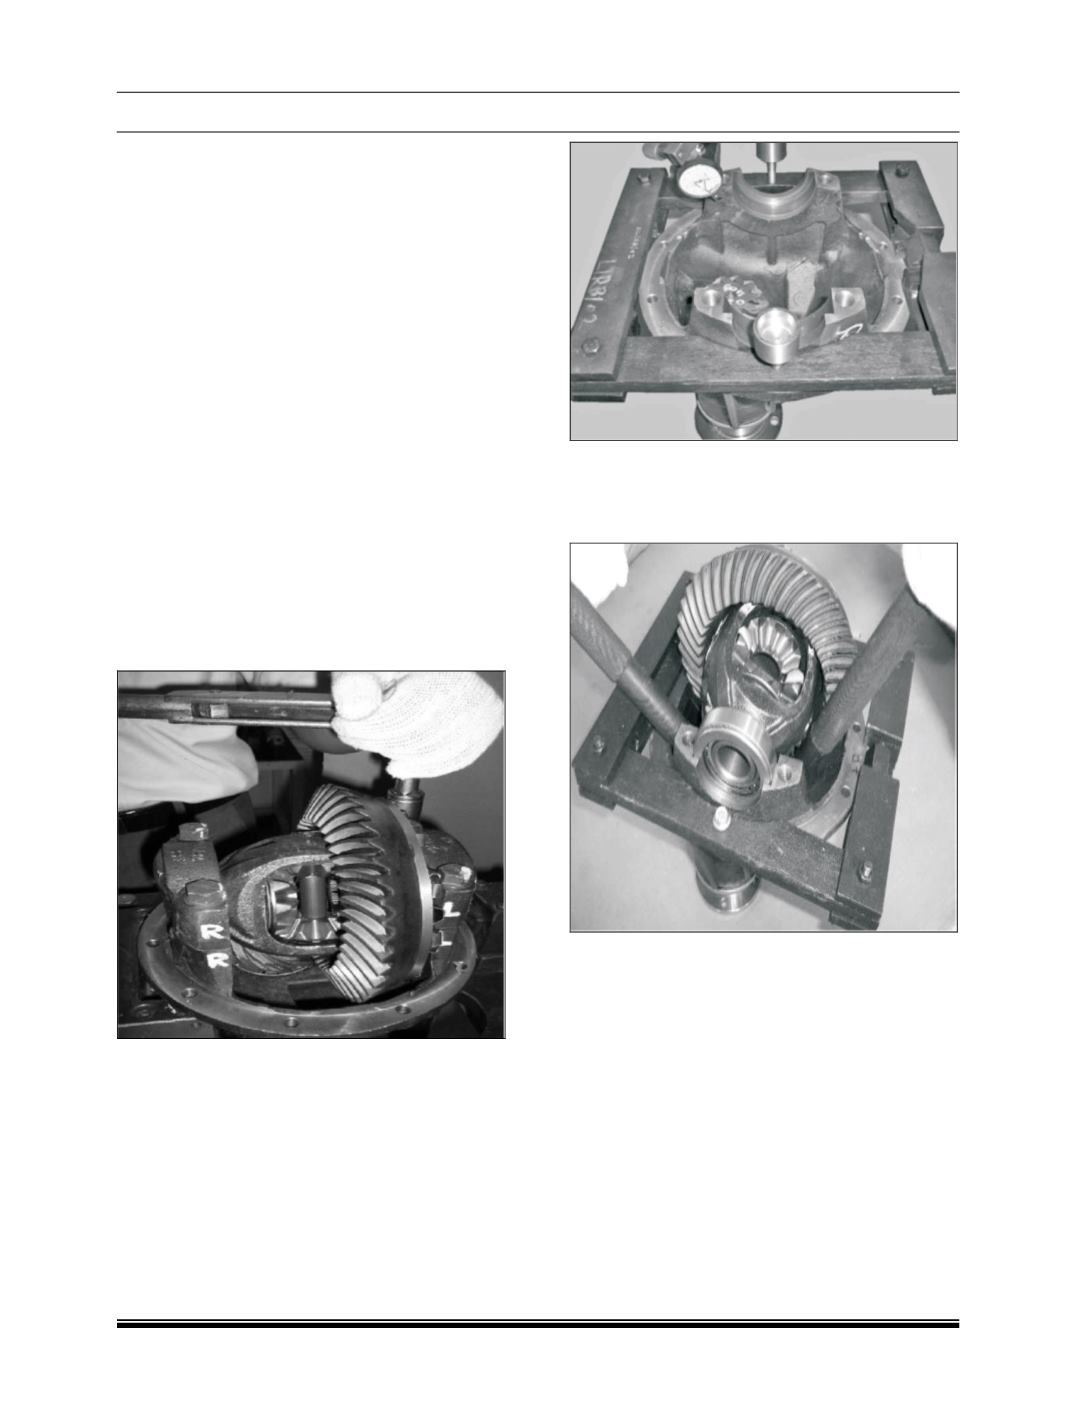
2. Mount spreader
(Part No. 289458903502)
on
carrier and spread carrier by rotating nut on
spreader. Do not spread carrier more than
0.58mm.
3. Pry out differential case from carrier with help
of Tommy bars
(Part No. 289458903521)
(Qty.
2 Nos)
and remove the spreader assembly
from the casing.
4. Remove side bearing cone from differential
case assembly using special tool mentioned
below.
a.
Adapter, differential bearing cone
(Part No.
289458903510)