


 1256 / 1526

ENGINE
88
Fig. 6
Fig. 7
Fig. 8
PISTONS AND CONNECTING RODS
REMOVAL
(Cylinder head and oil sump removed)
1 Carefully remove combustion residues from top
end of cylinder bores, preferably by a broken
piston ring. Cut ridge by ridge cutter.
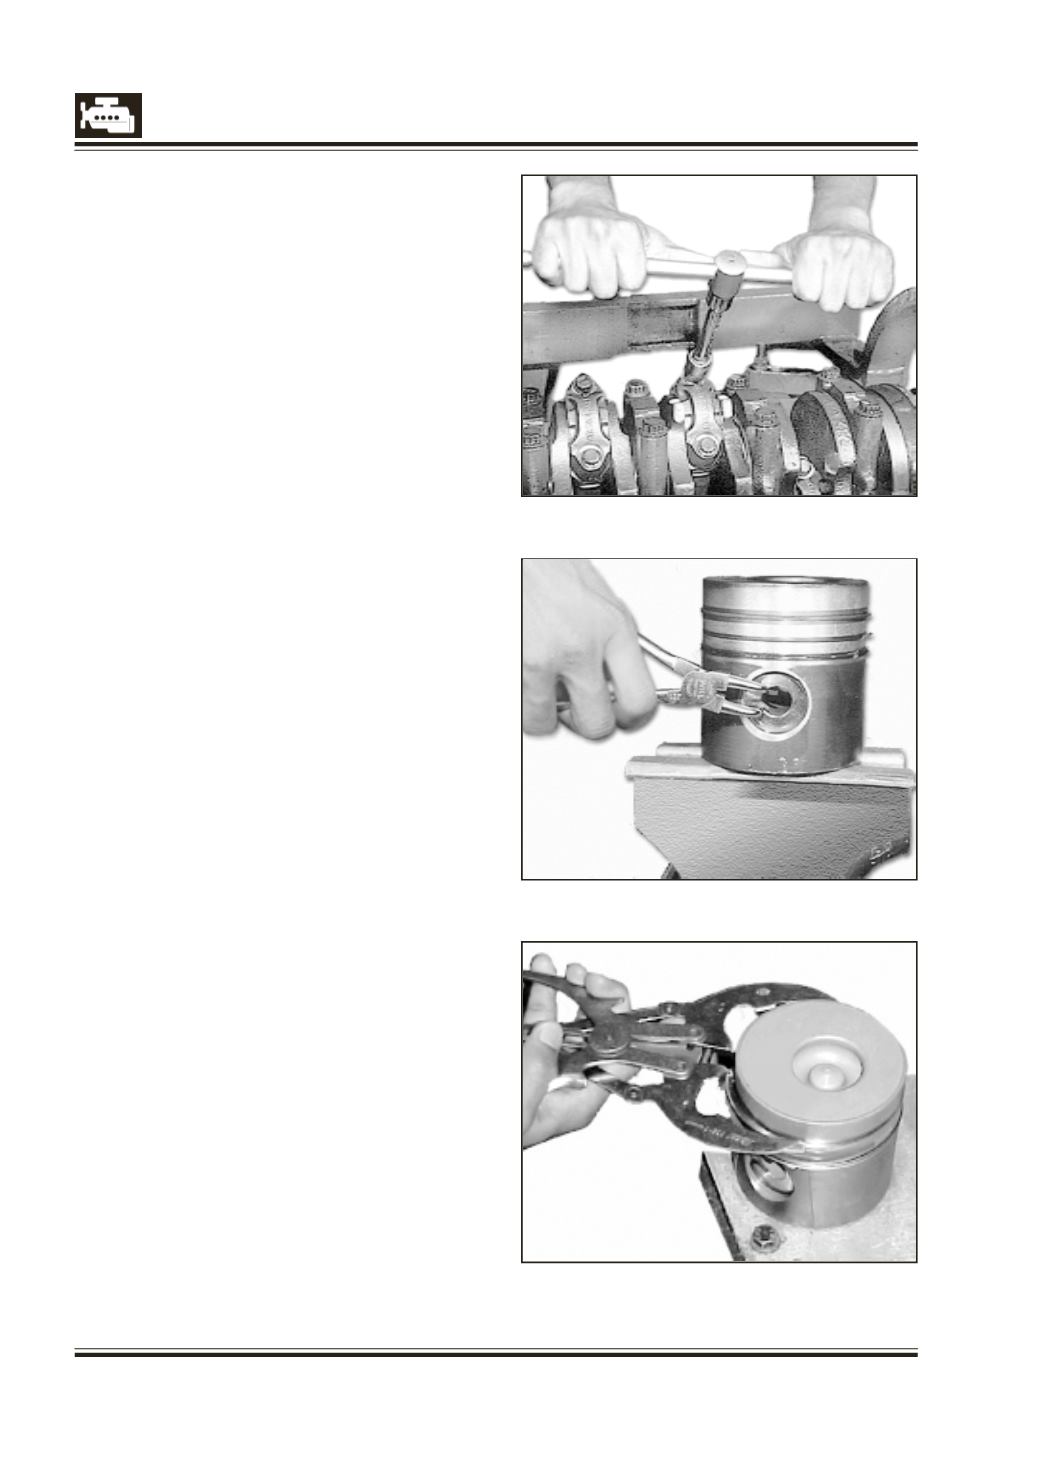
2 Turn crankshaft and bring a pair of pistons to
bottom most position. Unscrew their connecting
rod cap mounting bolts Fig. 6 and remove caps
with bearing shell. Turn crankshaft to bring this
pair of pistons and connecting rod to top most
position. Push these piston assemblies-out of
bores one by one using mallet wooden handle.
Remove remaining pistons in same manner.
NOTE :
Keep connecting rods and caps in sets. Preferably
assembleconnectingrodsandtheir capsafter removal
so that chances ofmixing/damageareavoided. Verify
serial numbers on cap and connecting rod.
3 Remove piston pin circlips with a suitable plier Fig. 7.
4 Remove piston pins with drift, 312 58913 39 (it is
advisable todippiston inhot oil at 70degC to 80deg
C before forcing piston pin out, if pistons are to be
reused).
5 Keep piston and piston pins in sets.
6 Remove connecting rod bearing shell and dulymark
them in case these are to be reused.
SELECTION OF PISTONS AND REPLACEMENT OF
PISTON RINGS
1 Remove piston rings from piston using piston ring
expander Fig. 8.
2 Remove carbon deposit and clean pistons/rings
thoroughly.
3 In case cylinder bore taper and ovality is within
specified limit, same piston/rings may be reused.
However, piston and rings should be examined
thoroughly for following:
a. Piston - Cracks, scoring, other damages, ring groove
wear,wear of piston pin bore in piston,circlip groove
wear/damage.
b. Piston rings - Scoring, lateral clearance in piston
ring grooves Fig. 9 and butt clearance (ring gap)
in cylinder bore Fig. 10 (this is to be checked in
unworn portion of the cylinder bore).
c. Piston or rings with any of the above referred
defects should be replaced.