
SUSPENSION
48
5.10.3. TYRE ROTATION:
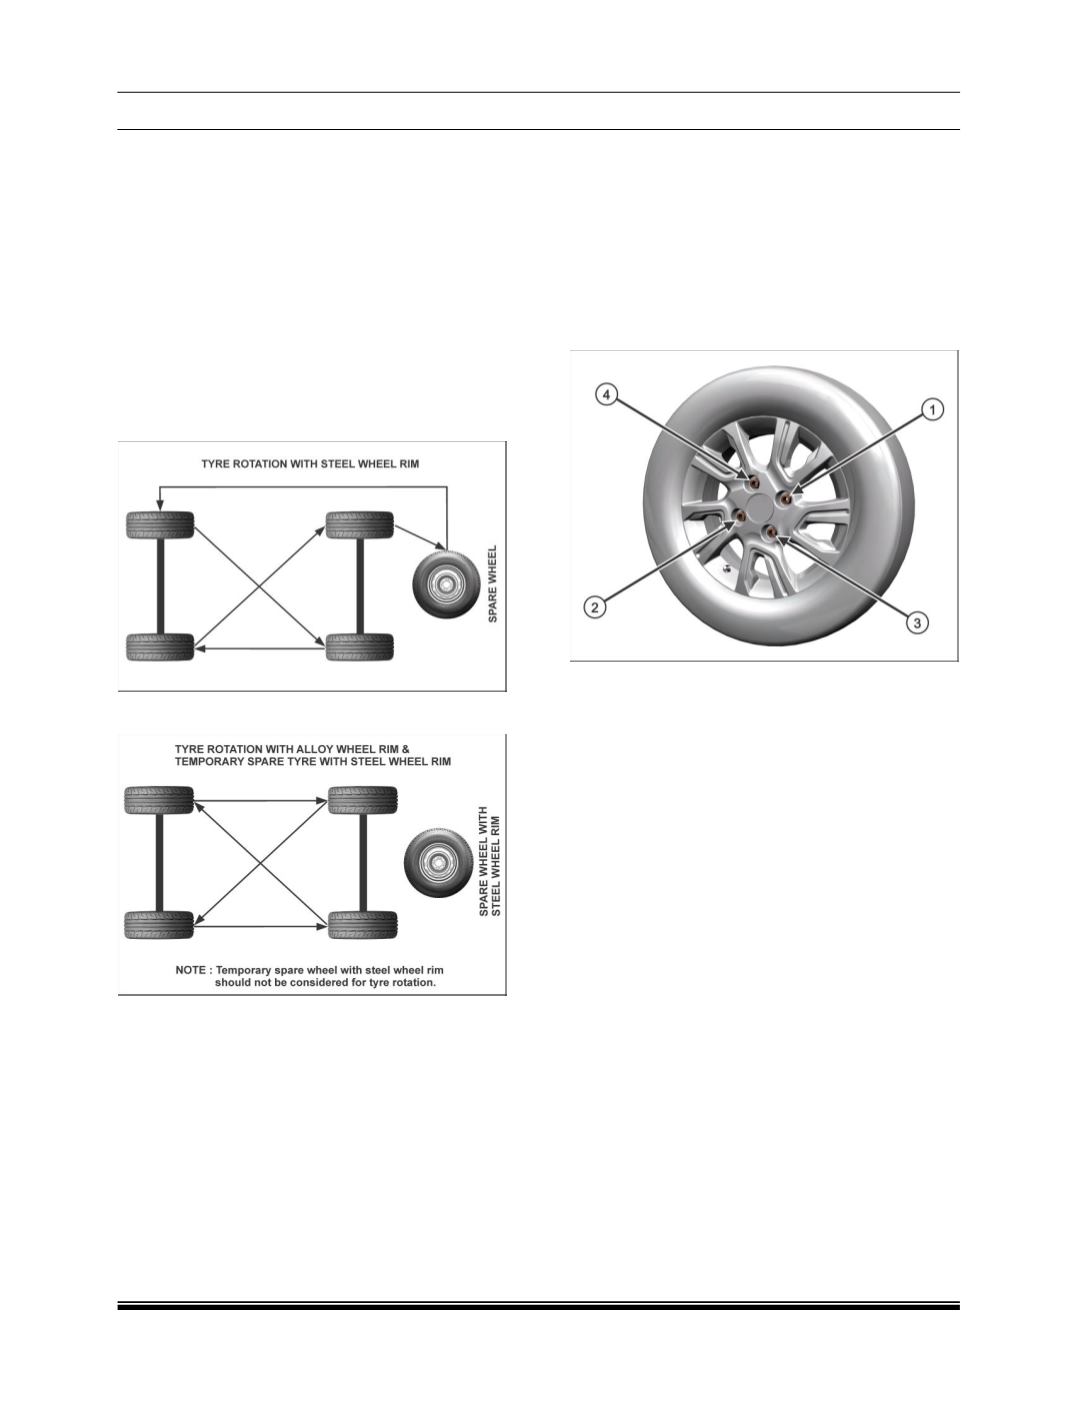
To maintain equal & uniform wear, rotate tyres as
per fig 88a & 88b, according to service schedule or
earlier depending on the operating condition of car
and wear pattern. Ensure correct recommended
tyre pressure is maintained.
NOTE:
Due to their design, radial tyres tend to wear faster
in
the shoulder area, particularly in front positions.
This makes regular rotation necessary. Do not use
spare steel wheel rim for tyre rotation, when vehicle
is fitted with alloy wheel rims.
FIG. 88a
FIG. 88a
5.10.4. WHEEL REMOVAL:
1.Loosen wheel bolts (M12 x 1.5) by approximately
180 deg (half a rotation)
2.Lift the vehicle using two post lift.
3.Remove bolts and then wheel. Wheel bolts must
be tightened in sequence given in Fig 89 and to
proper torque to avoid bending wheel or brake
disc.
FIG. 89
NOTE:
1.
Clean all parts and remove any buildup of
corrosion of any parts, before installation of the
wheel.
2.Never heat any part to loosen tight wheel, it will
shorten life of wheel.
5.10.5 TYRE MOUNTING AND DEMOUNTING:
Use a tyre changing machine to mount or demount
tyres.
Follow
equipment
manufacturer’s
instructions.
Do not use hand tools or tyre irons alone to change
tyres as they may damage tyre beads or wheel rim.
Rim bead seats should be cleaned with a wire
brush or coarse steel wool to remove lubricants,
old rubber, and light rust.
After mounting, inflate to specified pressure so that
beads are completely sealed.
WARNING:
Do not stand over tyre when inflating. Bead may
break when bead snaps over rim’s safety hump
and cause serious personal injury.
Do not exceed specified pressure when inflating.
If
the beads will not seat at the manufacturer's
maximum bead seating pressure, deflate, re-
lubricate and reinflate.
Install valve core and inflate to proper pressure.


