


 86 / 310

ENGINE
40
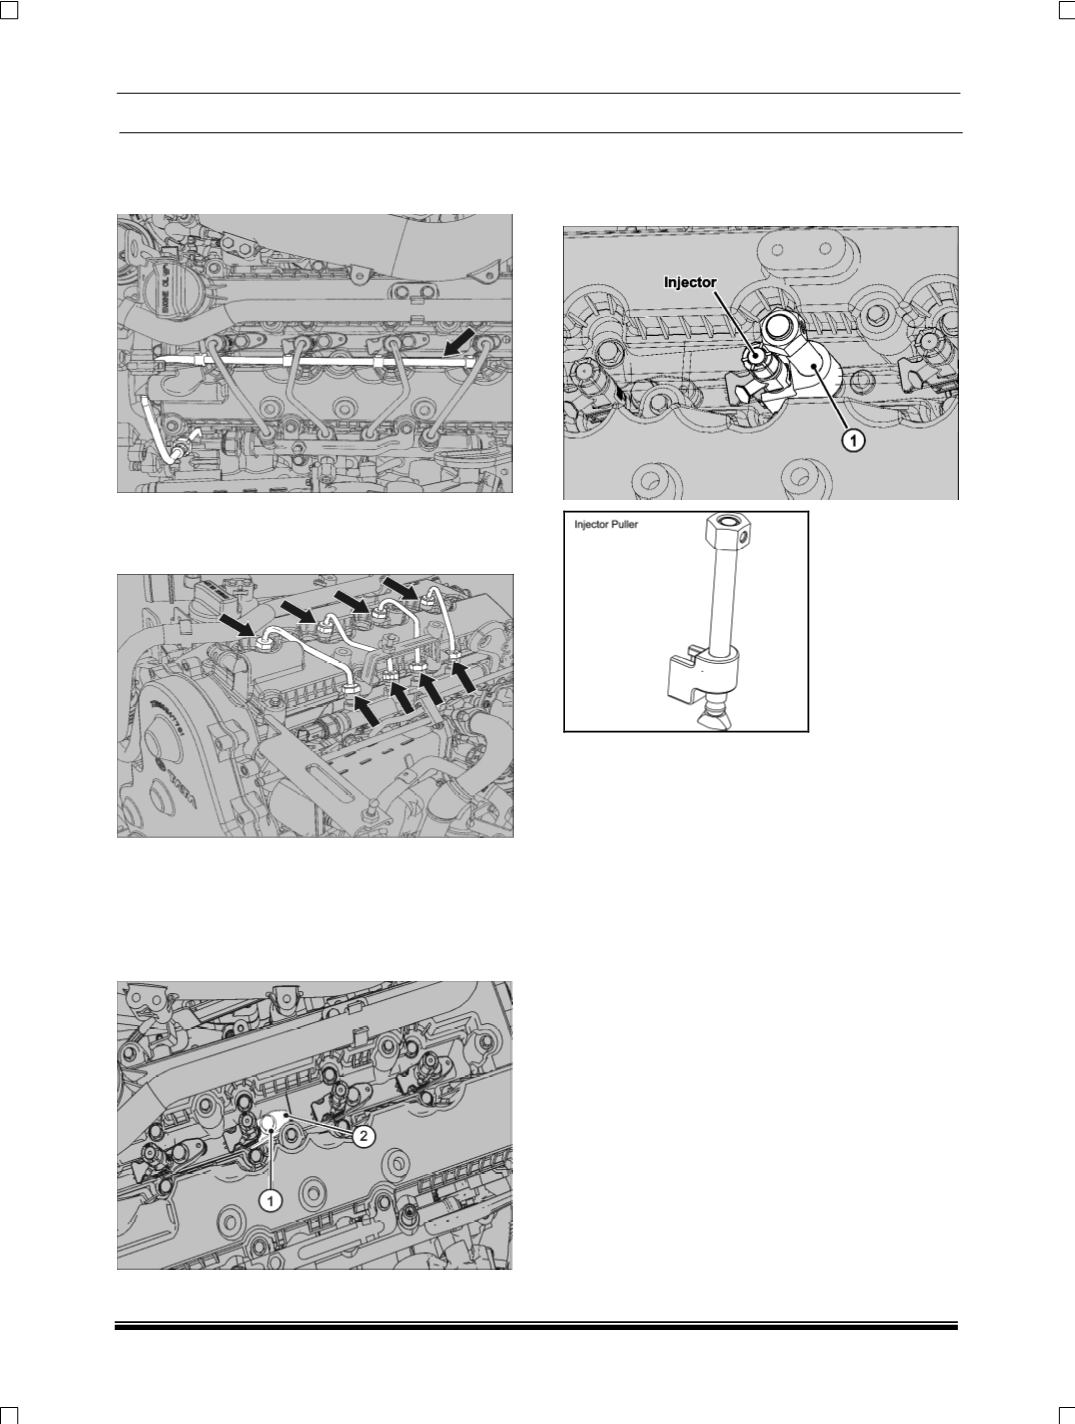
5. Disconnect the injector back leak tube
(Overflow
pipe
) and cover the injector side opening with
suitable caps.
6. Remove the HP pipes connecting injector to
common rail and cover the injector opening with
suitable caps.
NOTE
Once removed HP lines should not be reused. As-
semble the new HP Pipes at the time of assembly.
7. Loosen and remove the bolt
(1)
along with wash-
er and remove the injector claw
(2).
8. Extract the injector using injector removal tool
(1)
(Part no. 2868 5890 07 04).
Remove the injector
with the sealing washer.
NOTE
Injector should be tagged as soon as it is removed to
avoid chances of it being interchanged. Since the
I3C code of each injector is calibrated to the EMS,
whenever an injector is replaced it I3C codes of the
respective injectors should be fed in the EMS ECU
using diagnostic tool.
FITMENT
•
Follow the reverse order of removal for fitment.
•
Do not reuse the bolt and washer removed in
step 6, use new ones.
•
Replace the injector sealing washer while refit-
ting the injector.
•
Vacuum clean the injectors.