


 85 / 310

ENGINE
39
FITMENT
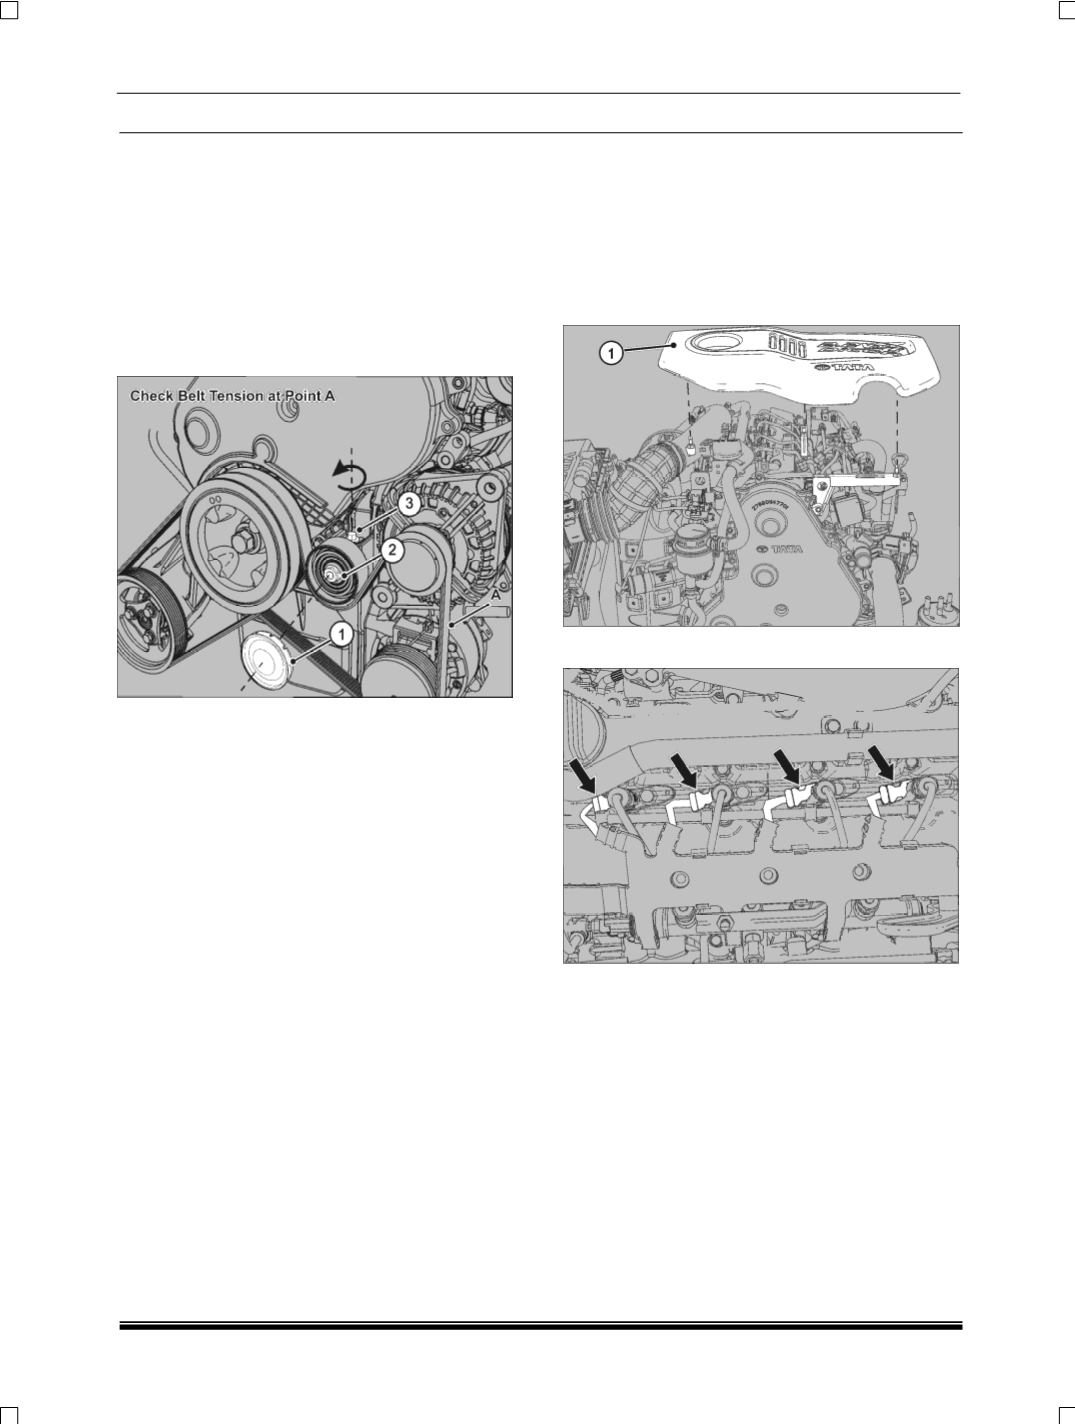
1. For fitment, first place the belt, and then tighten
the tensioner screw
(3)
by rotating it in the anti-
clockwise direction
(Loosening direction of a RH
threaded screw)
.
2. Tighten the tensioner bolt
(2)
to a torque of 4
Kgm and fit the cap.
3. Adjust the belt tension.
ALTERNATOR and AC BELT ADJUSTMENT
1. Remove the tensioner cap
(1)
and loosen the ten-
sioner bolt
(2).
2. Adjust the belt tension to as follows:
a. To reduce the tension rotate the tensioner
screw
(3)
in clockwise direction
(Tightening
direction of a RH threaded screw)
b. To increase the tension rotate the screw
(3)
in anti clockwise direction
(Loosening direc-
tion of a RH threaded screw)
.
Keep belt tension in given range .which is as follows.
For new Belt
Tension for new belt = 268 ± 10 Hz
NOTE
This value to be measured in the span between al-
ternator and AC compressor pully (marked as “A” in
the above image)
Then run the engine for 15 mins. Now the belt has to
be retensioned to 244 ± 10 Hz.
For reusing same belt
In case of reusing the same belt, it should be ten-
sioned to
244 ± 10 Hz.
E. INJECTOR REMOVAL
1.
Relieve the fuel pressure. (For procedure refer
maintenance section in fuel system.)
2. Remove panel
(Wiper plenum) (Refer body
group)
for injector removal.
3. Remove the engine cover
(1)
by pulling it up-
wards firmly.
4. Disconnect the injector electrical connecters