


 987 / 1428

TRANSAXLE
126
Installation:
NOTE
1. New AMT kit will be supplied with oil. Ensure
oil level in reservoir and top up oil if
necessary.
2. Ensure AMT kit engage piston slot is at
center (Neutral) and transaxle is in neutral
prior to assembling.
3. A new AMT kit is supplied with rubber collar
to plug the hole provided for ‘AMT kit
breathing so that AMT Kit hydraulic oil does
not leak during transportation. This needs to
be removed before kit fitment on transaxle
otherwise it may lead to abnormal operation
of AMT Kit.
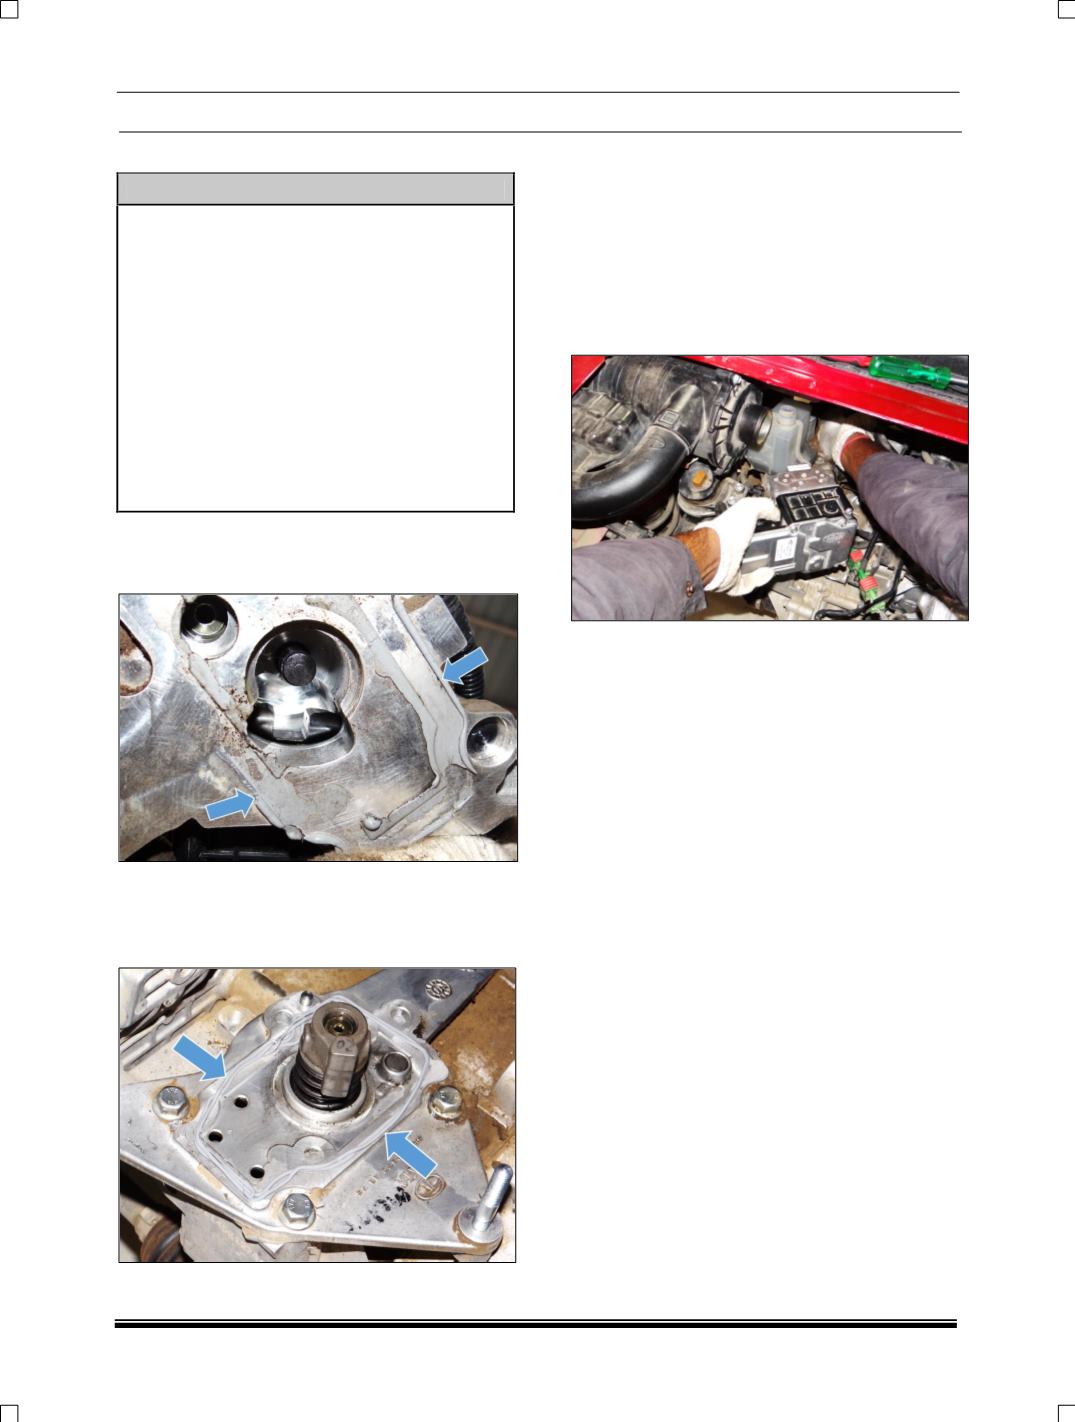
1. Before proceeding to install ‘AMT KIT’,
remove the old sealant thoroughly and clean
the assembly by air.
2. Clean ‘AMT KIT’ base mounting plate by air
and apply the fresh sealant properly (Silicon
liquid gasket three bond 12S001 or
ANABOND 690).
3. Ensure that interface finger is in neutral
position (this can be done by pushing the
selector shifter shaft vertically downwards. If it
moves it is in neutral. Otherwise rotate it to
bring it in neutral).Bring the slot of engage
piston of the AMT kit approximately at the
center (it will be in the same line as selection
piston center). Assemble the AMT kit carefully
by using the studs on the AMT top cover for
alignment.