


 1798 / 1906

BODY
63
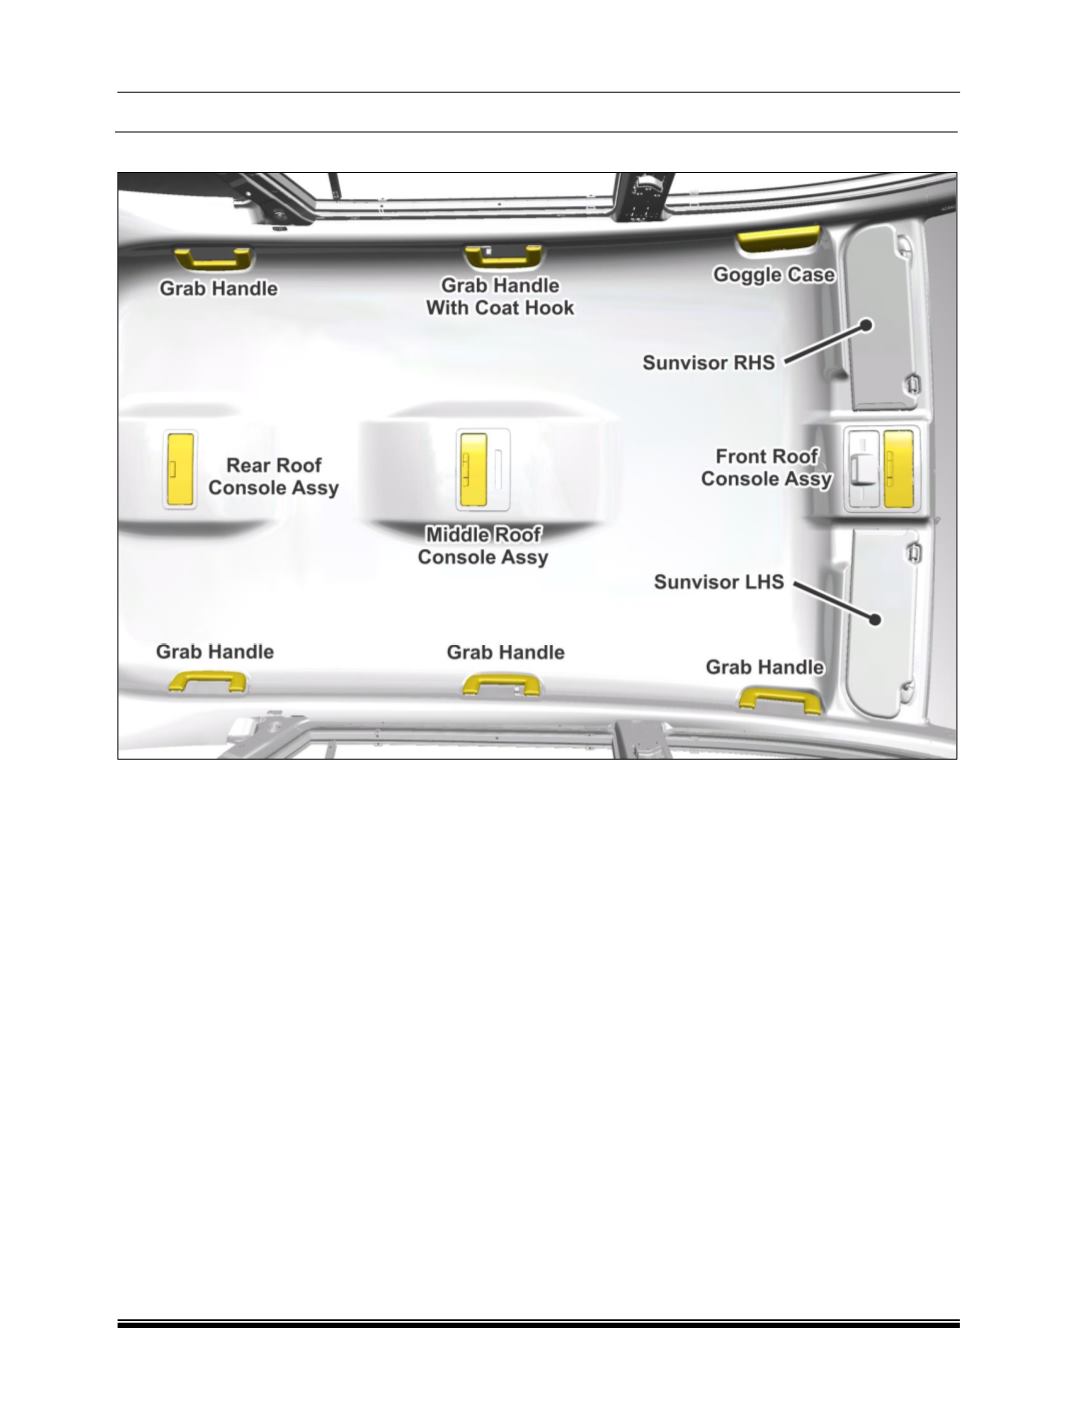
R. ROOF LINER ASSEMBLY:
REMOVAL:
1. Disconnect the roof wiring harness electrical
connection.
(For procedure refer electrical
section).
2. Remove the sunvisor from both ends.
(For
procedure refer sunvisor removal process.)
3. Remove all grab handles.
(For procedure
refer grab
handle
removal process.)
4. Remove the goggle case from the driver side.
(For procedure refer goggle case removal
process.)
5. Remove the front, central and the rear roof
console.
(For procedure refer roof console
removal process.)
6. Push headliner at rear end edge (near tailgate
aperature). Ensure three hook type mounting
plastic bracket gets disengaged from metallic
bracket present on BIW.
7. Carefully pullout the headliner assembly and
remove the same from the vehicle.
FITMENT:
1. Properly root the electrical connections of roof
lamps.
(For details refer electrical section.)
2. Locate the roof and snap all the clips properly.
NOTE:
a. Before assembly check the condition of the
clips if found damaged do not reuse the same
replace them with new one.
b. Check the condition of foams if deteriorate
change the same.
3. Fit all grab handles (5 Nos), the goggle case
and sunvisor.
(For procedure refer the
respective component procedure.)
4. Push headliner and ensure all plastic brackets
present on headliner gets engaged with BIW
bracket and then override tailgate primary
seal lip over headliner trim edge.
5. Fit the roof console assemblies.
(For
procedure refer roof console assembly
procedures.)