


 1795 / 1906

BODY
60
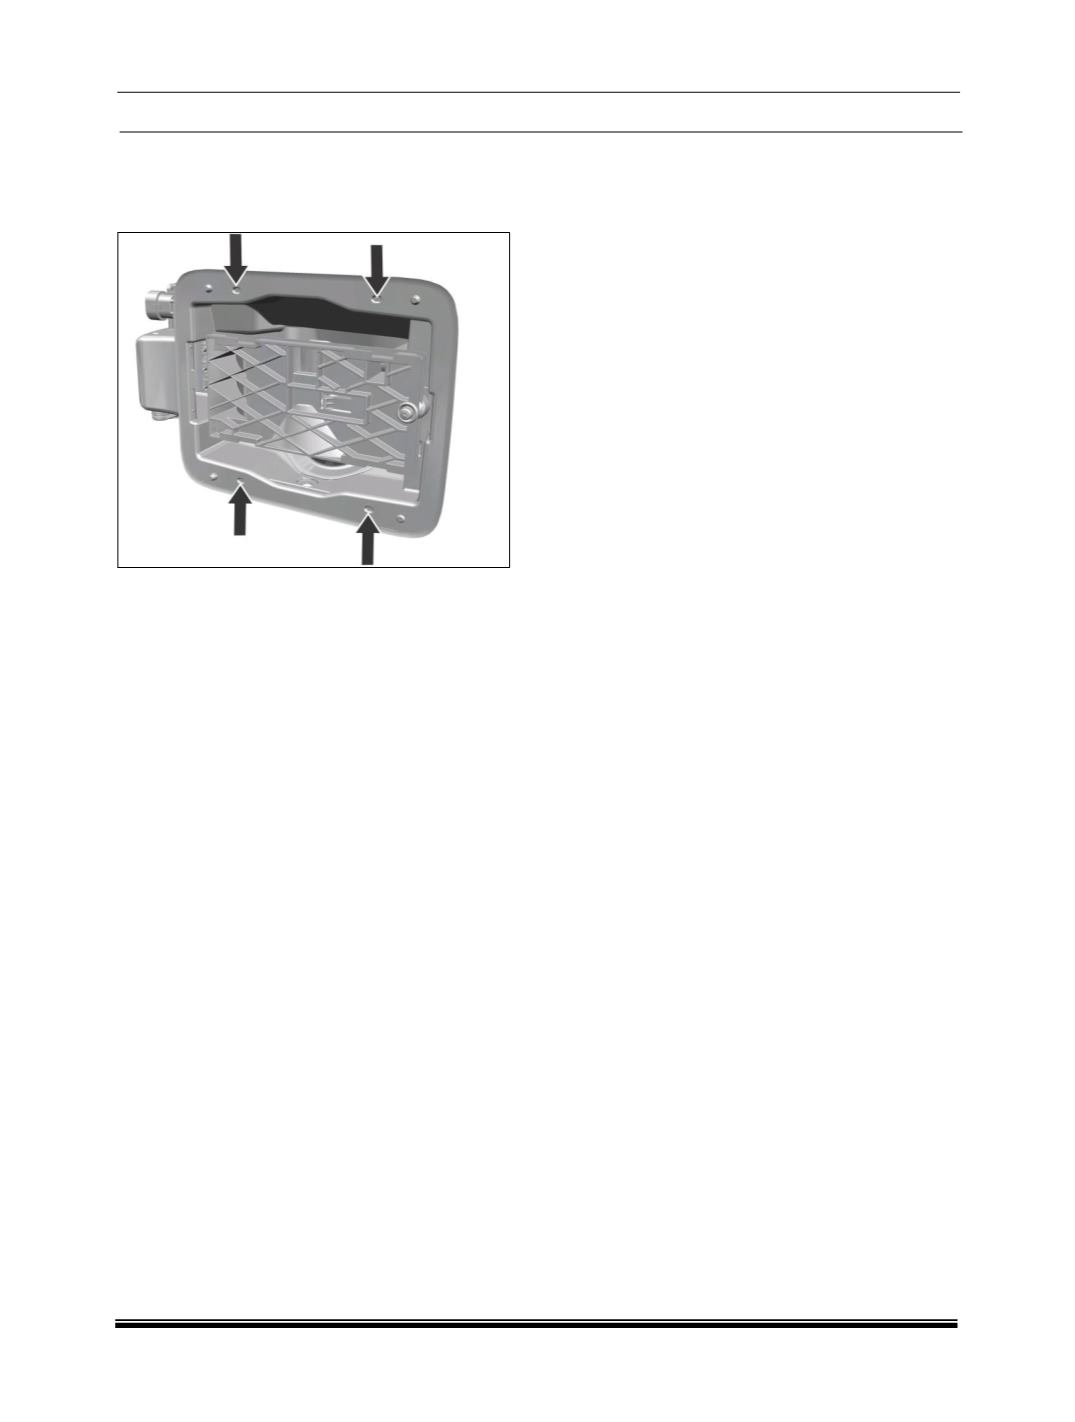
8. Fuel filler assembly is snap fitted at four places.
Pry out fuel filler assembly from location shown
in below image and partially pull out the fuel
filler assembly from the side of push-push knob.
9. Disconnect fuel lid release cable from body
panel bracket shown by arrow in below image.
10.Disengage the cable sphere and fuel lid release
cable from actuator locking arm.
11.Push locking arm to lock position so that it will
not touch to BIW while removing.
12.Disconnect electrical connector of fuel filler
assembly.
13.Take out fuel filler assembly from vehicle.
FITMENT
For fitment follow reverse procedure of removal.
Q. GLASS
WINDSHIELD GLASS
REMOVAL
1. Remove the leaf screen mould and then
remove the leaf screen assembly.
(For
procedure refer leaf screen removal process in
this section.)
2. Remove the panel assembly
(bracket for wiper
mounting)
.
(For procedure refer panel
assembly removal process in this section.)
3. Remove the windshield finisher from both side.
4. Remove the “A” pillar trim from both ends.
5. Make a small hole in the sealant from the
inside of the cabin near “A” pillar.
6. Pass a steel file through this hole and wrap
each end around wood.
CAUTION
Use appropriate protection to the components
to avoid any accidental damage.
Do not damage the windshield glass dashboard
and sheet metal parts.
WARNING
Put on gloves to protect your hands.
Wear eye protection while cutting the glass
sealant with steel wire.
7. With a helper on the outside, pull the steel wire
back and forth in sawing motion. Hold the steel
wire as close to the windshield as possible to
prevent damage to the sheet metal
components.
8. Carefully cut the sealant around the entire
windshield.
FITMENT
NOTE:
Before fixing the windshield glass following
preparations need to be done on the glass and
body shell flange area.