


 1505 / 1526

16
BODY
11. REMOVAL/INSTALLATION
OF
WINDOW
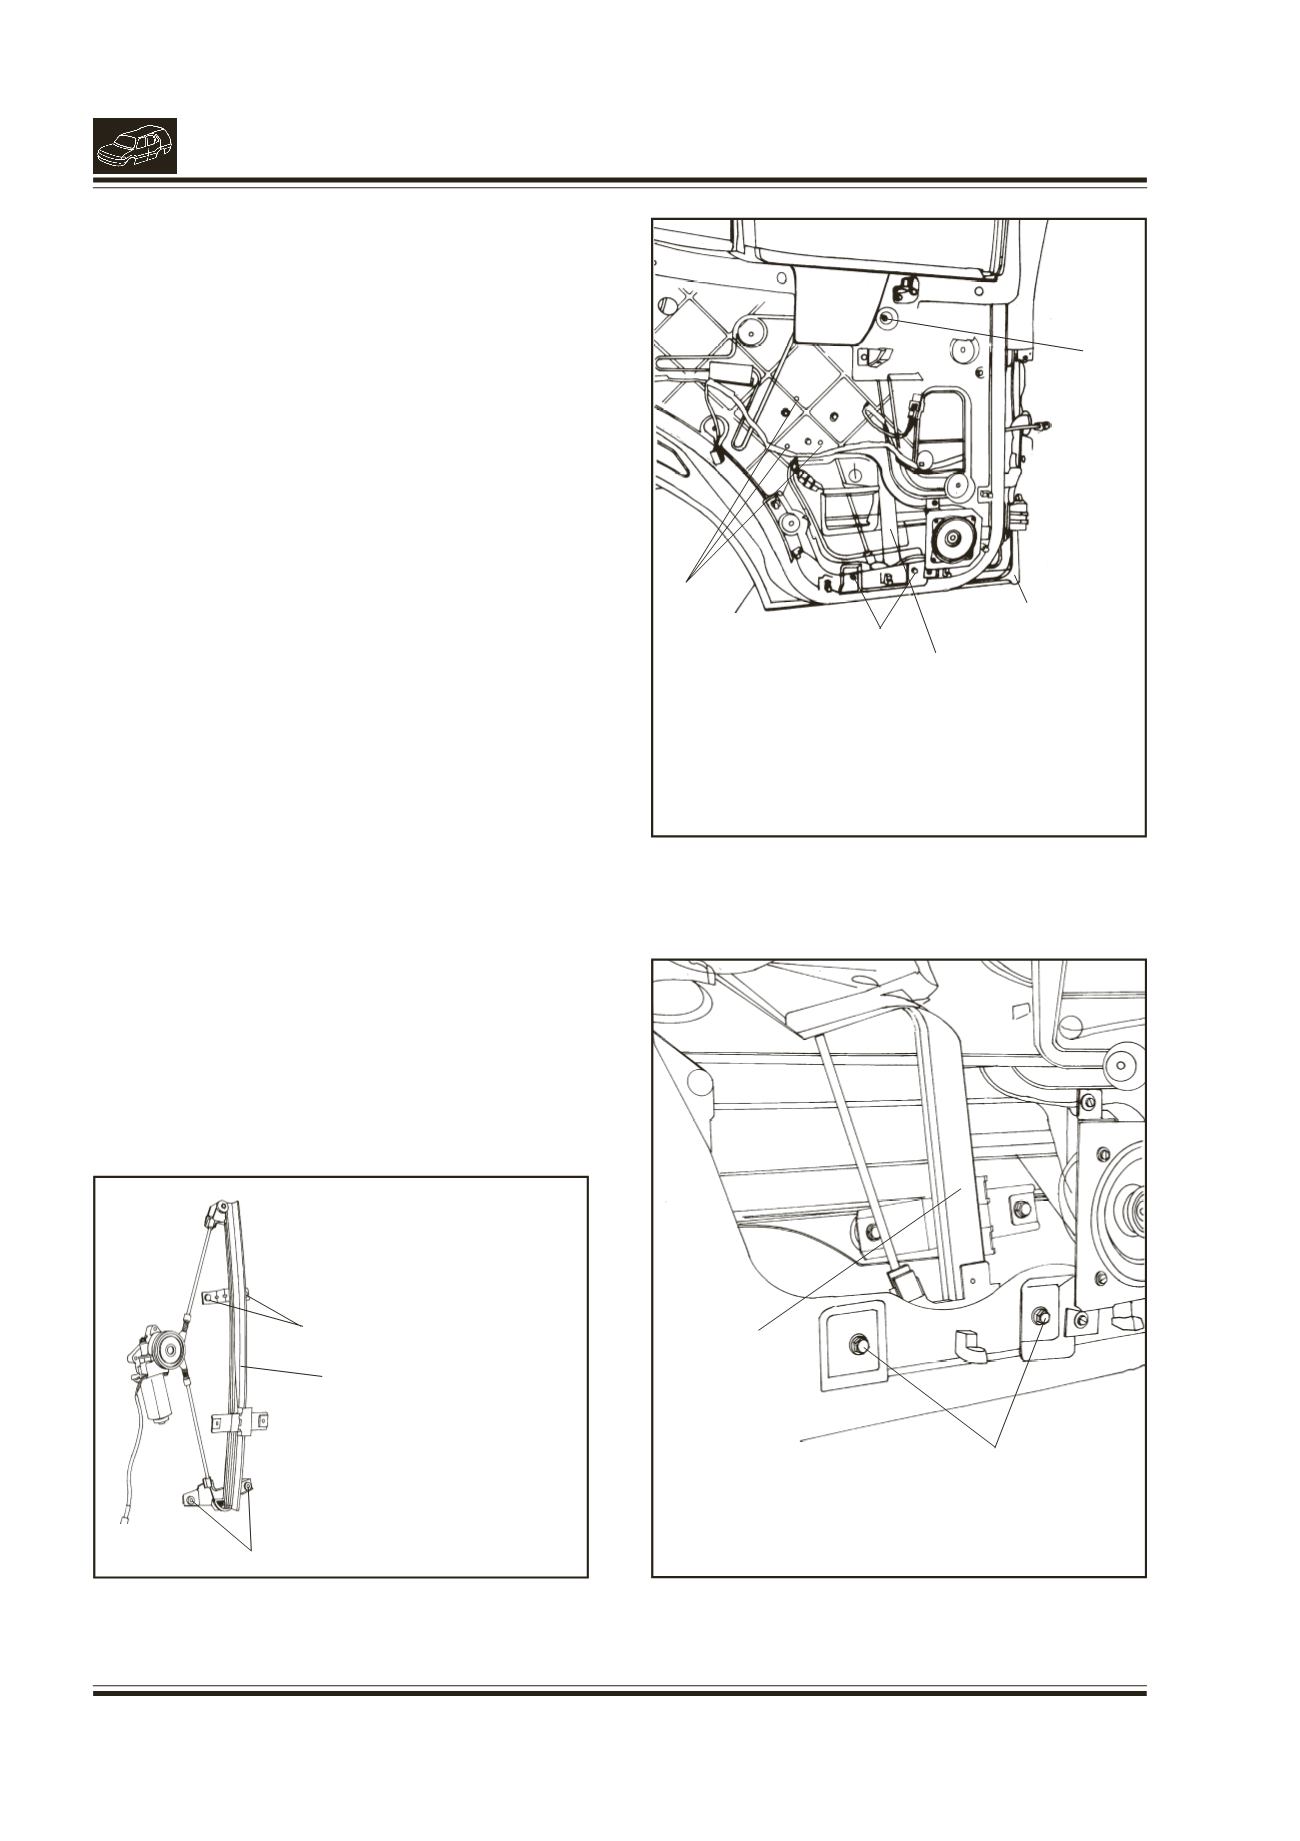
WINDING REGULATOR
(Fig. 14, 15 & 16)
REMOVAL
l
Remove the inner trim
l
Pull out required portion of plastic membrane.
l
Remove the window glass
l
Remove mounting screws/nuts of window
winding regulator i.e. 2 hex fl. nuts from top
mounting for front door (1 nut for rear door), 2
hex. fl. screws from bottom mounting and 3 hex.
fl. nuts from motor mounting.
l
Remove the window winding regulator carefully.
INSTALLATION
l
Locate window regulator in the door in proper
position.
l
Fit and tighten the window regulator mounting
screws and nuts i.e. 2 hex. fl. nuts (M6) and washers
(A6.4) on the top mounting for front door (1 nut
and washer for rear door), 2 hex. fl. screws (M6x12)
for the bottom mounting and 3 hex fl. nuts (M6)
for motor mounting.
l
Fit the window glass. Ensure correct position of
the glass. If not loosen the top mounting nuts and
bottom mounting screws of regulator and adjust
regulator for proper position of the glass.
l
Tighten the regulator mounting nuts/screws.
l
Fix the plastic membrane
l
Fit the inner trim.
Fig. 14.
Fig. 15.
1
1.
MOUNTINGNUTTOP
2.
WINDOW WINDING REGULATOR
3.
MOTORMOUNTINGNUTS
4.
MOUNTINGSCREWSBOTTOM.
2
1. LOCATION OF
MOUNTINGNUTS
2. WINDOW WINDING
REGULATOR
3. LOCATION OF
MOUNTING SCREWS
2
3
1
Fig. 16.
1.
MOUNTING SCREWS BOTTOM (REAR DOOR)
2.
WINDOW WINDING REGULATOR
3
2
1
REAR LH
DOOR
4