
STEERING
11
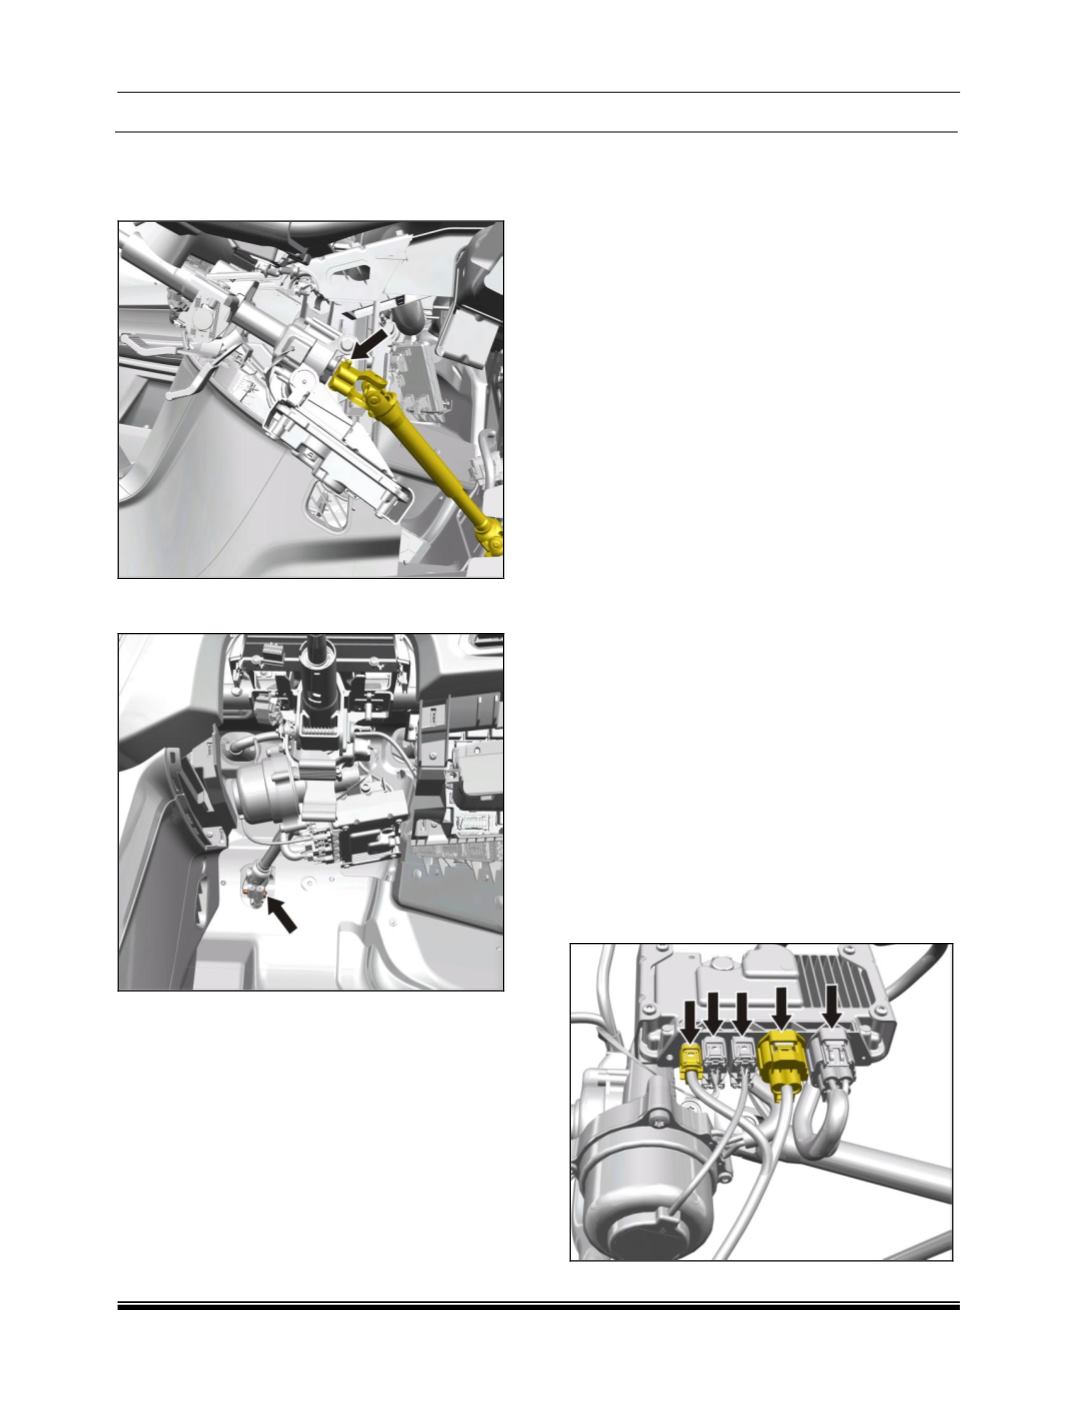
7.2.3.3 INTERMEDIATE SHAFT REMOVAL
1. Loosen the universal joint bolt between
steering column & intermediate shaft.
2. Remove the universal joint bolt between
intermediate shaft and rack & pinion assembly.
3. Disengage the intermediate shaft from rack &
pinion assembly and take out the intermediate
shaft.
REFITMENT:
For assembly follow reverse procedure of
removal.
7.2.3.4 ECU REMOVAL
NOTE:
Refer flow chart in section 1.7
Electric Power
Assisted Steering (EPAS) ECU replacement and
software update procedure in field
Dashboard removal procedure is as follows
1. Disconnect battery. (Refer battery removal
procedure/Body Electrical group)
2. Remove steering wheel (Refer Steering wheel
removal procedure/Steering group)
3. Remove combi switch assembly (Refer Combi
Switch removal procedure Body / Electrical
group)
4. Remove Instrument Cluster (Refer Instrument
Cluster removal procedure Body / Electrical
group)
5. Remove HVAC control assembly (Refer HVAC
Control assembly removal procedure/HVAC
group)
6. Remove two screws of bottom cover nacelle.
7. Remove all bolts securing steering column
assembly to the mounting bracket and
carefully rest the steering column on the floor.
8. Remove two side covers attached to the
dashboard.
9. Remove all screws securing dashboard to the
body.
10.Remove all screws securing air ducts to the
dashboard.
NOTE:
For detailed illustration, please refer to the Body
section of Gasoline Workshop Manual
11.Disconnect the electrical connector’s from the
ECU.


