
DRIVETRAIN-TA65 Star
25
CLUTCH CABLE
4.6. D. CLUTCH CABLE REMOVAL AND
INSPECTION:
REMOVAL
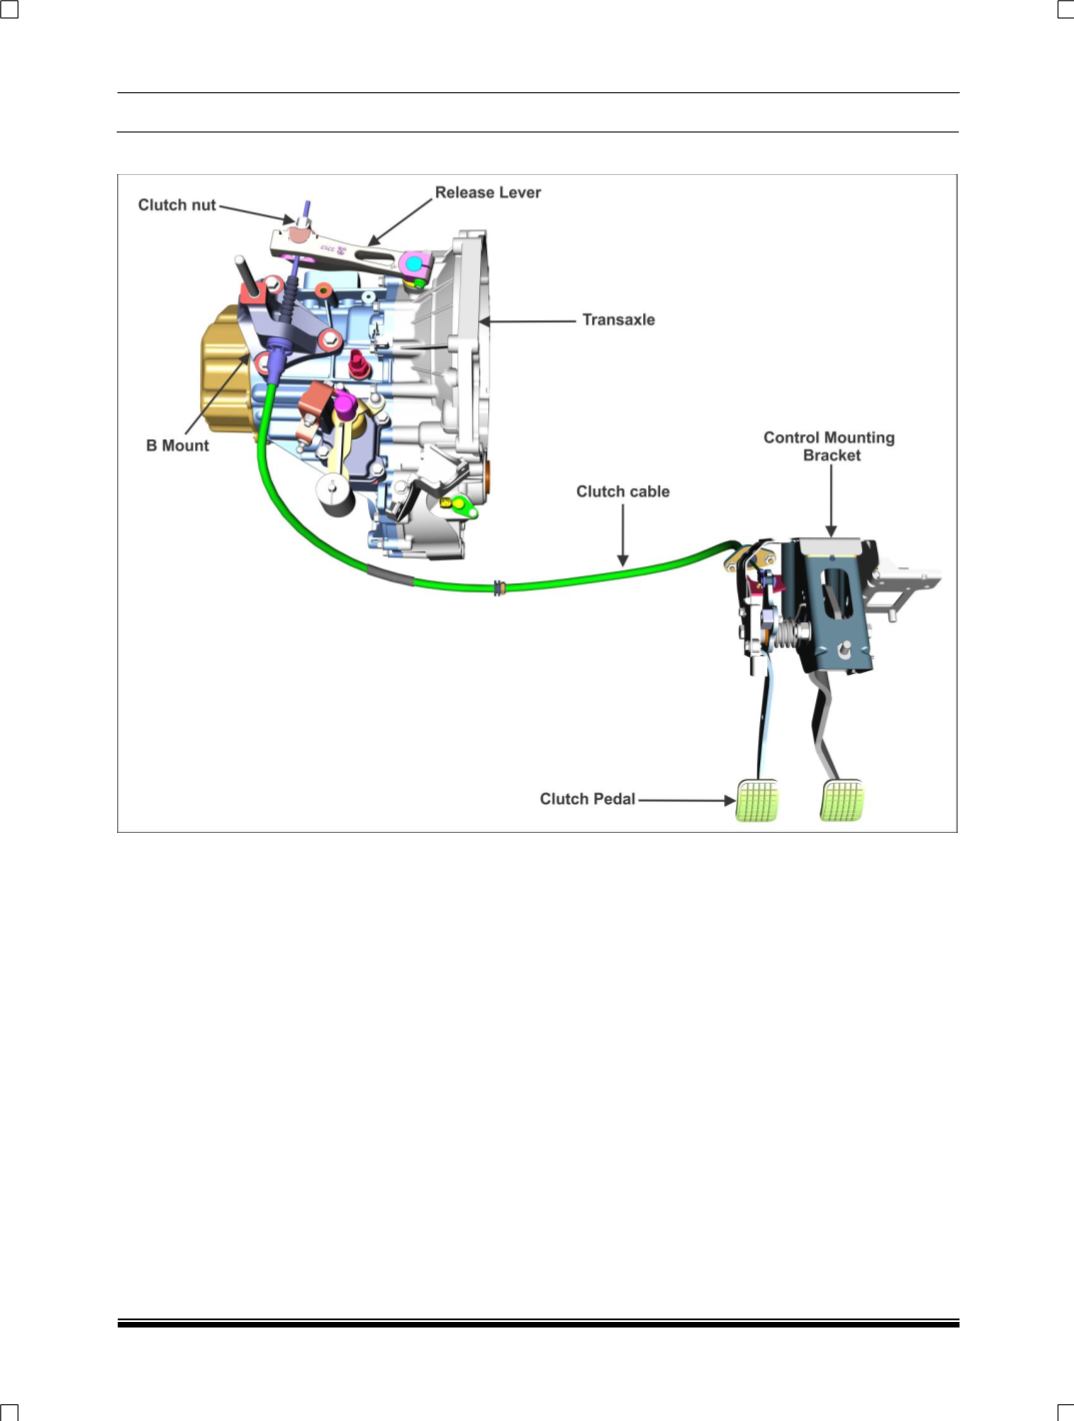
1. First loosen the clutch cable nut from clutch
release lever end and disconnect the pin from
cable stud at the clutch housing end.
2. Remove the clutch cable form the “B” mount
Hole and Clutch cable holding bracket welded
on BIW, then take out clutch cable from bracket
mounted on rack & pinion.
3. Now let’s go to driver compartment &
disconnect the Clutch Cable from clutch pedal
lever hook, by lifting up clutch pedal.
4. Finally clutch cable to be loosen from firewall by
removing the two mounting nuts of clutch cable,
from driver compartment & take out the clutch
cable form engine compartment.
INSPECTION
Replace the cable if
1. There are any permanent bends or kinks.
2. The cable is having a worn end.
3. The cable boot are broken in the engine
compartment.
4. The inner cable strand /s are broken.
INSTALLATION
1. Grease the Clutch Cable roller.
2. Insert the Clutch Cable inside the firewall,
clutch cable mounting hole and mount the
clutch cable abutment on firewall by using two
M6 Hex flange nut and applied appropriate
tightening torque (0.8-1 kgm), Insure that the
clutch cable is free inside the abetment.
3. Insert the Clutch Cable in the clutch pedal lever
hook, by lifting the clutch pedal upward.
4. Install Clutch cable properly inside the Cable
holding bracket welded on the
BIW.aswell
ensure clutch cable is inserted properly in cable
holding bracket which is mounted on rack &
pinion.
5. Insert the Clutch Cable in the “B” mount Clutch


