


 919 / 1428

TRANSAXLE
58
2.2 PROCEDURE:
A. REPLACEMENT OF CLUTCH DISC AND
CLUTCH COVER:
REMOVAL:
1. Disconnect battery & electrical connections
of starter motor.
2. Remove the starter motor. For procedure
refer “Electrical Group”
3. Lower the transaxle from the vehicle. For
procedure refer “Removal of transaxle from
vehicle”.
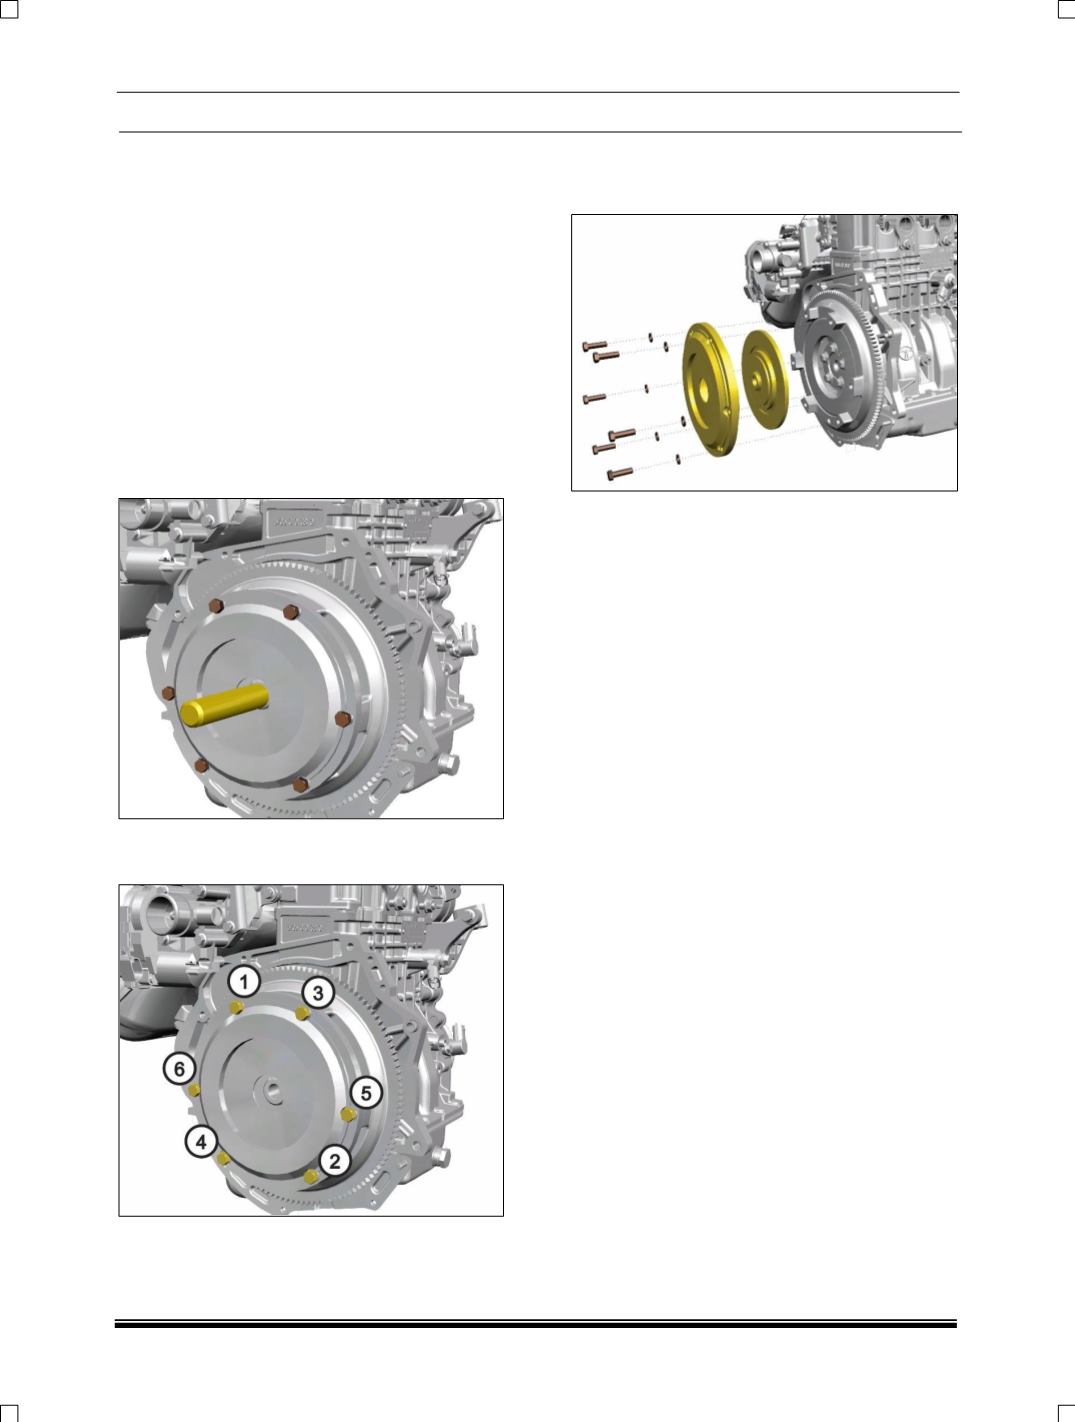
4. Insert the Tool 2834 5890 2501 (Clutch
Mandrel), into the centre of the clutch cover
and disc assembly and loosen the bolts.
5. For loosening the mounting bolts following
sequence is preferred as shown in Fig below.
6. Completely remove the 6 Bolts and spring
washer, to remove the clutch cover and the
clutch disc.
INSPECTION OF COMPONENTS:
• Check clutch disc hub splines for damage
and wear.
• Check torsion damper mechanism springs
for distortion, damage etc. For this purpose, hold
drive shaft in vice. Insert clutch disc and slide it
as far back as possible. Rotate disc by hand.
Rattling noise and excessive play indicates
damaged torsional damping mechanism and
such disc must be replaced.
• Check disc facing for wear, cracks, contact
pattern, burning marks and oil contamination.
Facings with any of the above defects or worn
out beyond permissible limits must be
replaced.
• Overhauling of clutch pressure plate assembly
is not recommended. Before fitment, assembly
should be checked against specification & should
confirm to the data of clutch pressure plate
assembly.
• Use disc & pressure plate of same make.
• Ensure that the clutch lining material is
not contaminated with oil or grease as this shall
result in clutch slipping.
• Clean friction face of the flywheel & check
for cracks, scoring, burn marks or
unevenness. If necessary machine flywheel
friction face to clear minor defect.