
BRAKES
53
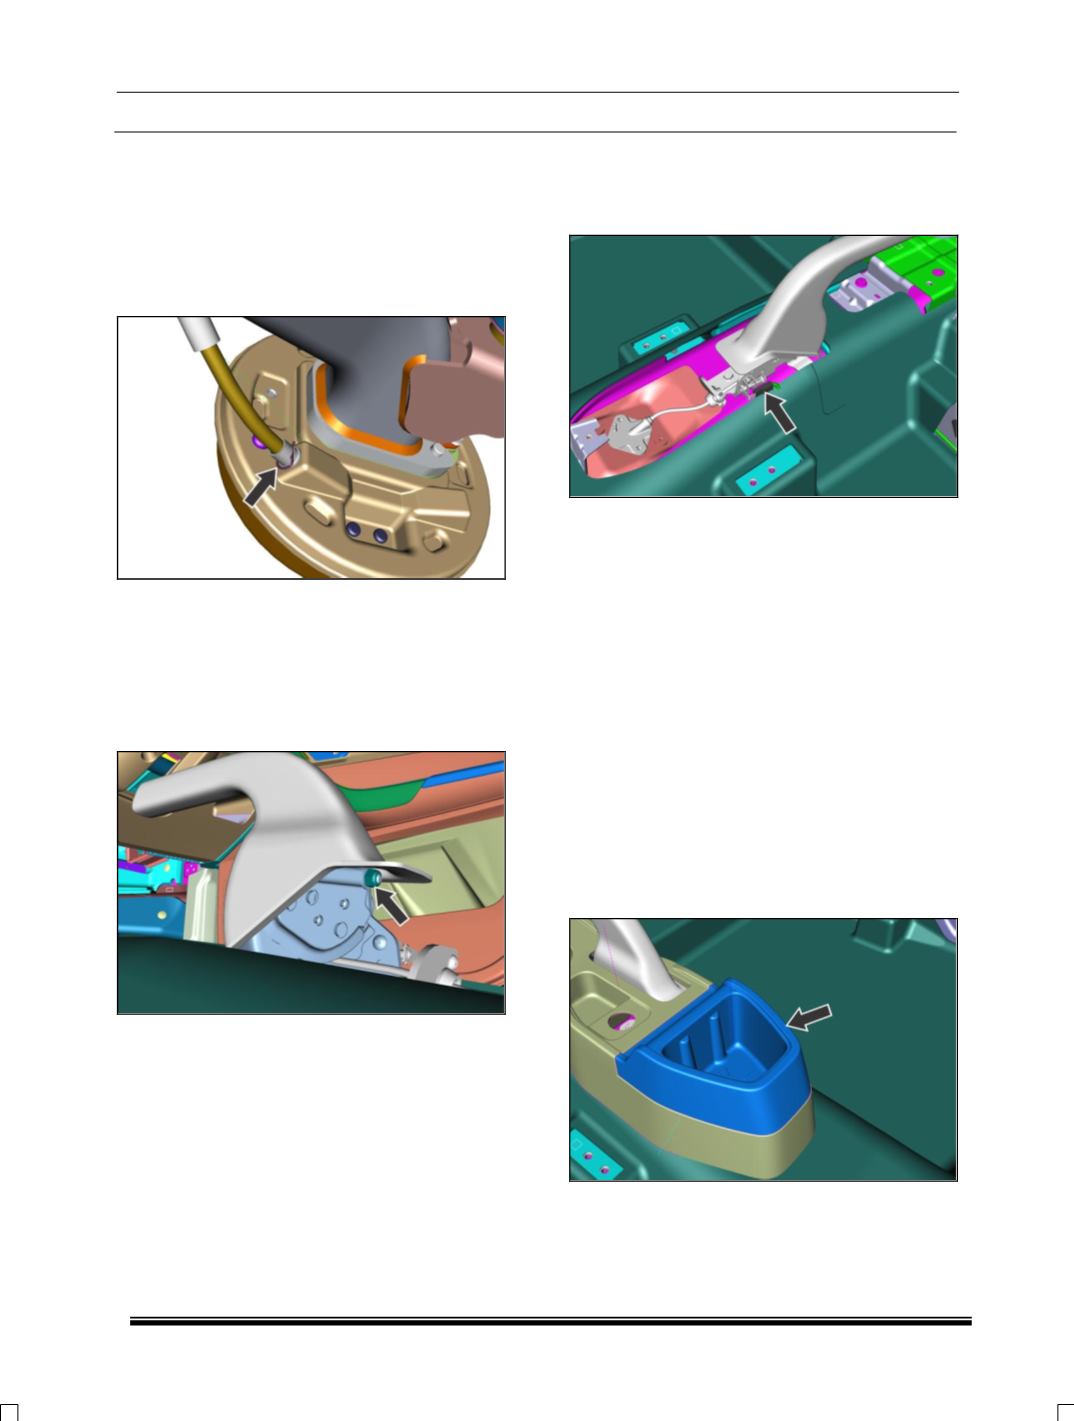
INSTALLATION OF CABLE
Carry out the above steps in appropriate
sequence for its fitment.
NOTE:
1. Fit the cable to the brake shoe lever.
2. Fit the parking brake cable clip to the brake
back plate securely.
INSTALLATION OF PARKING BRAKE LEVER
1. Proceed in the reverse order of removal.
2. Tighten the mounting bolts of the parking
brake lever to the torque specified.
3. Adjust the parking brake cable slackness as
per the procedure given.
4. Reconnect the electrical connections to the
parking brake switch assembly and confirm
that the parking brake lamp becomes “ON”
when parking brake lever is at first notch.
6.13.8A
PARKING
BRAKE
CABLE
ADJUSTMENT
1. Keep Parking brake lever in 0
th
notch and
tighten the parking brake cable adjustment nut
through cup holder pocket of center console.
2. Pull Parking brake lever fully and release it for
5 times.
3. If notch position is 4 to 6 then hand brake
setting is OK.
4. If notch position is above 6 then tighten the
hand brake adjustment nut for getting final
notch position.
5. If notch position is below 3 then loosen the nut
for getting final notch position.
6.13.8B PARKING
BRAKE
LEVER PRIMARY
CABLE GREASING
1. Remove Bottle Holder on center console
located in the cabin.


