


 1258 / 1588

ENGINE
59
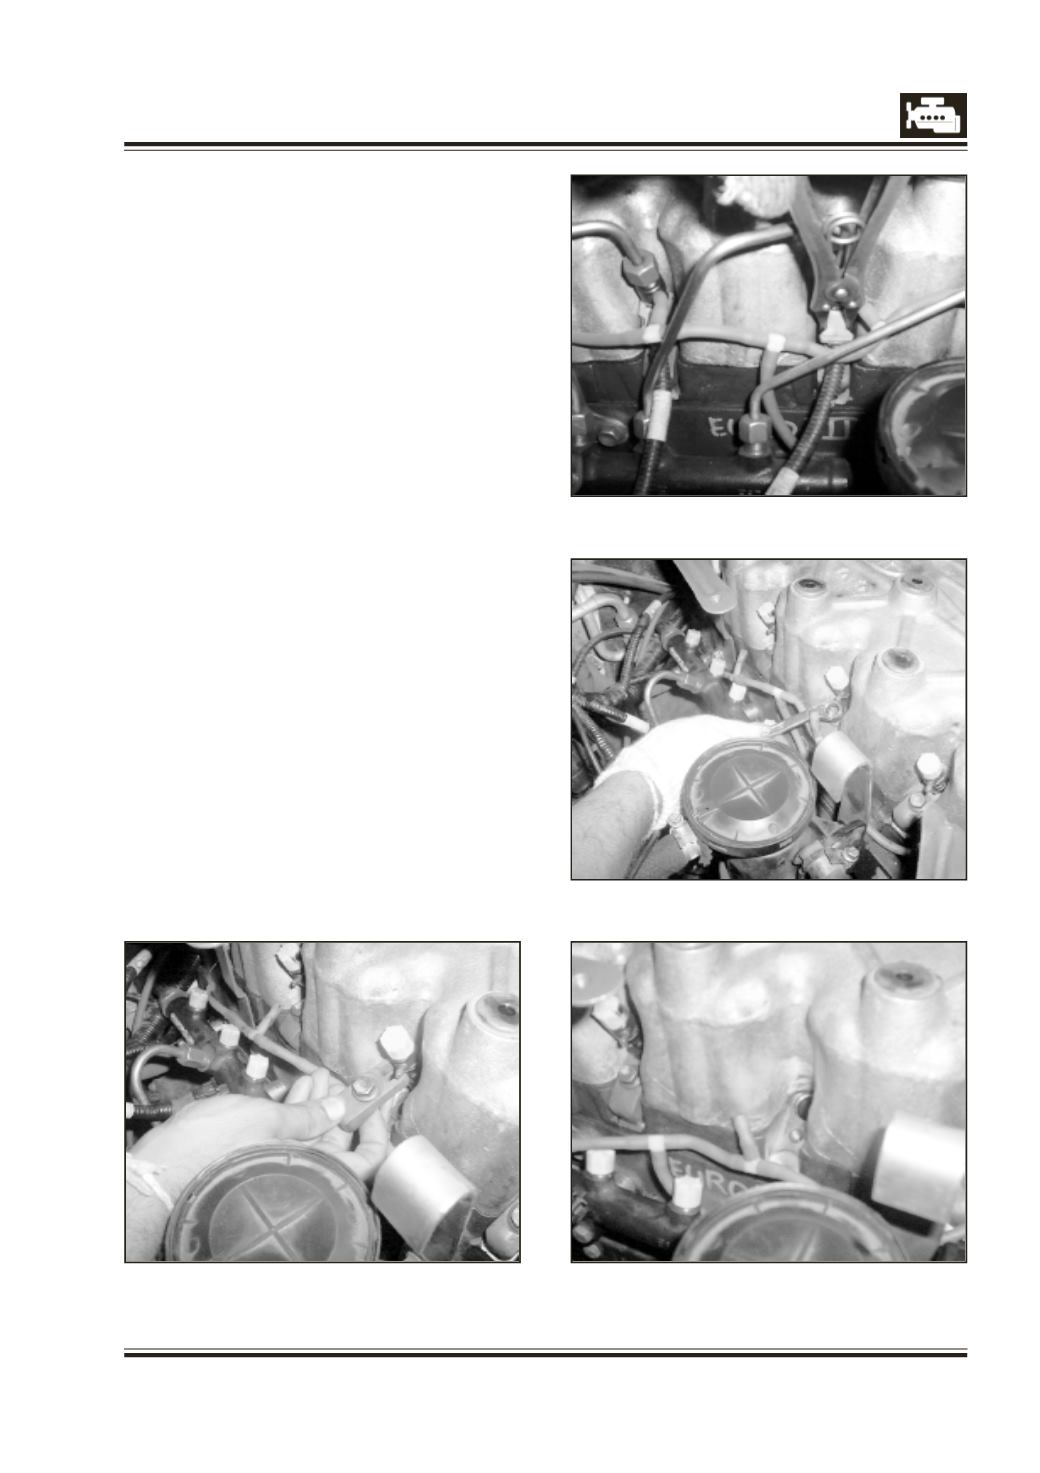
Fig 2
Fig 3
Fig 4
Fig 1
Removal of Injectors
1. For HP pipes removal (Rail to Injectors), refer HP
pipes removal procedure and follow the
cleanliness procedure. Plug the ports where
ever mentioned.
2. Disconnect and remove all the back-leak pipes
and immediately blank the injector nipples and
hoses with suitable plugs.(Fig: 1).
3. Using a pair of long-nose pliers disconnect the
injector electrical connector and move the
connector clear of the working area. Plug the
connector hole and the back-leak nipple with the
appropriate plugs from the service kit. (Fig: 2).
4. Unscrew the Injector Claw mounting screws with
a suitable socket or spanner and remove the
claw along with the spherical washer. (Fig: 3).
NOTE
Replace the clamp mounting screw and washer
every time it is removed.
Then remove the injectors with sealing copper
washer one by one. If the Injector is stuck in the
bore use tool no. 2699 5890 0607 to remove the
same.
1. Clean the Injector bore.
2. Plug the Injector Bores with a cloth or apply a
sticking tape to avoid entry of foreign particles
/ objects in the combustion chamber.
NOTE :
The injector must not be dismantled nor
should the nozzles be cleaned, even with an
ultrasonic cleaner. If the injector is faulty in any way
it must be replaced.