


 176 / 1575

ENGINE
137
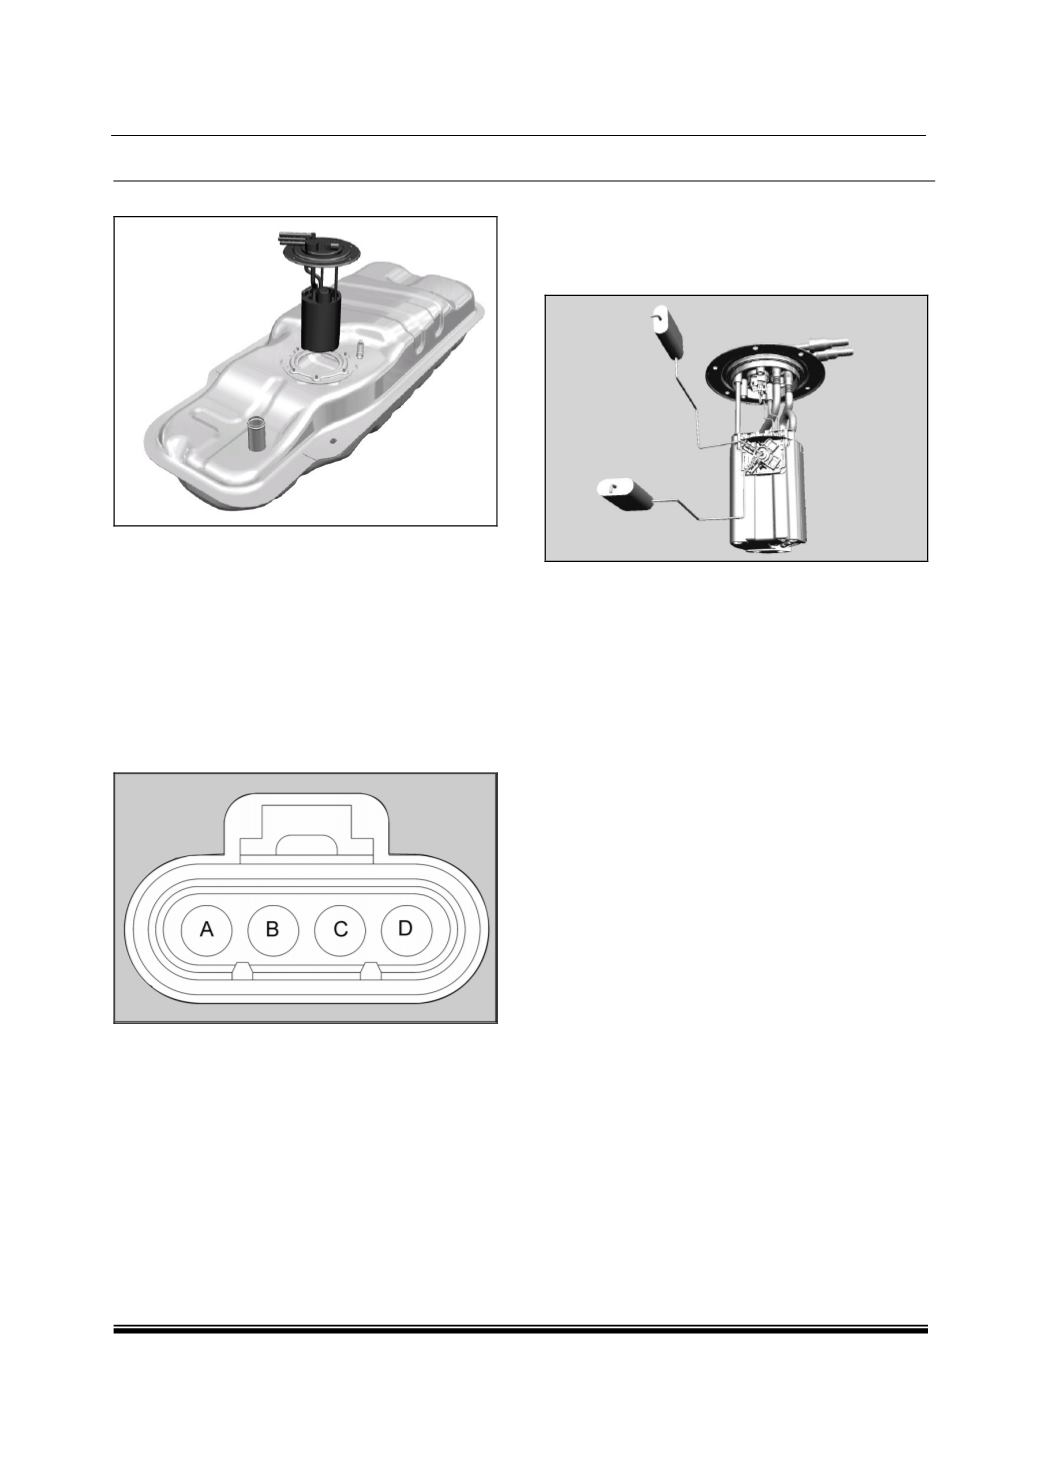
4. Lift the in-tank pump carefully out from the tank.
FITMENT
Follow the reverse order of removal for fitment
.
NOTE
Care should be taken while removing and fitment so
as not to cause any damage to the float arm.
INSPECTION
Use multimeter to confirm that the resistance of the
fuel level sensor changes with the level of float posi-
tion.
Measure the resistance in pins B and C. refer next
page for values at different heights of the float.
E FUEL LEVEL SENSOR
REMOVAL
1. Remove the tank unit.
2. Disconnect the connector.
3. Remove the fuel level sensor by releasing the
snaps.
FITMENT
Follow the reverse order of removal for fitment
.
3.1.7.4. FUEL TANK PURGING PROCEDURE
WARNING
The purging may not remove all fuel vapours. There-
fore any repair on fuel tank using external heat or
flame may result in explosion causing personal injury
or damage.
1. Remove fuel tank from the vehicle. Refer proce-
dure as mentioned for fuel tank removal.
2. Remove all fuel lines from fuel tank.
3. Remove fuel pump and fuel level gauge from
fuel tank.
4. Shift the tank to flushing area.
5. Fill tank with warm water or normal tap water and
agitate rigorously and drain the water through
drain plug. Repeat this procedure until inside of
the tank is clean.
6. Replace the tank if it is rusty from inside.
7. Completely flush out remaining water after wash-
ing.
CAUTION
Do not allow water to remain inside fuel tank after
washing. This will cause corrosion inside fuel tank.
Use shop cotton cloth for tank cleaning. Do not use
cotton waste