


 1297 / 1526

ENGINE
129
1
2
3
4
5
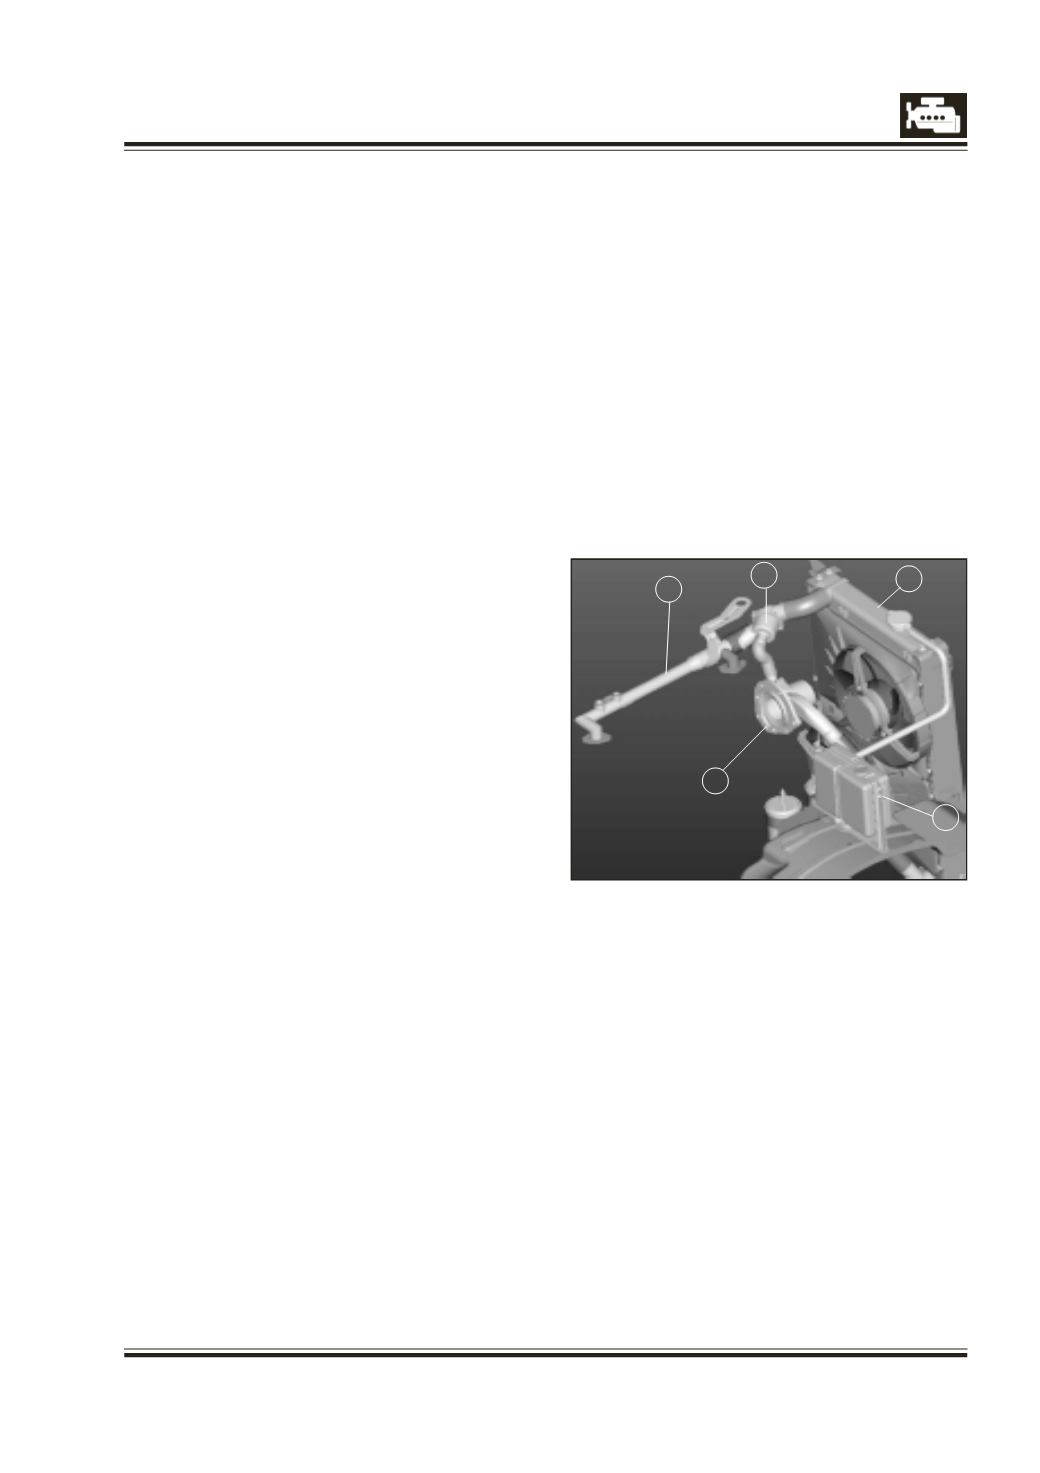
1 Radiator
2 Upper water cooling line
3 Auxilliary tank (coolant reservoir)
4 Thermostat
5 Water pump
cap. Blow compressed air or oil/grease dissolved
with water, through radiator fins from engine side
to clean air passages. Do not brush or scrape
radiator core in any way.
Testing for leaks
Remove radiator cap. Suitably plug radiator inlet,
outlet and filling neck. Remove radiator drain cock
adapter.With suitable adapter connect pressurized air
supply to radiator drain cock hole. Submerge radiator
in water tank. Admit air at 1.0 bar (max) into radiator.
Check for leaks and if any suitably mark them. Take out
radiator from water tank. Disconnect air supply
connections. Remove all plugs. Rectify leaks by
soldering, recheck radiator for leakage. Fit back radiator
drain cock adapter. Fit back radiator cap.
Instruction for soldering
Cr-Br. Radiators
Use 40% tin content solder. This solder has higher
tin content and hence lower melting temperature
than used in manufacture of radiator. Use of this will
not have any effect on original soldering near by.
Use non corrosive fluxes for soldering. Neutralize
and wash residues to avoid any consequent
damage. Acid should not be used for this purpose.
DICOR Engine
Pressure valve opening pressure 0.9+ 0.15 kg/cm2
(gauge)
Vacuum valve opening pressure < 0.05 kg/cm2 Max.
Checking cap
Check radiator cap for perfect sealing in filler neck.
Check radiator cap, main and vacuum valve opening
pressures. Replace defective cap with new one of
recommended rating.
Test for main valve opening pressure.
The radiator cap shall be tightened after filling in
with water. The water inside the radiator is
pressurized. Check that main valve opens at
specified pressure of 1.0 kg/cm2
Radiator cap main valve should not open below the
specified pressure value. On the vehicle, the
functioning of radiator cap main valve can be
checked by observing increase in coolant level in
auxiliary tank at high coolant temperature.
Test for vacuum valve opening
The radiator cap shall be tightened without water
inside the radiator and shall be connected to vacuum
pump. Check that vacuum valve opens fully at 0.05
Kg /cm2 vacuum. On the vehicle, the functioning of
the radiator cap vacuum valve can be checked by
observing decrease in coolant level in an auxiliary
tank when it cools down compared to higher level
at high temperature.