


 1126 / 1526

11
FUELSYSTEM 2.2LDICOR
the sedimenter has to be drained. This sensor is fitted
to the bottom part of the sedimenter where water
separated from the fuel is stored. When the water
reaches a defined level then the sensor output
switches from high state to low state. The sensor is
connected to the dash board to switch a lamp.
Check if water in fuel sedimenter indicator lamp in
instrument cluster is 'ON'.
Drain the water from the sedimenter, by unscrewing
the drain plug by 2 turns.
Note
Water ingress in Fuel System can result in CR system
failure
Water in fuel sedimenter indicator lamp
(Fig. 8)
This light comes ON when there is excess water in
the Water sedimenter. In the event of this lamp
glowing continuously, drain the water from the
sedimenter.
Procedure for DrainingWater fromSedimenter
Stop the engine, and wait until pressure stabilizes.
Unclip one of the hydraulic connections (either
inlet or outlet) and the electric connector of the
water sensor.
Place a container underneath the sedimenter.
Unscrew the water sensor about 2-3 turns.
Wait until all the water has drained out of the water
sedimenter.
As soon as the flow is free of water, screw back
the water sensor to the required torque.
Clip the hydraulic connector and the electric
connector to the water sensor.
Use hand primer pump to refill the fuel line before
restarting.
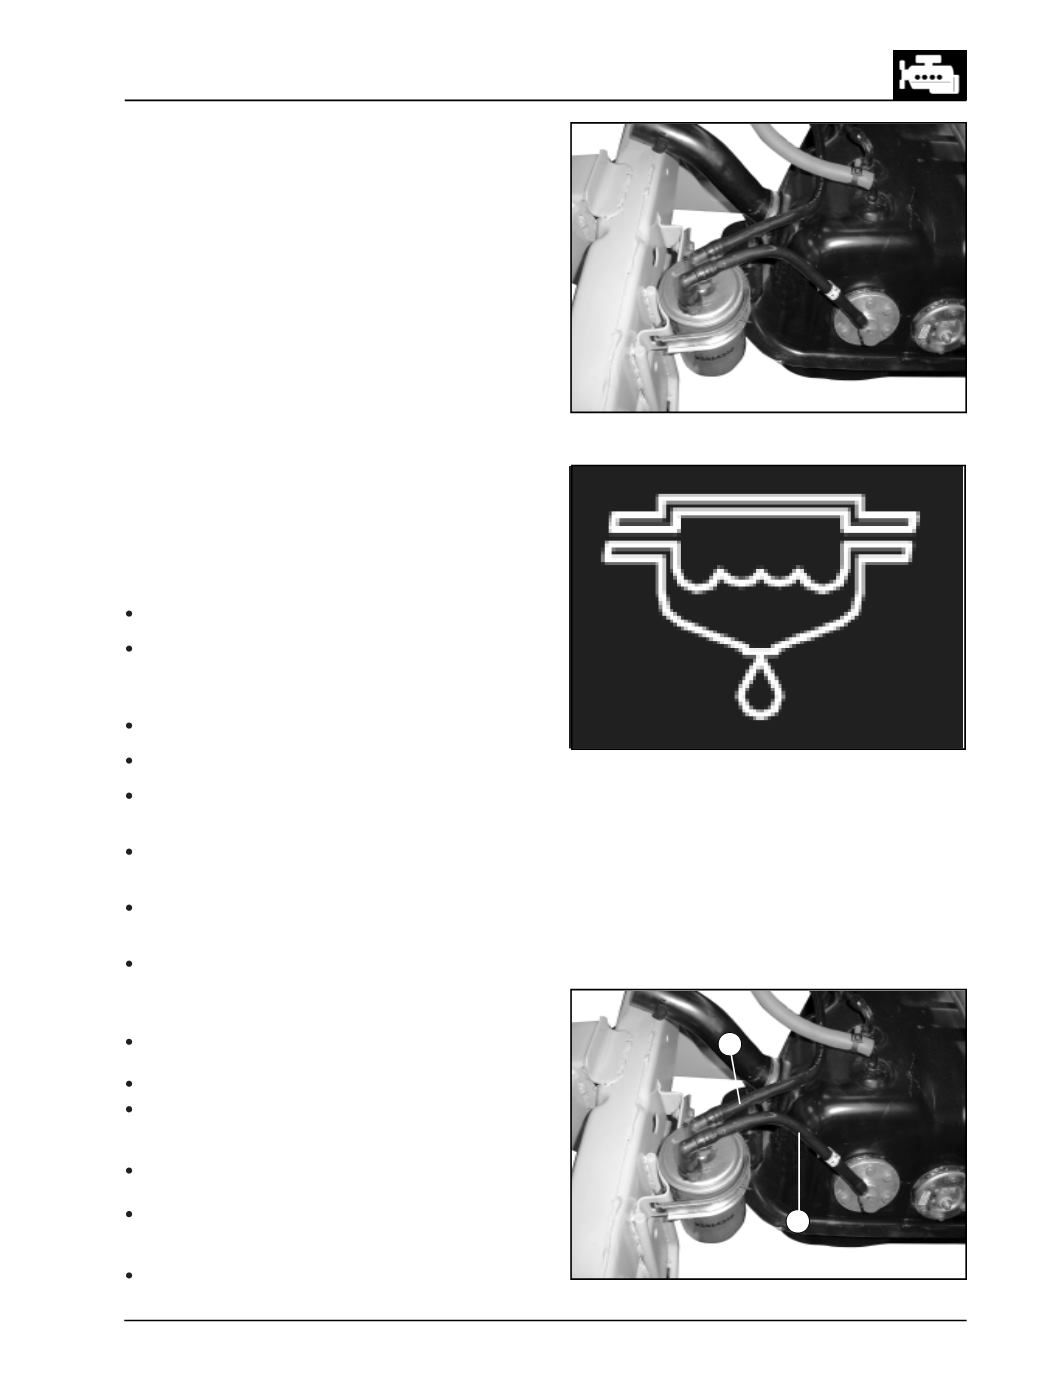
Procedure for Sedimenter Removal
(Fig.9):
Clean the sedimentor, its connections,and
the surrounding area.
Disconnect the water senser electrical connector.
Disconnect the fuel tank to sedimentor supply pipe
(A) and plug the pipe and port with appropriate
plug.
Remove the hose (B) from sedimenter to fuel filter
and plug the pipe and port with appropriate plug.
Loosen and remove the M8 bolt with a suitable
spanner of the fuel filter and sedimenter mounting
bracket.
Lift the Sedimenter.
Fig. 8
Fig. 7
Fig. 9
B
A