


 545 / 1904

BRAKE SYSTEM
533
BRAKES
Inspect the following components, if defective
correct or replace.
1. Ratchet of strut for wear or damage.
2. Check parking brake shoe lever for freemovement
against brake shoe webs.
3. Inspect back plate for any wear or damage.
Replace if found defective.
Installation:
1. Clean the back plate with kerosene or diesel and
ensure the hand brake quadrant levers are free to
rotate easily on the strut.
NOTE:
Keep the grease away from the shoe linings and all
hydraulic parts.
2. Use graphite grease to lubricate the contact faces
of the strut and hand brake lever, strut and the
quadrant lever. Also lubricate the tips of the shoes,
the shoe platforms on the back plate and contact
areas of the adjuster strut and back plate.
3. Install brake shoes and wheel cylinder.
4. Mount brake back plate and tighten four mounting
bolts to specified torque.
TIGHTENING TORQUE FOR BACK PLATE MOUNTING
BOLTS = 3.5 - 4 Kg-m
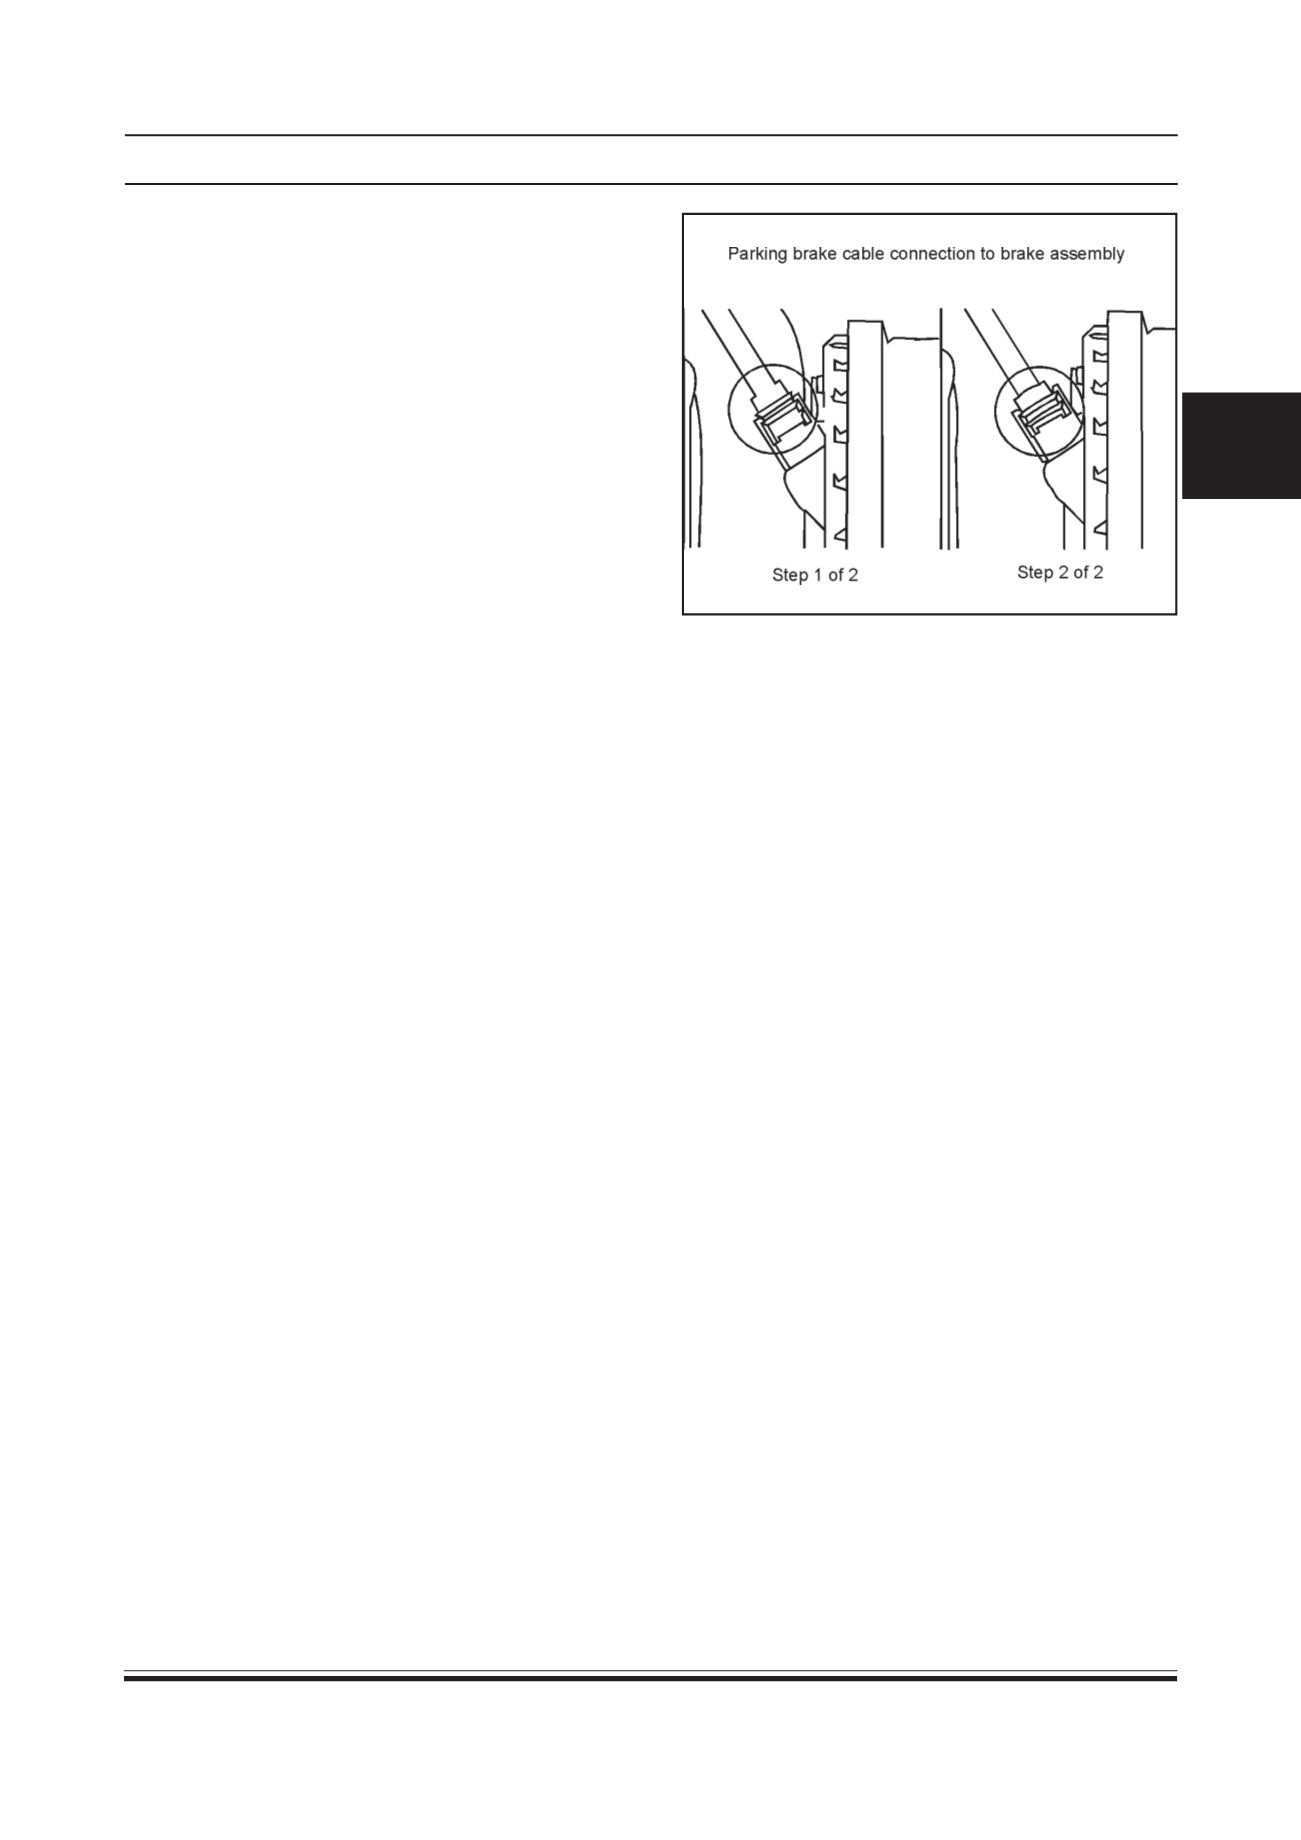
5. Guide parking brake cable through brake back
plate. Snap fit parking brake cable clip attached
to the brake back plate as shown below. Insertion
of clip is confirmed by “tick” sound.
6. Connect brake hydraulic line to wheel cylinder
assembly.
7. Install brake drum (Refer Rear Brake Drum
installation procedure).
8. Tighten wheel lock nut (driveshaft lock nut) to
specified torque. Fix thrust washer and hub cap.
TIGHTENING TORQUE FOR DRIVESHAFT LOCK NUT
= 17 Kg-m
9. Perform brake bleeding. (Refer bleeding of
hydraulic system)
10. Mount wheel (s) and tighten wheel mounting bolts
to specified torque.
TIGHTENING TORQUE FOR WHEEL MOUNTING
BOLTS = 8 - 8.3 Kg-m
11. Remove supports and lower vehicle.