


 895 / 1575

ELECTRICAL
75
ELECTRICAL
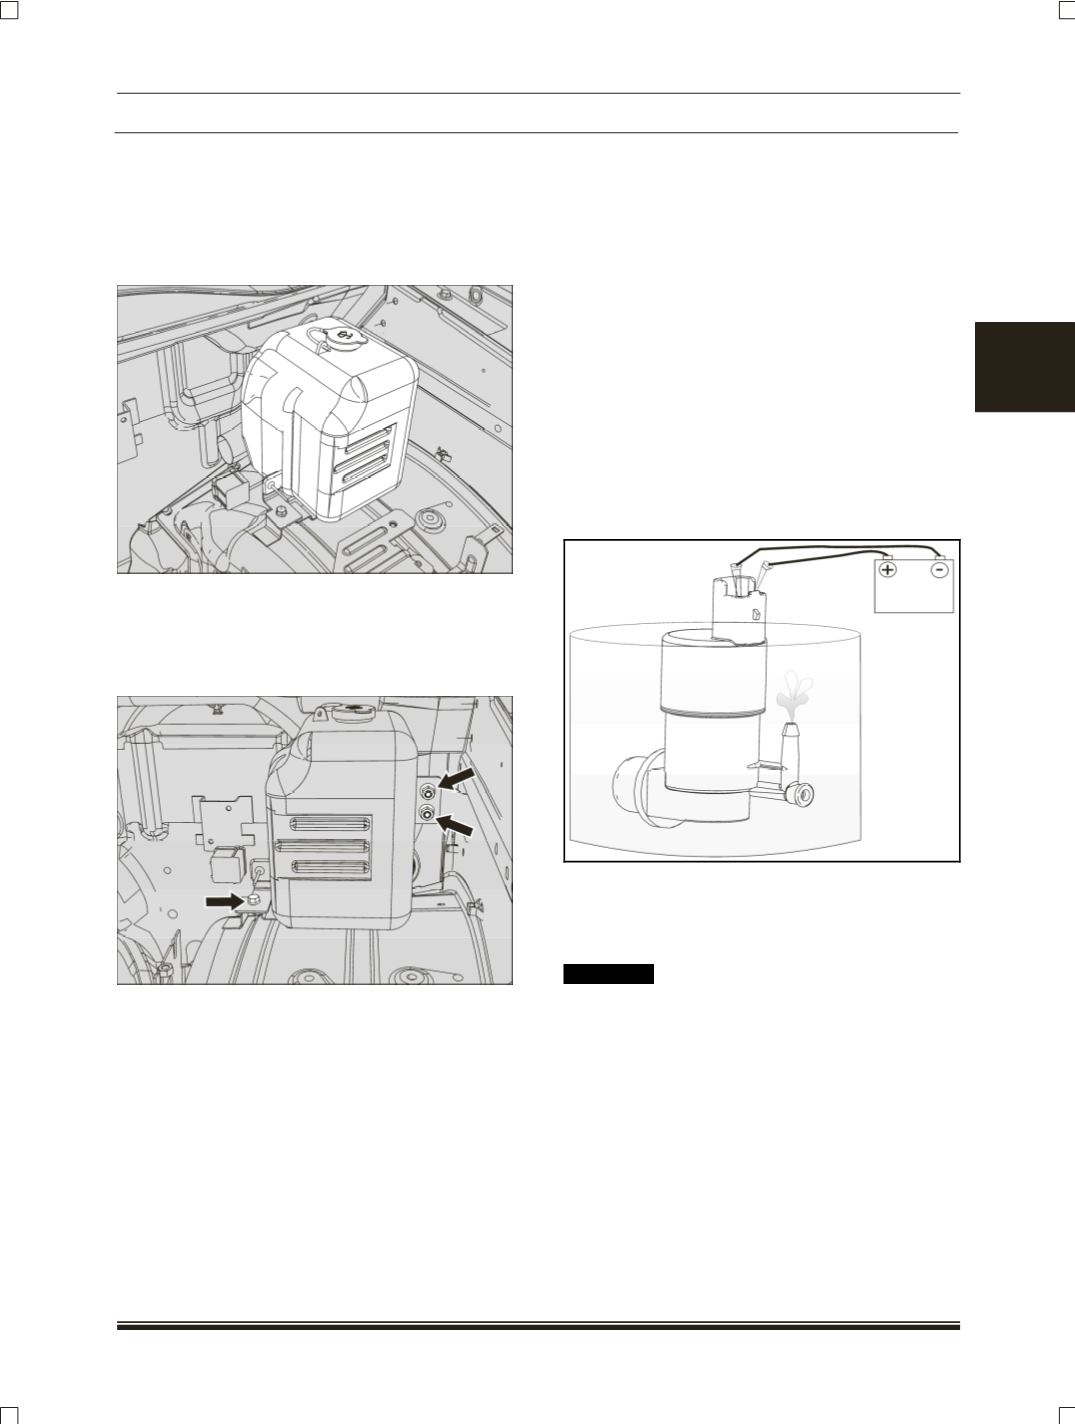
8.9.4 WASHER SYSTEM COMPONENTS:
8.9.4.1 WASHER BOTTLE
Capacity- 3.0 Lit.
LOCATION:
It is fitted on LH side on the bracket
on the LH wheel arch.
REMOVAL:
1.Disconnect the electrical connections of washer
pump.
2.Remove one mounting bolt and two nuts.
3.Take out the washer bottle assembly.
INSPECTION:
Check the washer bottle for cracks
and leakages if any.
REFITMENT:
1.Align the washer bottle to match mounting holes
on washer bottle mounting bracket.
2.Fit the mounting nuts and bolt and tight with
specified torque.
Tightening torque for bolts -0.95 Kgm
3.Connect the electrical connections of washer
pump.
4.Connect the filler pipe to washer bottle and
washer hose to washer pump.
NOTE:
After installation, add water up to the upper level of
the washer bottle and check for water leakage.
8.9.4.2 WASHER PUMP
REMOVAL:
1.Disconnect the washer hose from the washer
pump.
2.Pull out the washer pump from washer location.
INSPECTION:
1.Partially dip the washer pump in a water filled jar
and connect battery (+) and (−) terminals to
pump (+) and (−) terminals respectively to check
pumping rate.
2.Connect the positive (+) lead from the battery to
terminal 2 and the negative (−) lead to terminal
1, check that the pump operates.
If operation is
not as specified, replace the pump.
! CAUTION
These tests must be performed quickly to prevent
the coil from burning out.
REFITMENT:
1.Locate the washer pump on the washer bottle
hole and press it inside.
2.Connect electrical connection to the washer
pump.
3.Check for leakage.
4.Connect the washer hose to the washer pump.