


 717 / 1575

BRAKES
63
BRAKES
2. Disconnect the brake fluid lines from the LSPV
by removing nuts and banjo bolt.
NOTE
•
Make sure the correct fitting positions of the
lines and then unscrew the coupling nuts and
banjo bolt and carefully withdraw the pipes.
•
Plug the pipe ends to minimize the loss of
brake fluid through pipes and to prevent the
entry of dirt into the system.
•
Plug the open ports of LSPV to prevent the
entry of dirt into the system.
•
Wash off any spilt fluid immediately with cold
water
.
3. Loosen and remove two mounting bolts and
separate the LSPV form the vehicle.
ASSEMBLY
For assembly follow the reverse procedure of
removal.
NOTE
•
LSPV should be fitted with the vehicle in
unladen condition and all wheels should be on
ground
•
After assembly it is necessary to bleed the
system.
LSPV IMPORTANT INSTRUCTIONS
Following are the work instructions which need to
be followed strictly for NON-ABS vehicle:-
1. Ensure the pipeline connection to the
respective port of LSPV.
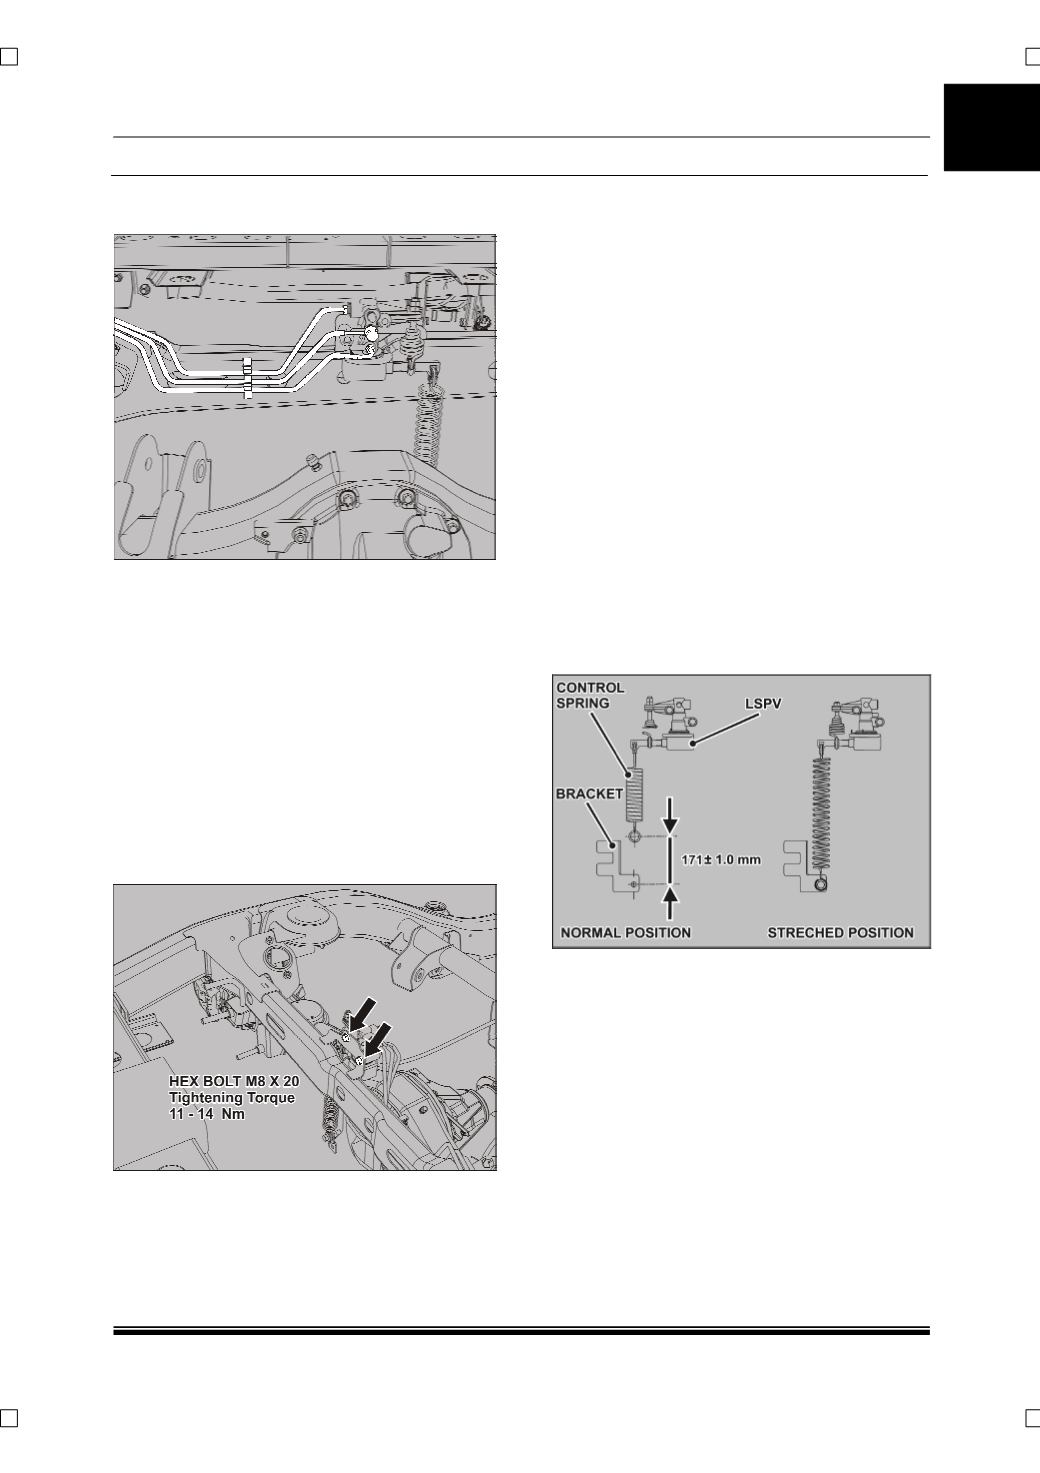
2. LSPV stretch to be strictly maintained as per
specified value of 171 ± 1.0 mm.
3. LSPV control spring
should
be taken out from
axle bracket if the shock absorbers are to be
removed from the vehicle and spring to be
fitted back, with proper stretch value
mentioned, before making vehicle on-road.
This is to avoid the permanent deformation in
the LSPV control spring.
4. For manual bleeding, complete the bleeding
first and then do fitment of LSPV control
spring to axle bracket. This is to facilitate
development of more pressure to rear circuit
while bleeding.
NOTE
The LSPV spring should be stretched by 171 ± 1
mm and to be assembled as shown.