


 154 / 1575

ENGINE
115
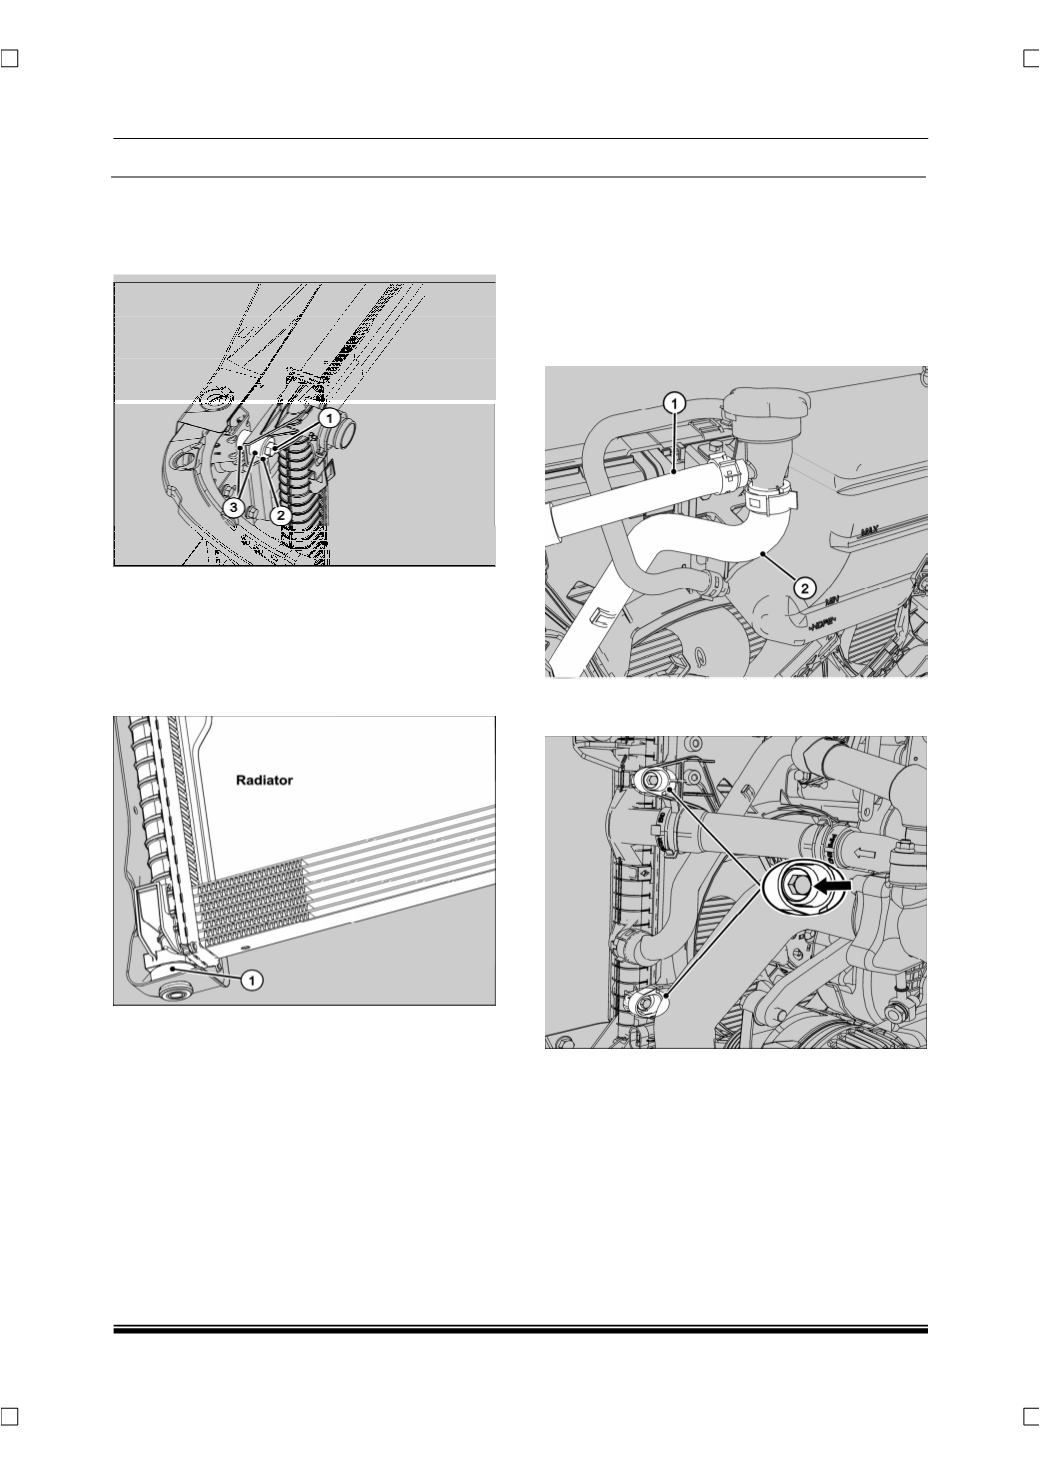
4. Loosen and remove the LH Radiator top mount-
ing screw
(1)
, along with the washer
(2)
and
grommet
(3).
Similarly remove the RH mounting
screw.
5.
Disconnect the electrical connector of radiator fan
which is located at bottom side of radiator.
6. Tilt the radiator inwards and lift the radiator along
with shroud assembly from the grommet
(1)
on
the bottom mounts, both LH and RH simultane-
ously.
FITMENT
For fitment follow the reverse order of removal.
Tighten the following fasteners to the recommended
torque.
Refer engine tightening torque section.
•
Radiator top mounting
M10 bolt– (4.6 Kg-m)
•
Refrigerant lines on condenser
M6 bolt– (0.81 ~ 1.2 Kg-m)
C. RADIATOR FAN SHROUD REMOVAL
1.
Remove the recovery bottle .
(refer “recovery bot
tle removal” procedure
.
)
2.
Disconnect the electrical connections to the radia
tor fan.
3.
Remove bolts and disconnect filler shroud (1)
and (2) from filler neck end.
4. Loosen and remove two mounting bolts of
shroud assembly form both right and left side.
5. Separate the shroud assembly from radiator
and pull out the shroud from the top.
FITMENT
For fitment slide the shroud into the mounts till it
snaps at the top mounts