


 1475 / 1575

BODY
80
4. Loosen and remove the cross flanged screw at
the front.
5. Loosen and remove mounting screws
(5 Nos.)
from bottom side as shown below.
6. Open both door and pull out the sill finisher
carefully and separate it from the vehicle.
NOTE
Before assembly check the condition of plastic
clips if found damaged replace with new one at the
time of assembly.
FITMENT
For fitment follow reverse procedure of removal.
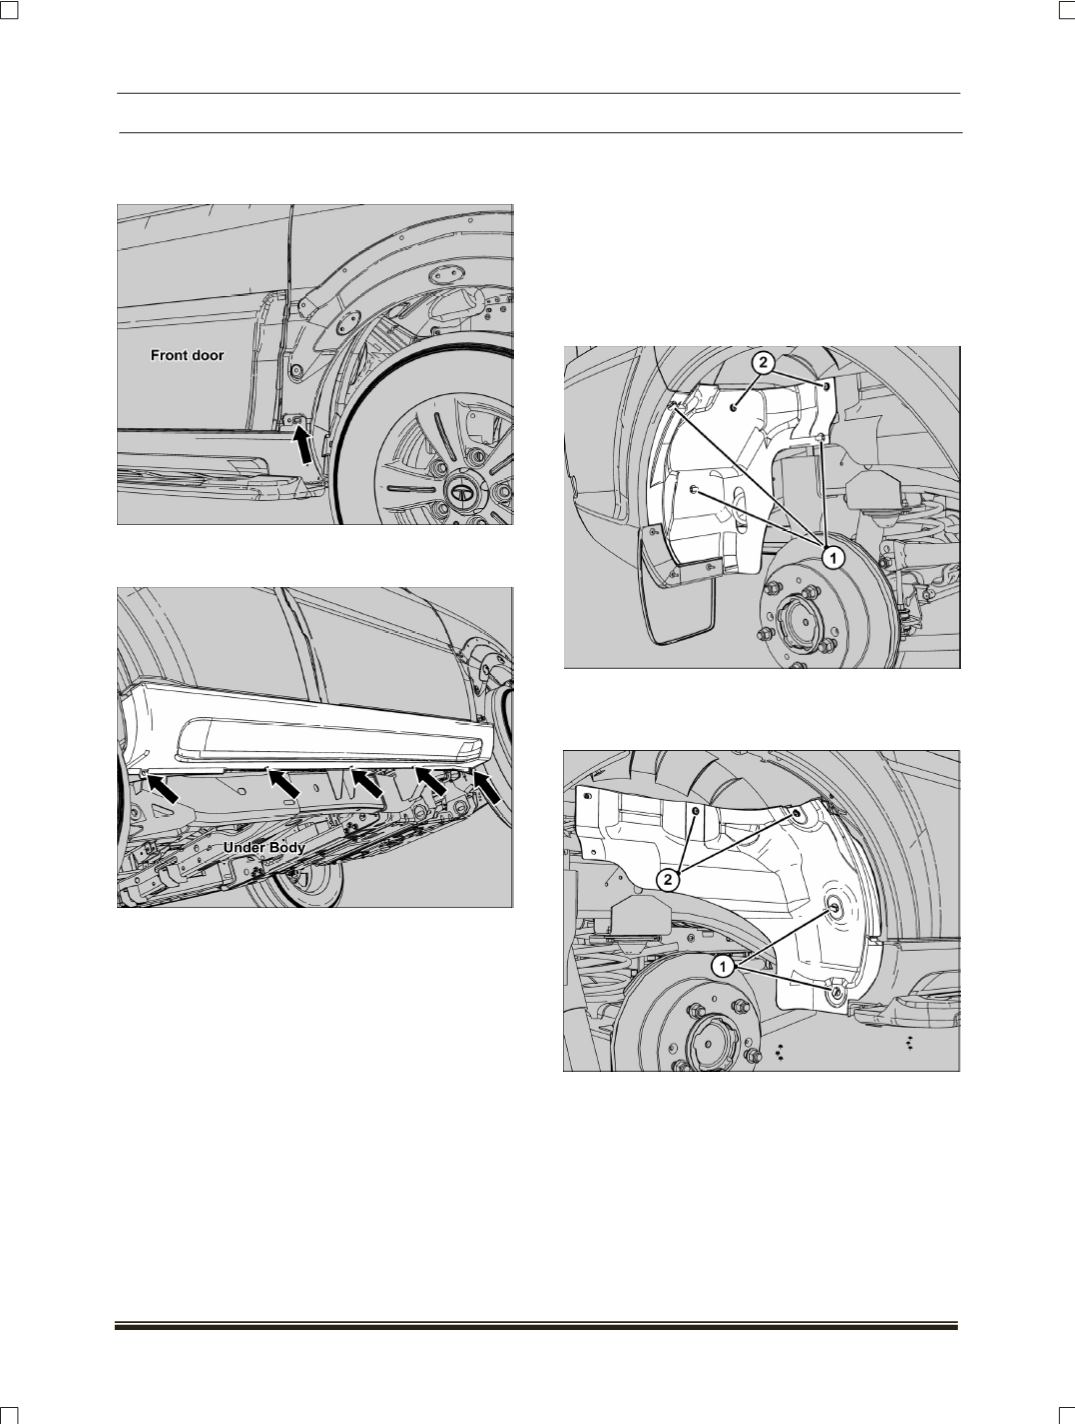
9.2.46 REAR WHEEL ARCH LINER
REMOVAL
1. Loosen and remove 2 mountings from bolt side
and 3 mounting facing tire side and take out
rear mud flap
2. Remove mounting clips (1).(3 Nos.) and
mounting screws (2) (2 Nos.) and take out the
right hand side liner.
3. Remove mounting clips (1).(2 Nos.) mounting
screws (2) (2 Nos.) and take out the left hand
side rear liner
FITMENT
For fitment follow reverse procedure of removal.
NOTE
Before assembly check the condition of plastic
clips if found damaged replace with new one.