


 1067 / 1119

FATC
44
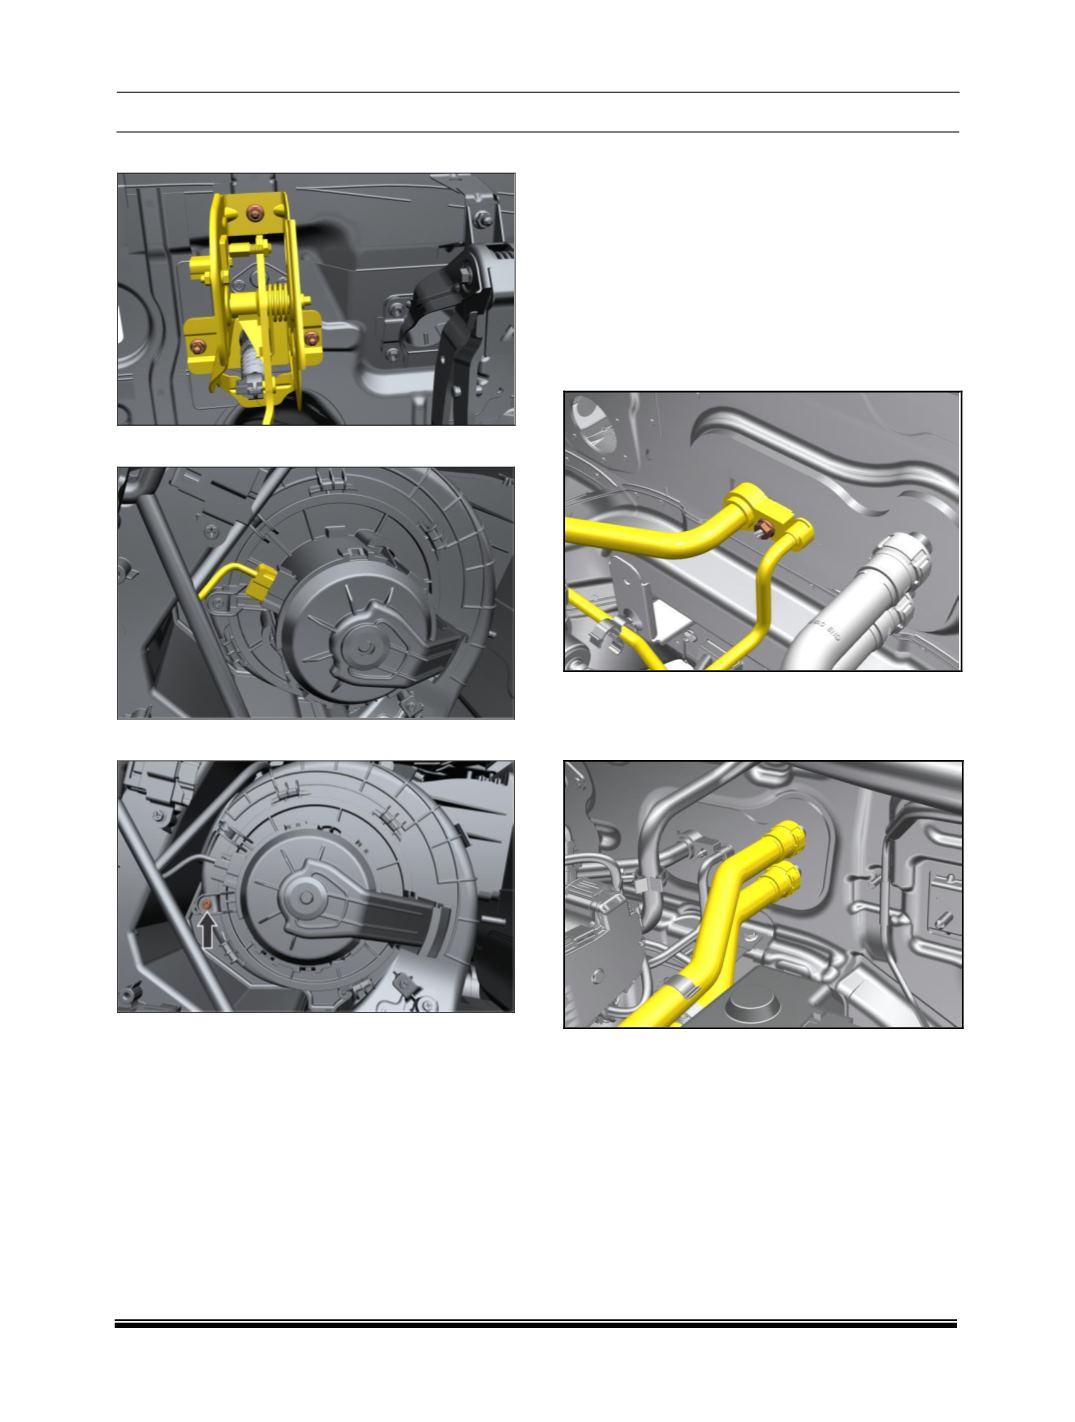
4. Remove Mountings on Clutch Pedal.
5. Disconnect Electrical connection from Blower.
6. Remove one screw on blower Assembly.
7. Rotate Blower motor in anticlockwise direction
and take it out.
ASSEMBLY
For assembly follow the reverse procedure of re-
moval
D. FRONT HVAC UNIT REMOVAL AND AS-
SEMBLY
1. Recover the refrigerant using standard recovering
equipment.
2. Remove dashboard Skin.
(For procedure refer
dashboard removal procedure in Body section.)
3. Disconnect all electrical connections.
4. Loosen and remove bolts and disconnect the inlet
and outlet lines i.e. high pressure line and low
pressure line and plug the ports.
5. Drain the coolant.
6. Disconnect the Heater inlet and heater coil outlet
pipes.
WARNING
The heater pipes contain hot coolant which may spill
out when disconnected, even if the coolant is
drained, so be careful while disconnecting them.
Keep a suitable container below to collect the cool-
ant that will flow out.
7. Loosen and remove the mounting bolts of support
tube on both side of HVAC unit and take out the
tubes.
8. Loosen and remove mounting cap screws on
HVAC lower mounting bracket as shown in figure
below