


 1131 / 1906

PROPELLER SHAFT
14
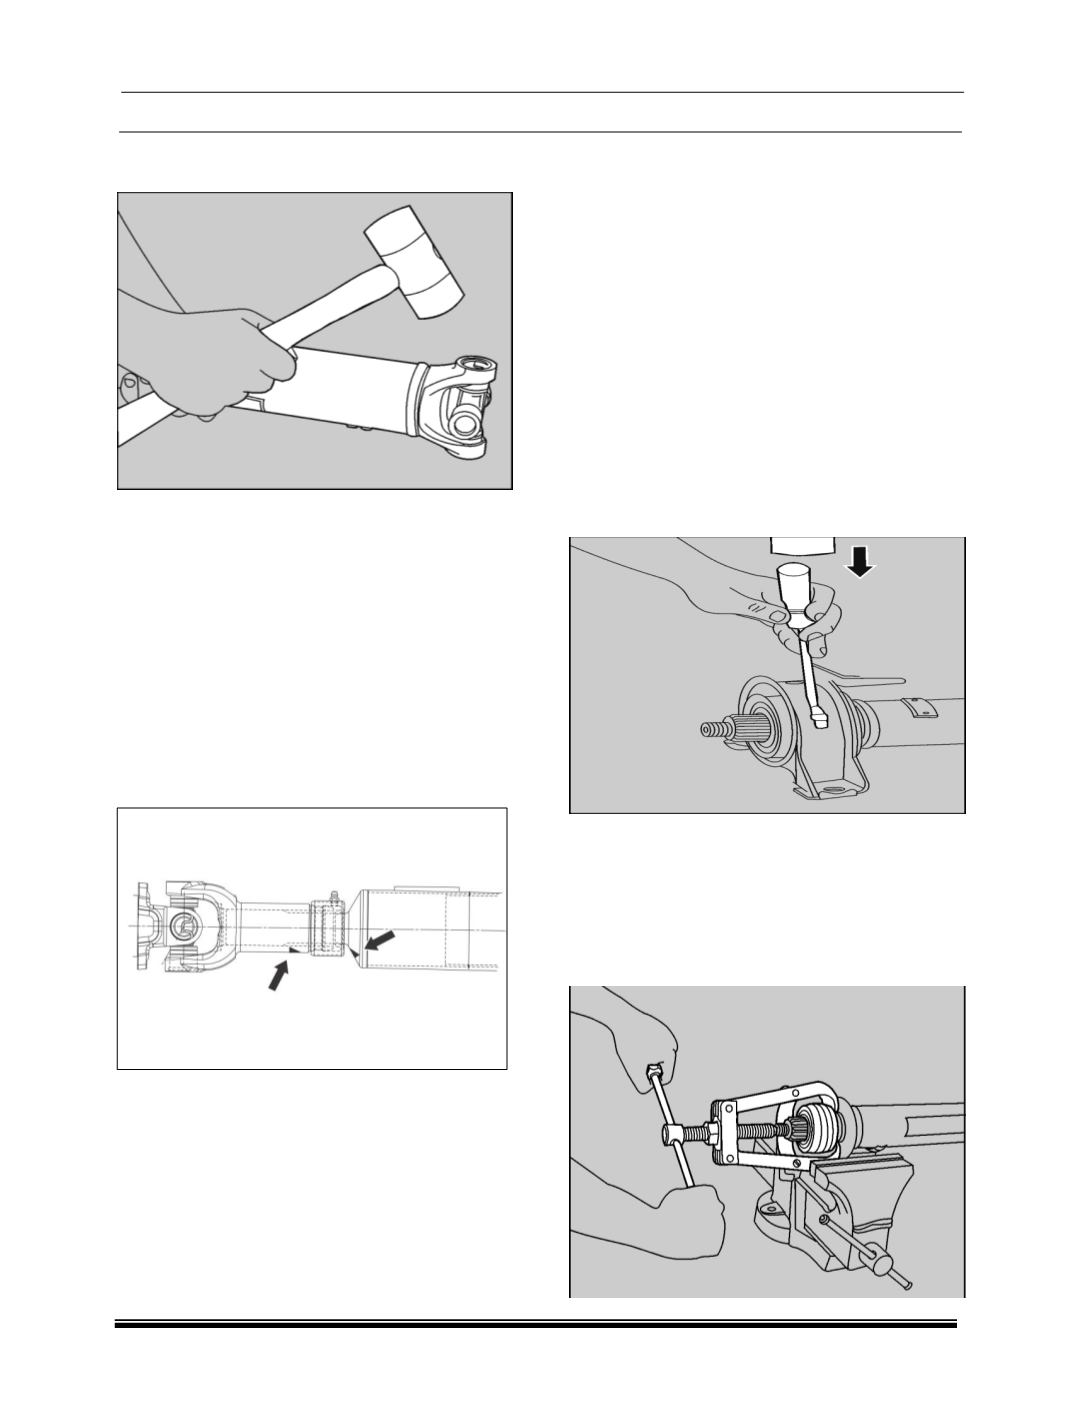
6. If the joint is stiff, strike the yoke ears with a
soft hammer to seat the needle bearings.
CAUTION
Be sure that snap rings are properly seated in
grooves.
7. Repeat the above steps at the opposite end of
the propeller shaft in installing a second kit. If
removed earlier, the unitized seal should be
replaced with a new unit. Install a new seal by
generously lubricating the seal lip and press it
over slip yoke using a small arbor press.
8. Assemble tube shaft and slip yoke, making
sure that the alignment marks are in line. This
will ensure that slip yoke lugs and tube yoke
lugs are in line.
B CENTRE BEARING
DISMANTLING
NOTE
The unitized one piece seal used on Spicer
propeller shaft is not intended to be removed in
service. To separate the tube shaft from the
slip yoke, pull the tube out of the slip yoke,
leaving the seal in place.
A significant amount of force is required to
remove as well as reinstall the tube shaft
through the seal.
Removal of the unitized seal causes damage
to the seal lip where it contacts the slip yoke.
1. Unstake the clamping strap and remove centre
bearing bracket. Slide off rubber housing from
centre bearing assembly.
2. To remove the old seal, hold the yoke
assembly firmly in a vise. Drive the seal off the
yoke.
3. Remove rear spacer ring with Puller
(Part No.
312 589 25 33)
pull out centre bearing
assembly from propeller shaft. Remove front
spacer ring.