


 742 / 1526

35
BODY
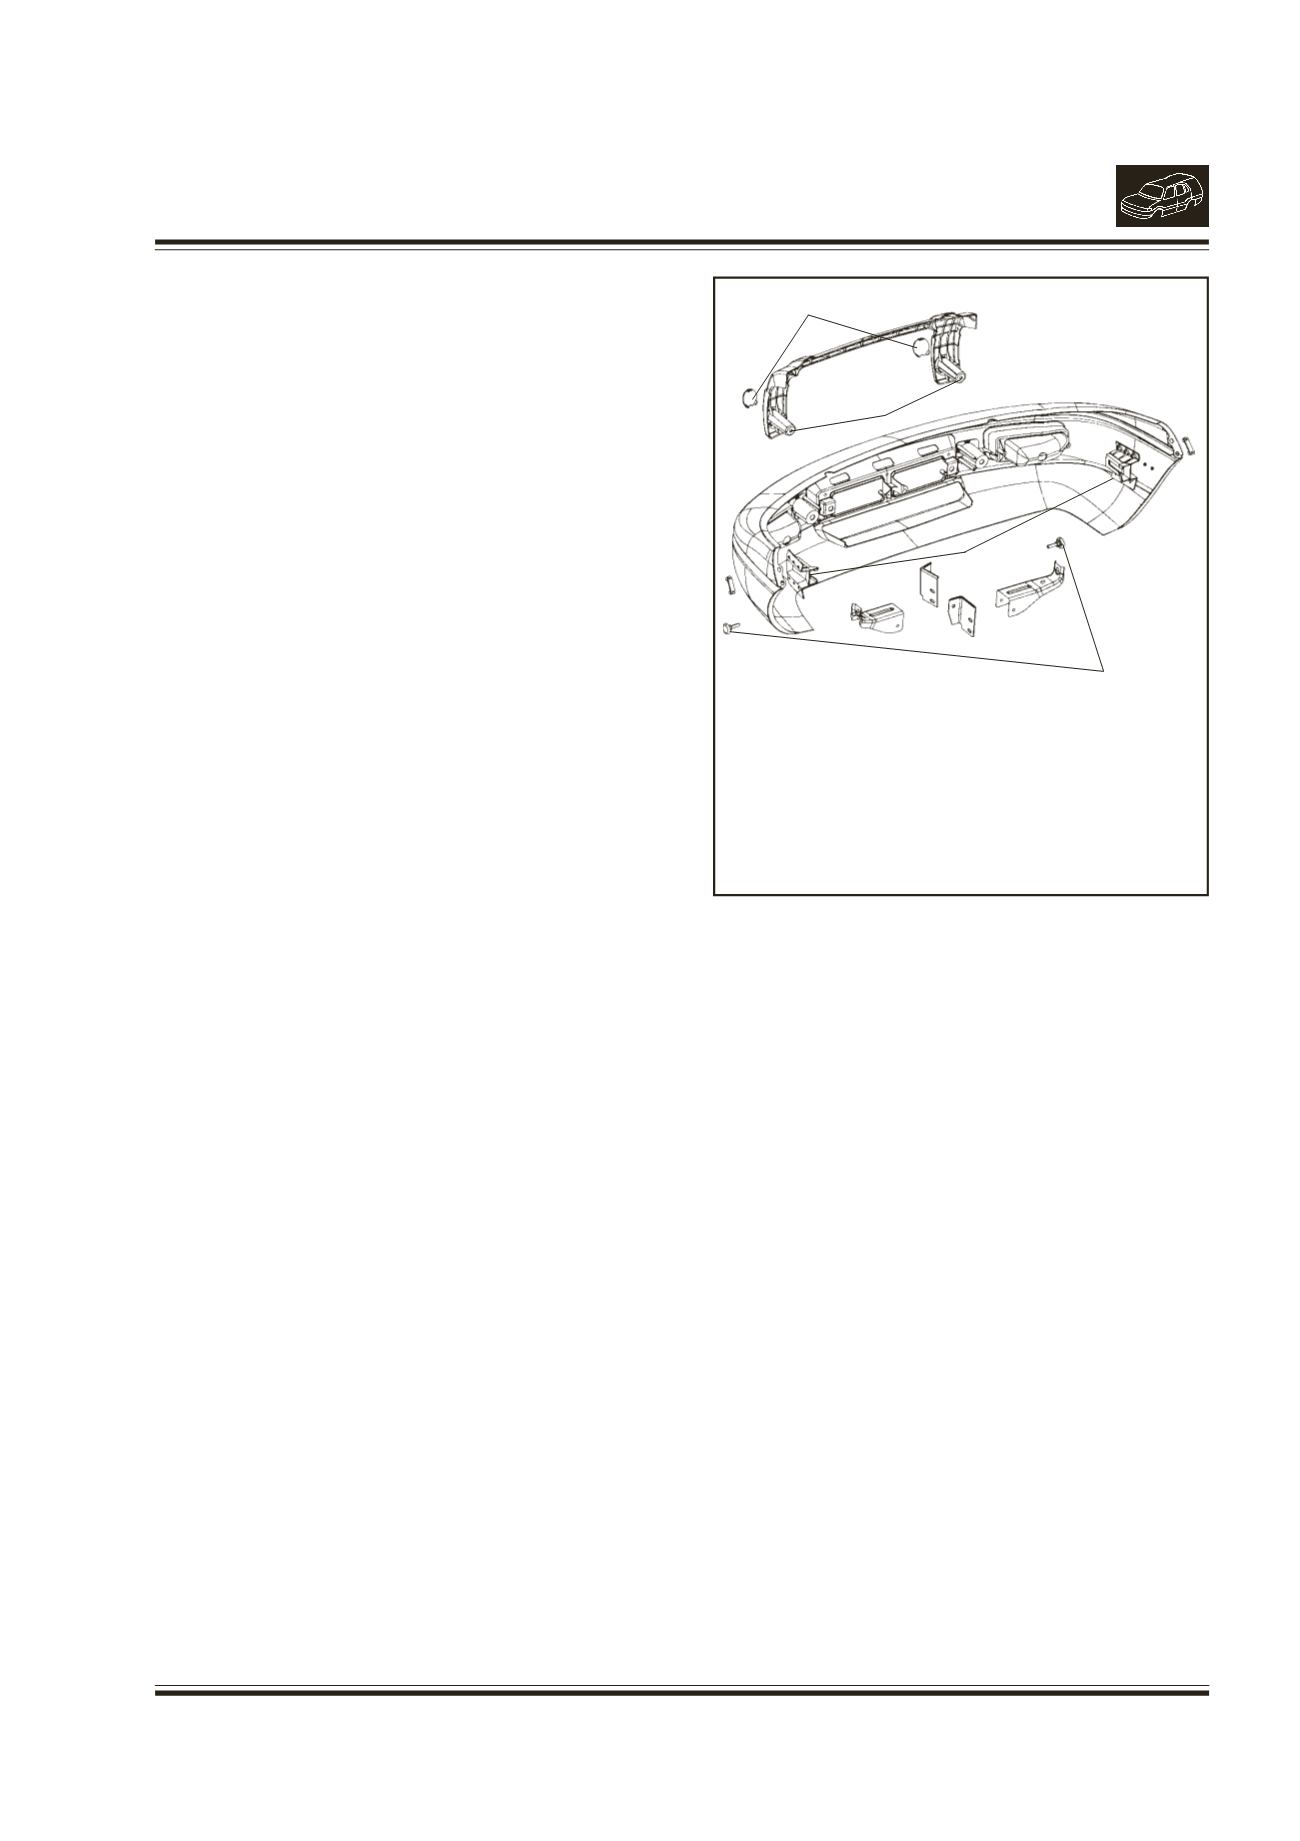
15. REMOVAL / INSTALLATION OF FRONT
BUMPER
(Fig. 21)
REMOVAL
l
Remove the mud cover over side bracket.
l
Remove the electrical connections for fog lamps.
l
Open the plastic cover at both side of front
number plate and remove the two bumper
mounting screws after properly supporting the
bumper and then remove the crash guard.
l
Pull out the bumper.
INSTALLATION
l
Support the bumper and complete the electric
connections for fog lamps.
l
Align both ends of front bumper with two welded
pins on either side at fender.
l
Loosely mount the front bumper on sidemounting
screws. Fix 2 hex. fl bolts (M10x25) and washer
(A10.5) at the both sides of front number plate.
l
Adjust side gap by tightening/loosening the
adjusting screws.
l
Adjust the vertical gap by moving the bumper
manually.
l
Tighten all fasteners once the bumper gap is set
and close the covers at front side.
l
Fit the mould cover over the side bracket with
the help of a hex. fl. bolt (M8x20) and a button.
Fig. 21.
1.
COVER
2.
LOCATION OF MOUNTING SCREWS FRONT
3.
LOCATION OF SIDE ADJUSTING SCREW
4.
ADJUSTINGSCREW
1
2
3
4