
ELECTRICAL
5
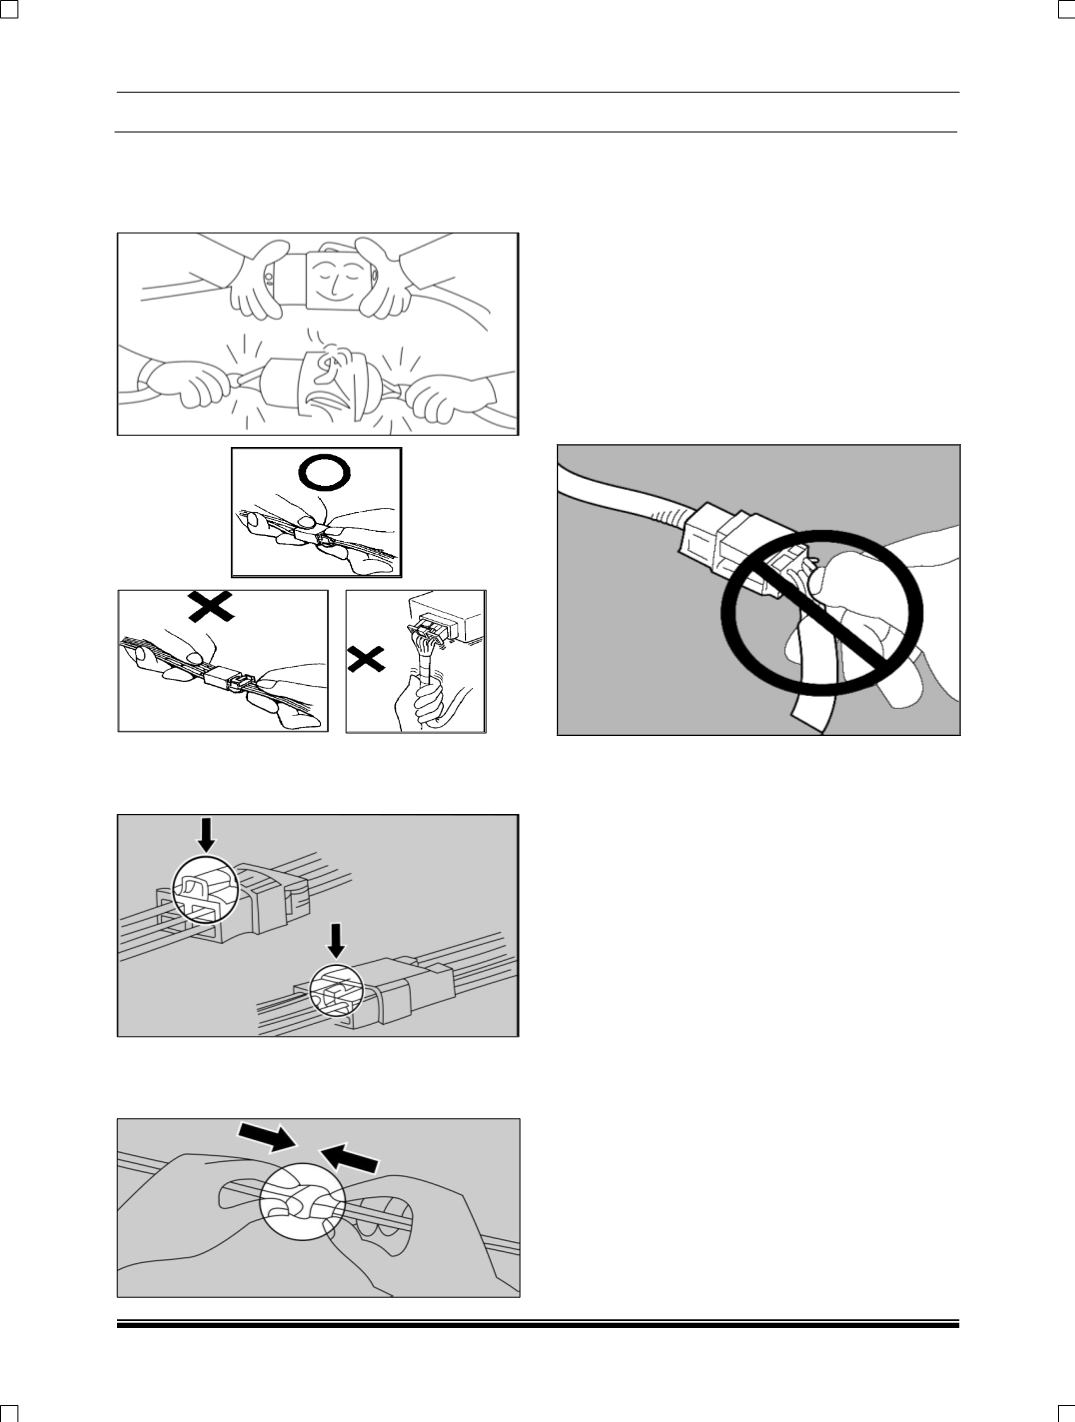
b. When disconnecting a connector pull it off
from the mating connector by holding on both
connectors. Never try to disconnect
connectors by pulling on their wires.
c. While disconnecting the interconnection
connector, press in the direction indicated by
arrows in the illustration.
d. While connecting the interconnection
connectors, insert the connectors until a
“snap” noise is heard.
e. Dirt / corroded terminals result in improper
contact. The terminals should be cleaned
carefully. Improper contact pressure between
mating terminals disturbs the connectivity
between them. Replace the damaged
connector body to avoid exposure of the
terminals in case of inadequate contact
pressure.
Ensure proper connection between the
terminals to the wire. Rectify the loose
connection by repairing / replacing the wire
harness. Worn out insulation of the wire may
result in short circuit. Avoid water entering in
the connectors.
10.Before removing a faulty component, refer to the
Workshop Manual for removal procedures.
Ensure the starter switch is turned to the ’OFF’
position, the battery is disconnected and any
disconnected harnesses are supported to avoid
any undue strain at terminals. When replacing
the component keep oily hands away from
electrical connection areas and push
connector’s home until any locking tabs fully
engage.
11.When using a circuit tester to perform continuity
or voltage checks or connector terminals, insert
the test probe from the harness side.
If the connector is a sealed connector, insert the
test probe in through the hole in the rubber cap for
the electrical wires, being careful not to damage the
insulation of the wires; continue to insert the test
probe until it contacts the terminal.


