


 267 / 310

CLUTCH
13
3.1.2.2. REGULAR MAINTENANCE
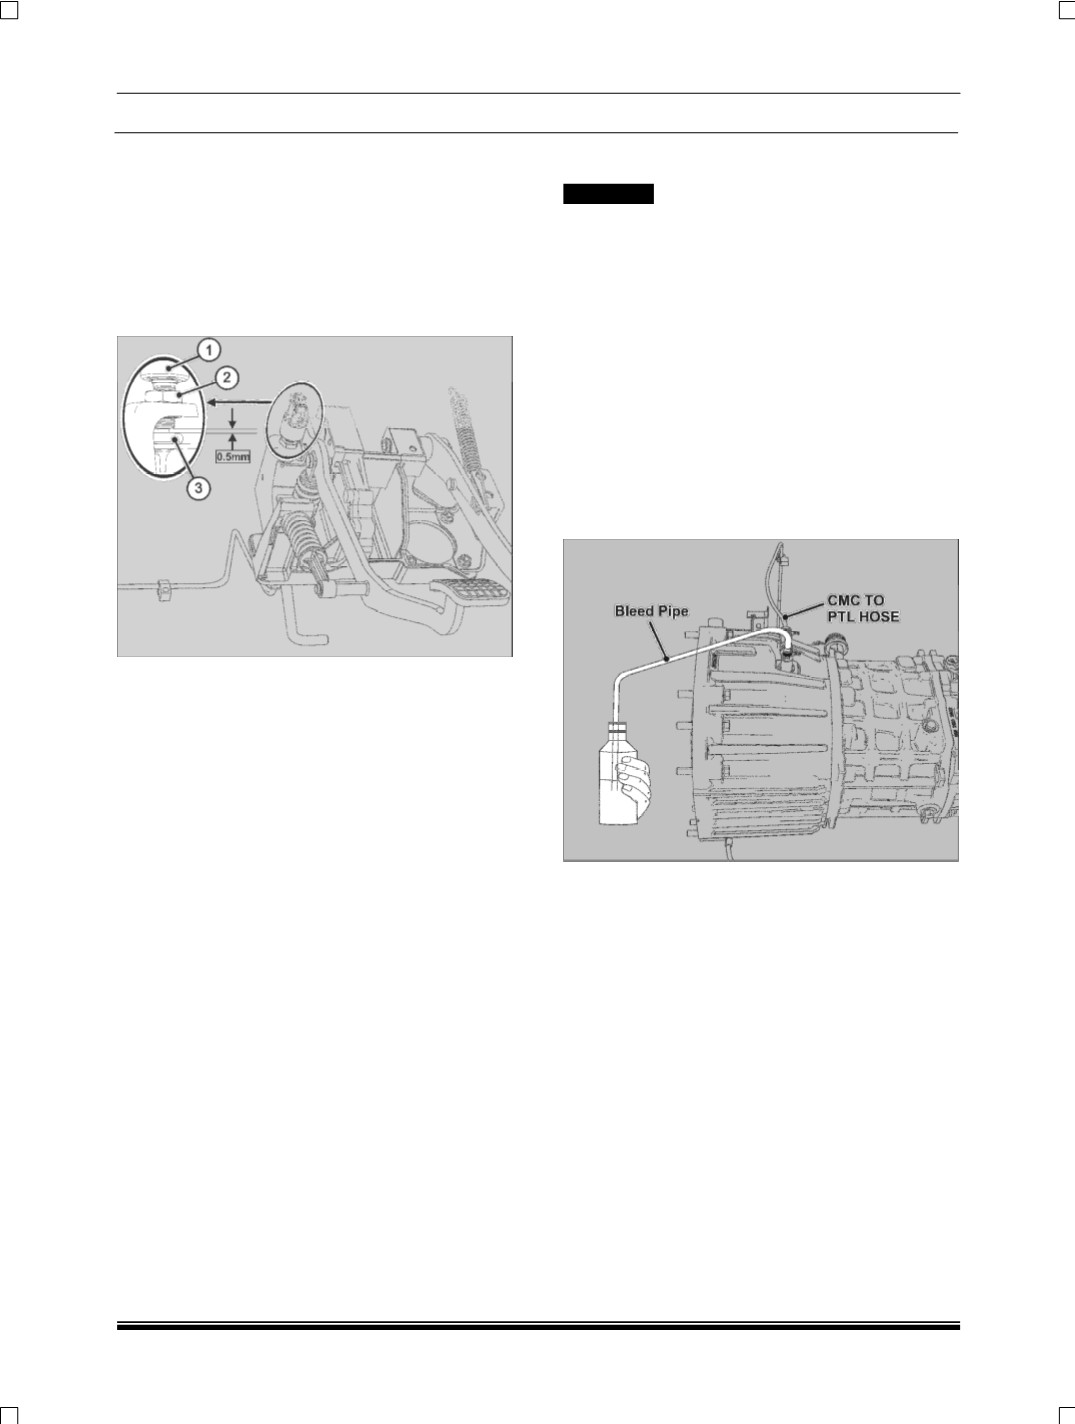
A. CLUTCH SWITCH ADJUSTMENT
1. Place the clutch in the released position.
2. Loosen the lock nut
(2).
3. Adjust the clutch switch
(1)
till the gap between
the edge of the threaded portion of clutch
switch and rubber stopper
(3)
is 0.5mm.
NOTE
Check for switch in pressed condition after setting
the above gap
.
4. After confirming the gap, tighten the lock nut
(2)
.
For further details on clutch switch refer Engine
Management system (EMS) section.
B. CLUTCH BLEEDING PROCEDURE
! CAUTION
•
Use only DOT-4 fluid.
NOTE
•
Whenever Clutch master Cylinder/ Concentric
Slave Cylinder /clutch hose/ pressure line tube
has to be removed or if the clutch pedal is
spongy, bleed the system.
1. Remove the stone guard for access of bleeding
valve (hydraulic adapter) from the vehicle.
2. Clean the external areas of the hydraulic
adapter and remove the dust cap from the
hydraulic adapter bleeding connection.
3. Connect the bleed pipe to the hydraulic adapter
bleeding connection.
4. Place the other end of bleed pipe in a clean
container which should be at a lower level than
the slave cylinder and ensure that the hose is
submerged in the clutch fluid.
5. Fill the clutch fluid reservoir to its max level.
6. Press the clutch pedal slowly throughout its
stroke and hold it pressed to its extreme
position.
NOTE
During bleeding process keep a watch on fluid
level in reservoir and top up if the level falls below
the maximum mark.
7. Keeping the clutch pedal pressed open the
bleeding valve (turn anti-clockwise) until the
fluid containing air escapes.