


 764 / 1588

25
BODY
5. REMOVAL / INSTALLATION OF FRONT /
REAR DOOR
(Fig. 4 & 5)
REMOVAL
l
Open the door
l
Remove door inner trim. Refer 'Removal/
installation of front / rear door inner trim'.
l
Pry out plastic cover on door mirror mounting
screws carefully from inside of door and
disconnect wiring harness connector of the door
mirror for front door.
l
Disconnect all other connectors of electrical
components inside the door. If necessary pull out
the required portion of plastic membrane.
l
Remove the wiring harness by pulling out clamps.
l
Remove the plastic membrane.
l
Remove rubber grommet provided on the door
for wiring harness.
l
Take out the wiring harness from the door through
the hole.
l
Remove check strap mounting screw on pillar.
l
Support the door properly and remove mounting
screws of top and bottom hinges on the door.
l
Remove the door.
INSTALLATION
l
Locate the door on the hinges.
l
Fit the door to top hinge with 2 screws and
washers. Fit the door to bottom hinge with 2
screws and washers. Ensure proper alignment of
door and tighten the mounting screws.
l
Fit the check strap on the pillar using a sl. ch.
screw (M8x16), spring washer (B8) and tighten
the screw.
l
Insert wiring harness through grommet into the
hole provided for harness on the door. Fit the
grommet on door.
l
Apply Butyl Mastic sealant on the door inner panel
and fix the plastic membrane on it.
l
Complete the speaker connections and fit the
speaker.
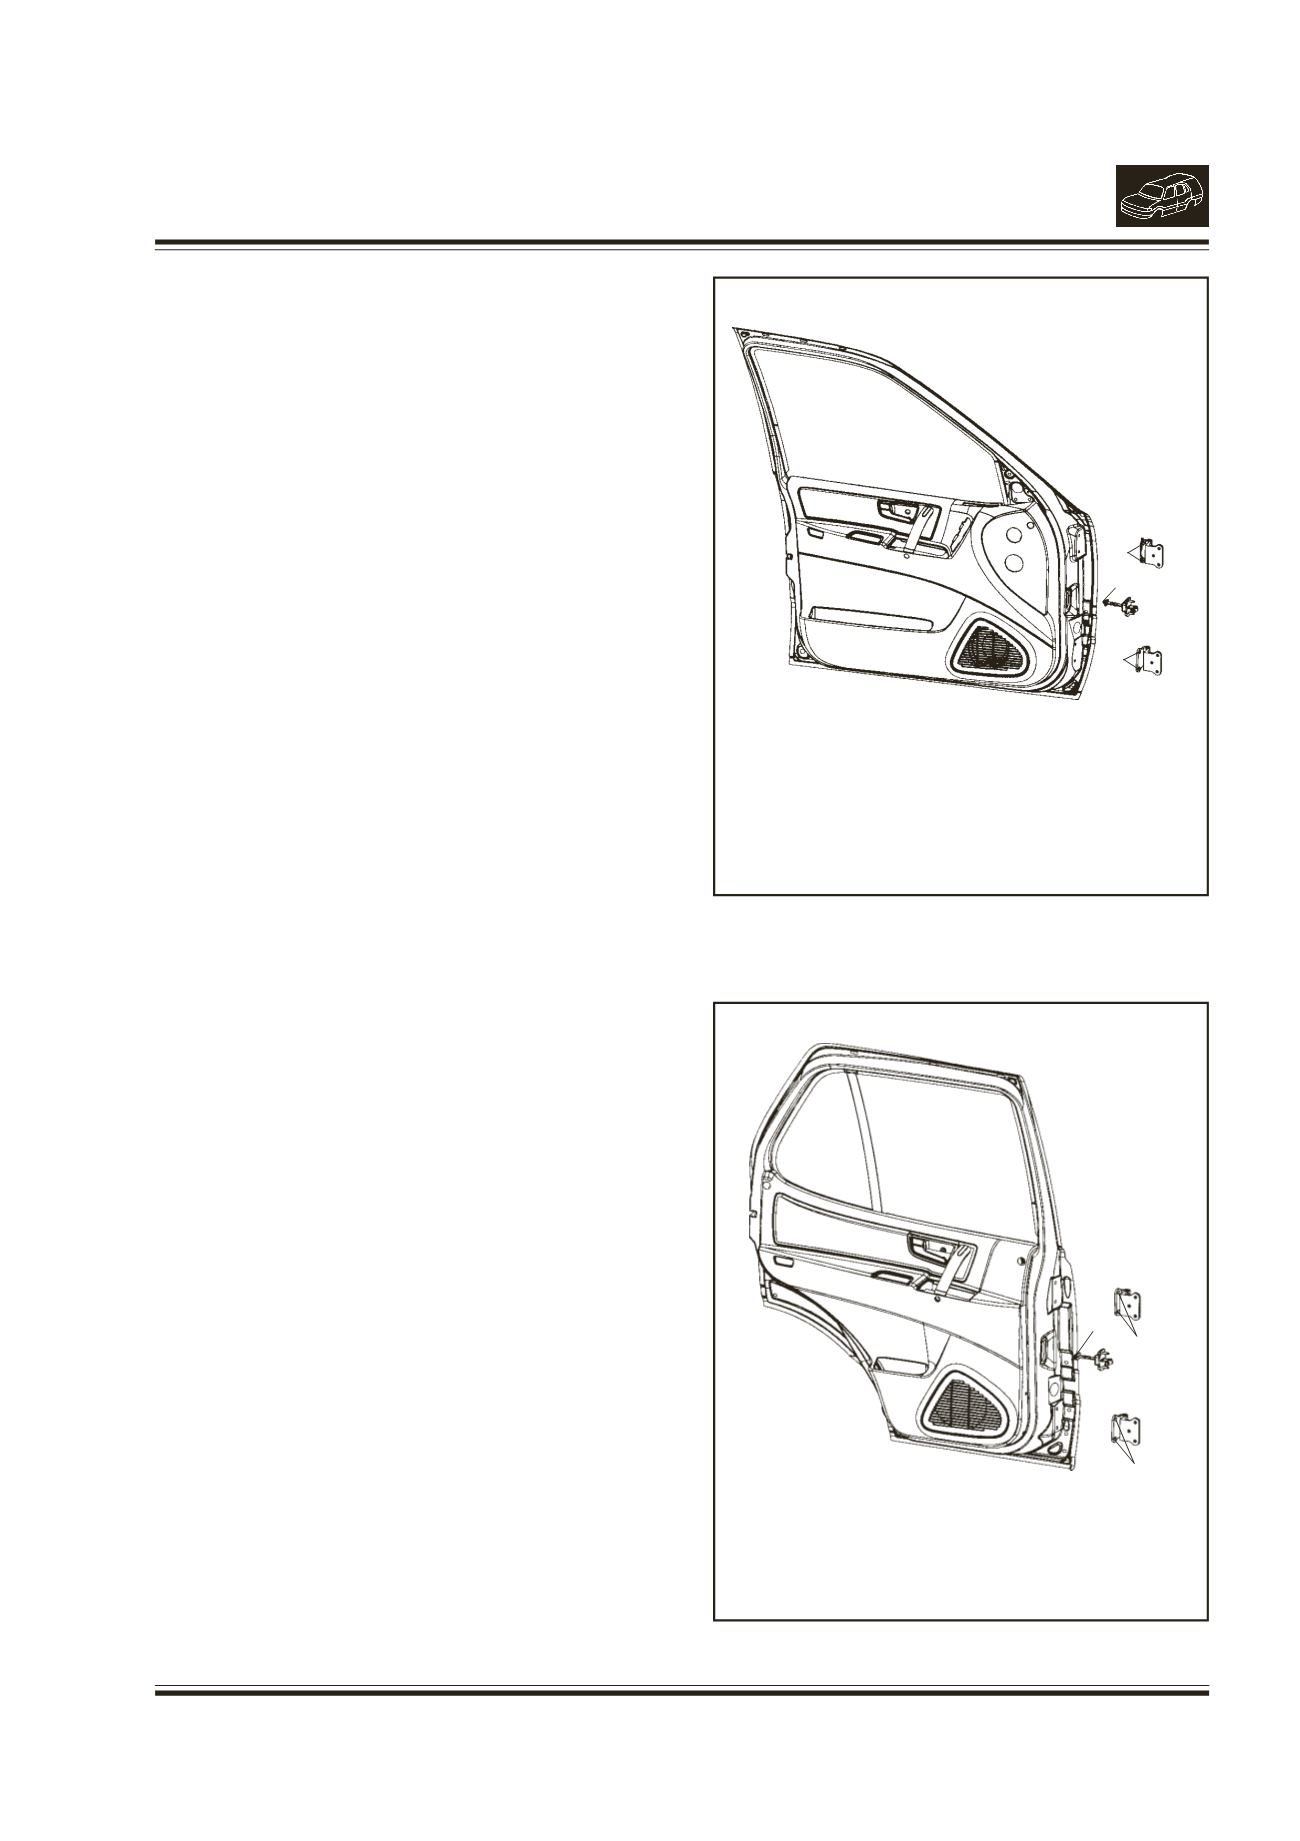
Fig. 4 - Front door
1.
TOP HINGE
2.
CHECKSTRAP
3.
BOTTOMHINGE
1
2
Fig. 5 - Rear door
1.
TOP HINGE
2.
CHECK STRAP
3.
BOTTOM HINGE
1
2
3
3