


 763 / 1588

24
BODY
4. REMOVAL/INSTALLATION OF TAIL GATE
INNER TRIMS
(Fig. 3)
REMOVAL
l
Open the tail gate.
l
Remove 2 mounting screws of door pull and
remove grab handle.
l
Remove the inner handle cover by removing
the screw.
l
Pull out trim middle, trim top, trim LH, trim RH
and trim lower, for removing lower trim remove
four speaker mounting screws.
INSTALLATION
l
Replace the trim clips.
l
Locate trim lower on door, ensuring proper
alignment of trim clips in the mounting holes on
door. Press the trim on door properly.
(10 trim clips on trim lower,
4 trim clips on trim middle,
4 trim clips on trim top,
3 trim clips on trim RH,
3 trim clips on trim LH)
l
Similarly fit the trim LH and trim RH, trim top and
trip middle.
l
Fit the door pull using 2 csk screws (M6x16) and
bright washers (6.4) and tighten the screws.
l
Fit the inner handle cover by tightening the pan
hd. screw (M6x16).
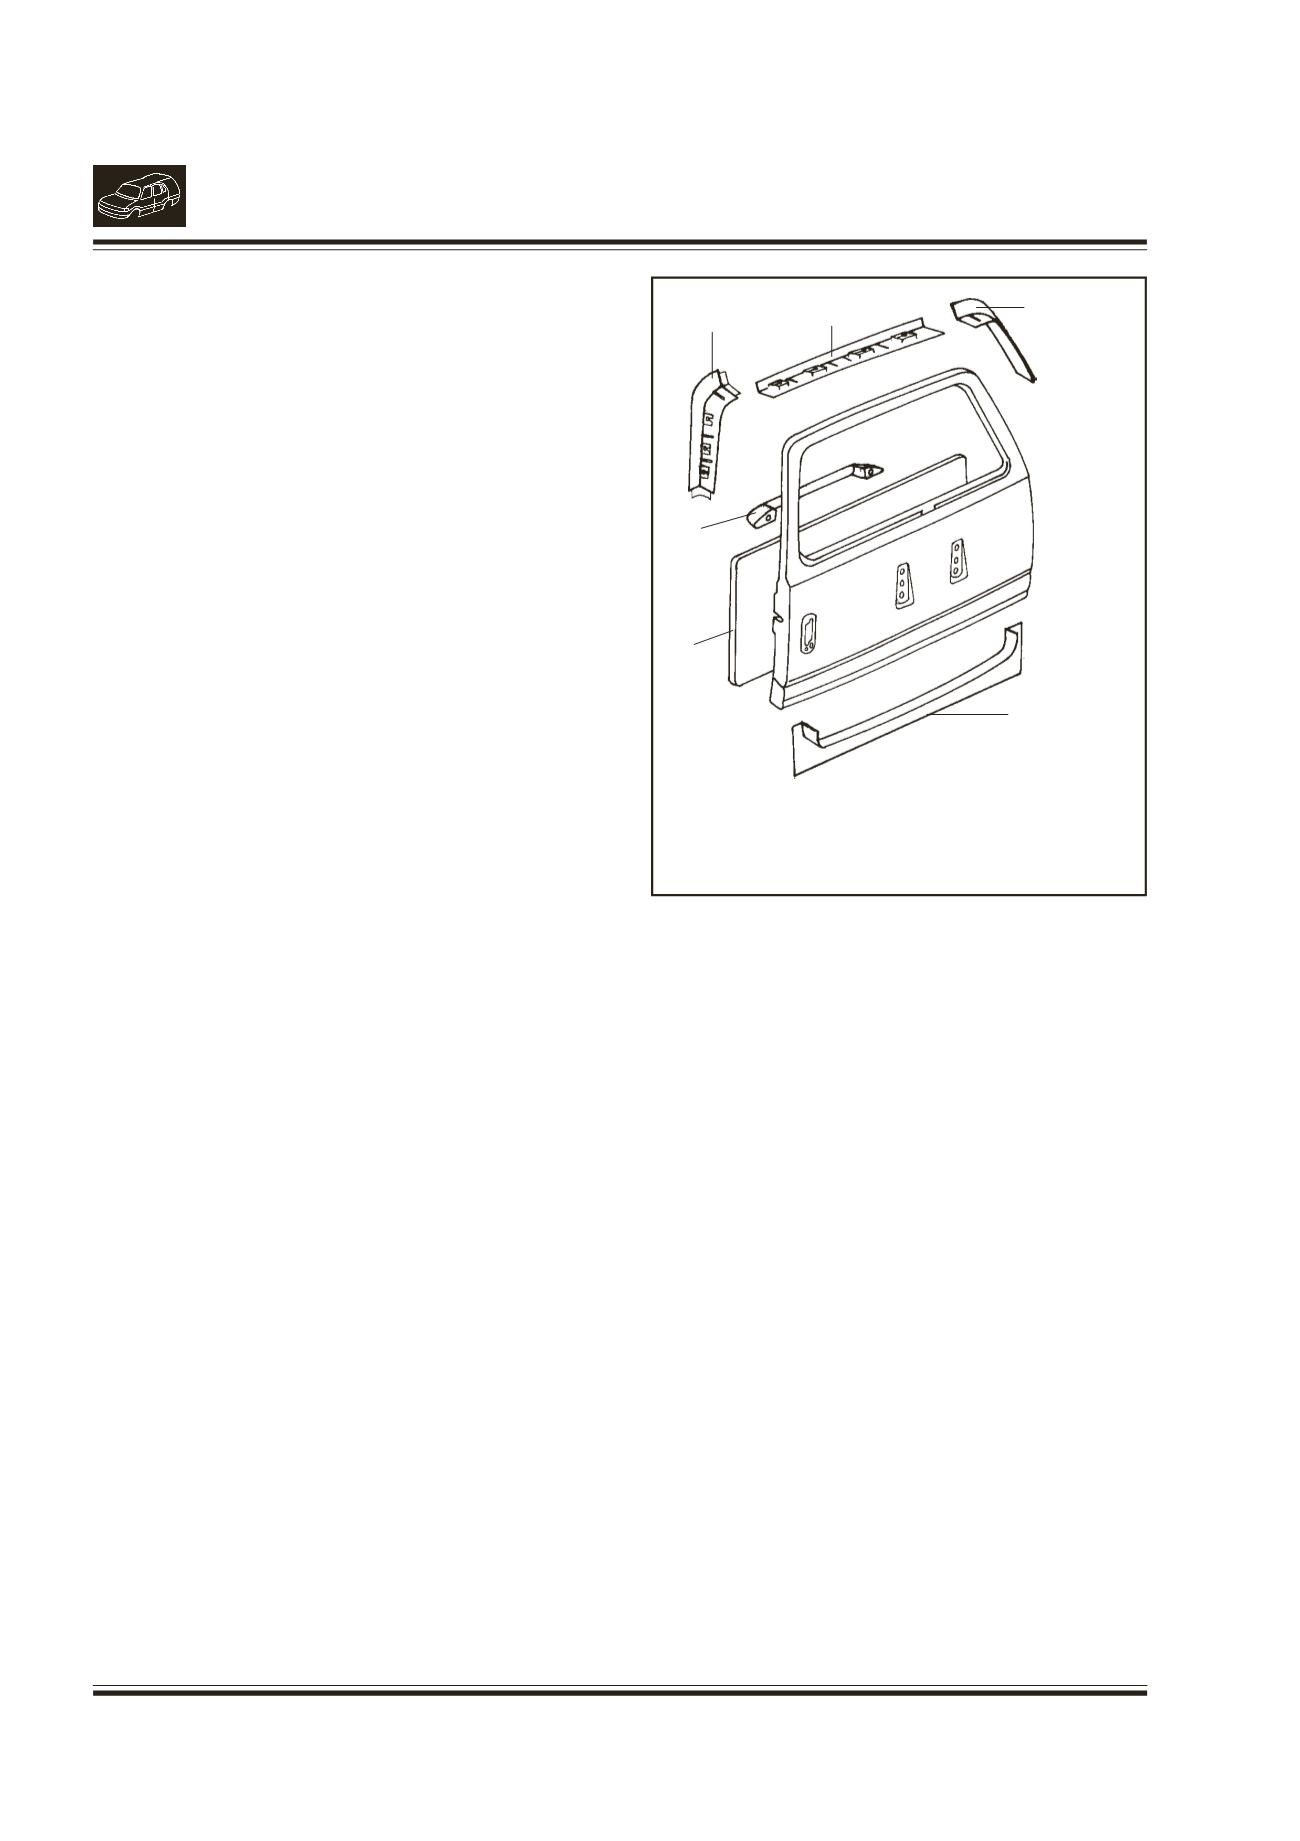
Fig. 3.
1.
DOOR PULL
2.
TRIM MIDDLE
3.
TRIMTOP
4.
TRIM LH
5.
TRIMRH
6.
TRIM LOWER
1
2
3
4
5
6