


 453 / 1235

FRONT SUSPENSION
16
C. LOWER WISHBONE
REMOVAL
1. Remove the lower mounting of Strut assembly
from the lower wishbone.
(For procedure refer
front
Strut assembly
removal procedure in this
section).
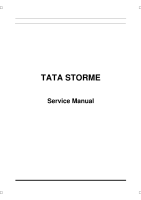
2. Remove the split pin and thin Castle nut.
3. Support the lower wishbone and knuckle
separately.
4. Place the puller
(1) (Part No. 287058904601)
in
the between ball joint and front axle.
5. Tighten the hex screw
(2)
inside the puller
(1)
(Part No. 287058904601)
in clockwise direction
to push the ball joint upwards and take out the
ball joint.
6. Slightly move the knuckle assembly to separate
the ball joint from the knuckle.
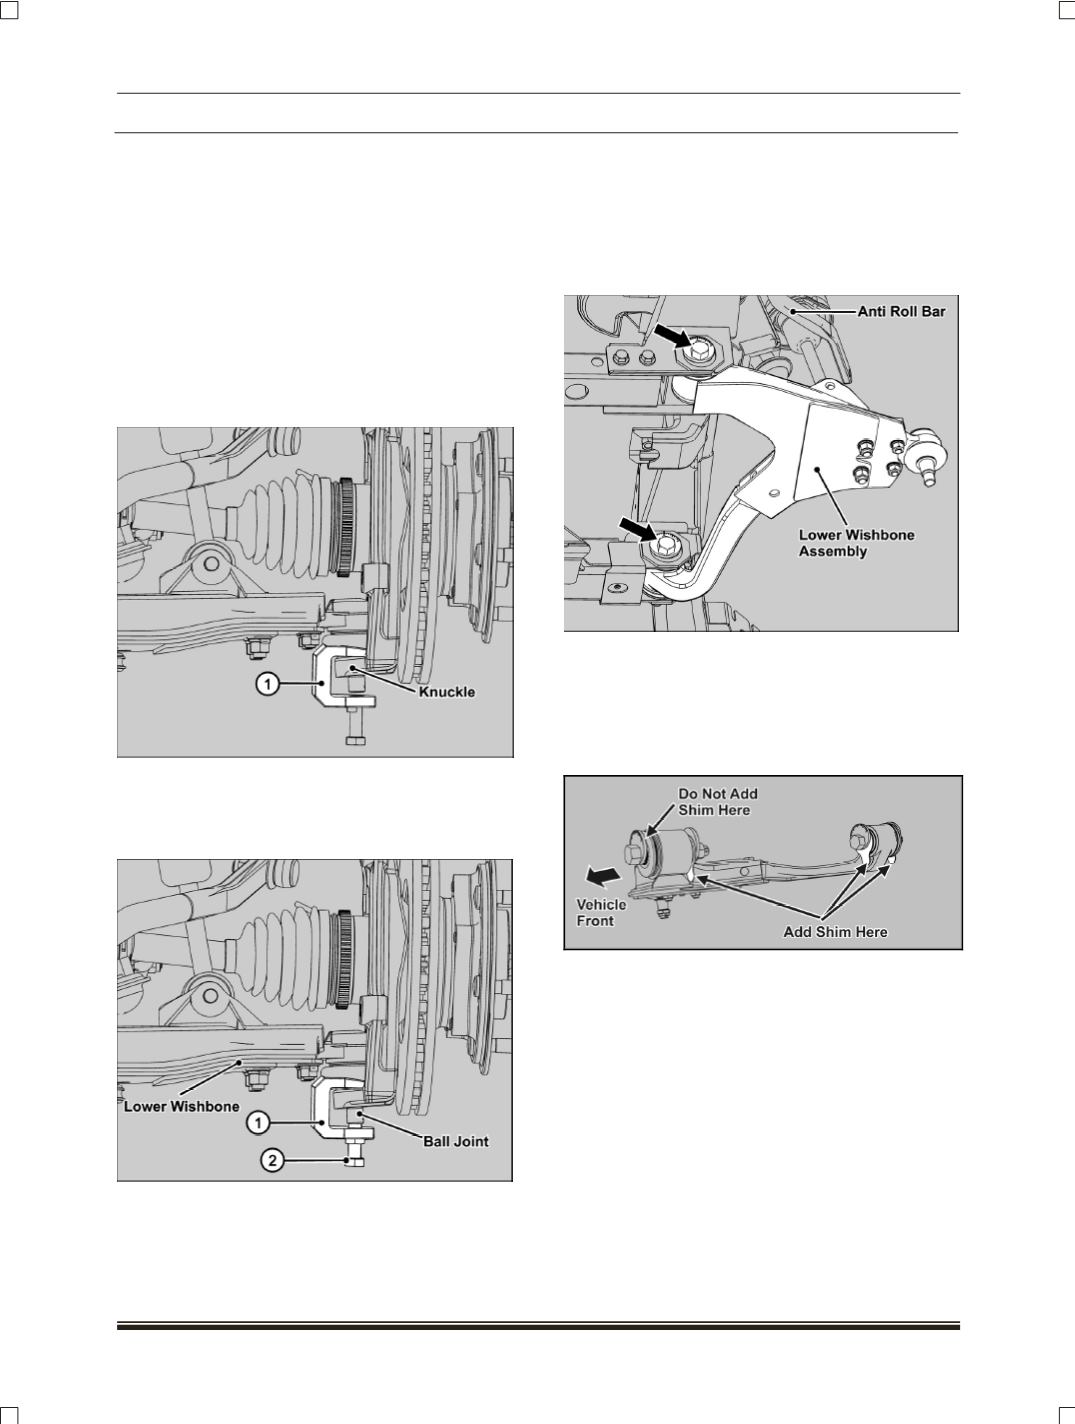
7. Loosen and remove the eccentric pin assembly
(2 Nos.)
of lower wishbone which are attached
to the frame and take out the lower wishbone
assembly.
FITMENT
For fitment follow the reverse procedure of
removal.
If required add the shims as given in the figure
below to fill the gap.
Ensure no fouling with other components during
fitment of shims.
NOTE
Lower wishbone eccentric pin to be tightened to
specify torque after wheel alignment is done.
Before assembly check the condition of ball
joint. Check for excessive play in the ball joint, if
needed replace the same with new one.
Make sure that all the mountings are tightened
to the specified torque.