


 457 / 1235

FRONT SUSPENSION
20
5.1.3.2 DISMANTLING, INSPECTION AND
ASSEMBLY
A. FRONT STRUT
DISMANTLING
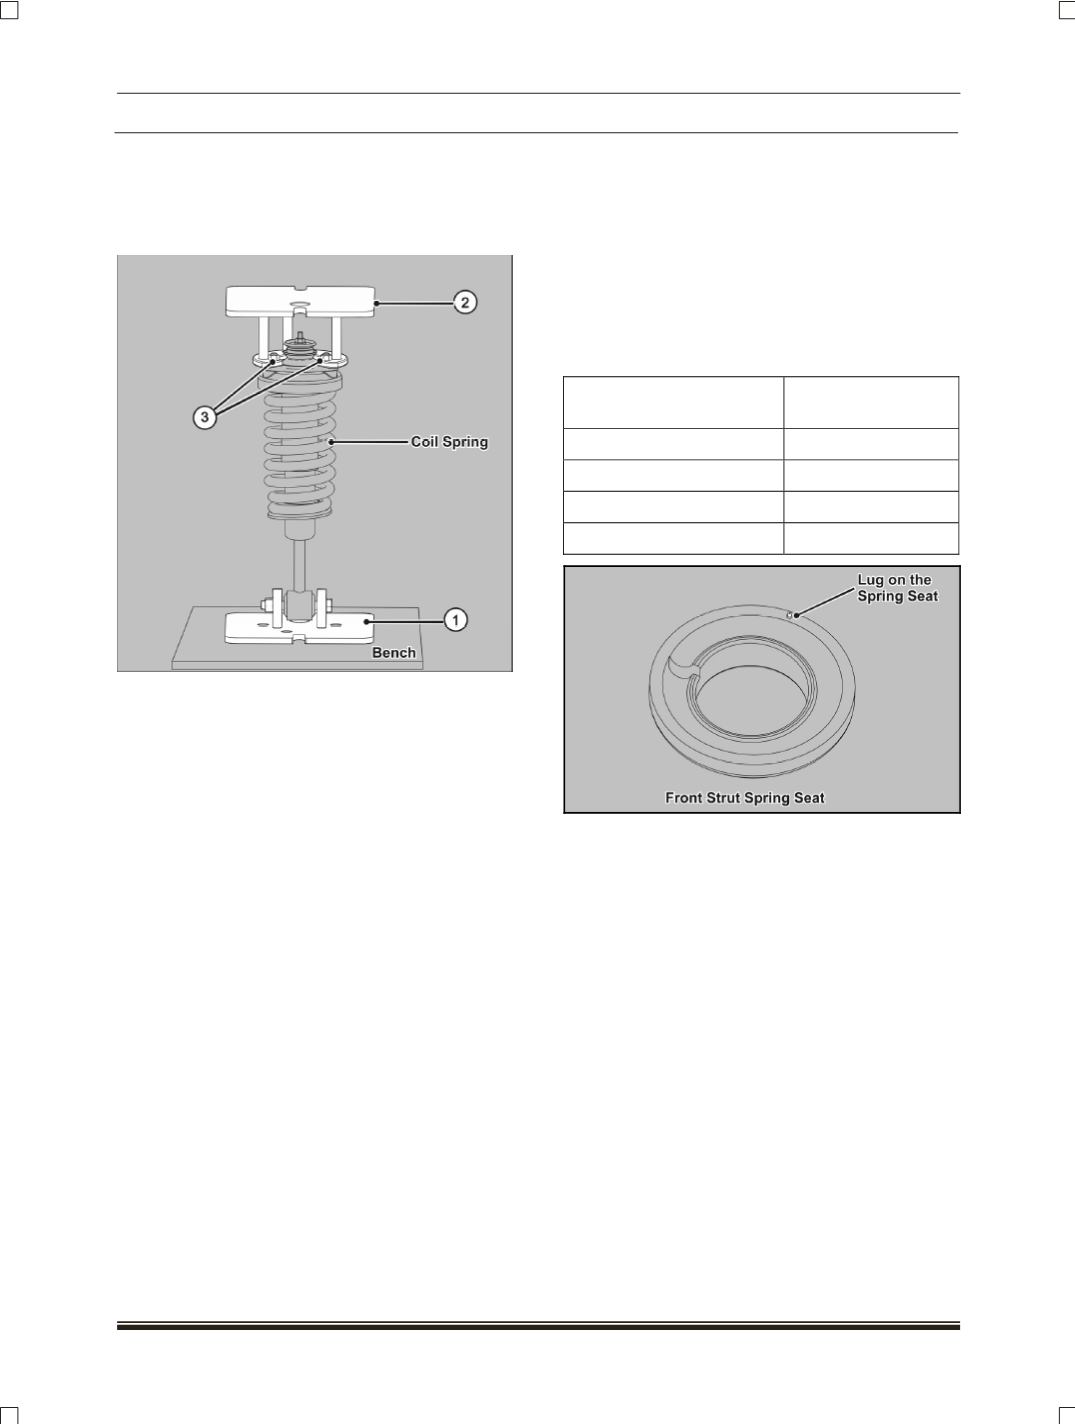
1. First hold the Strut assembly in the bottom plate
(1)
(Part No.287058903239)
and lock the same
by using nut and bolt.
2. Place the top plate
(2) (Part No.287058903238)
and lock the same with Strut assembly using
nuts and bolts
(3)
.
3. Press the top plate with press machine such
that the coil spring gets compressed and then
remove the strut assembly top mounting nut.
4. Slowly release the load from the top plate and
take out the coil spring.
INSPECTION
1. Check the rubber parts for damage or
deterioration.
2. Check the coil spring for sagging and
weakness.
3. Check out the shock absorber for abnormal
resistance or unusual sound or leakage.
ASSEMBLY
For assembly follow the reverse procedure of
removal. Use the same special tools which are
used for removal. Also follow the below
instructions.
NOTE
Ensure that spring is properly seated in the top
and bottom spring seat.
Ensure proper combination of spring and top
rubber spring seat before assembly.
Use coil springs of same color band for a
vehicle.
Spring seat should match with the color code of
coil spring as mentioned below.
LUGS ON SPRING
SEAT
COIL SPRING
COLOR CODE
Spring seat with 1 lug
Sky blue
Spring seat without lug
Light orange
Spring seat with 2 lug
Canary yellow
Spring seat with 3 lug
White
Marking on the spring is located at two coil
turns from the top.