


 83 / 1575

ENGINE
44
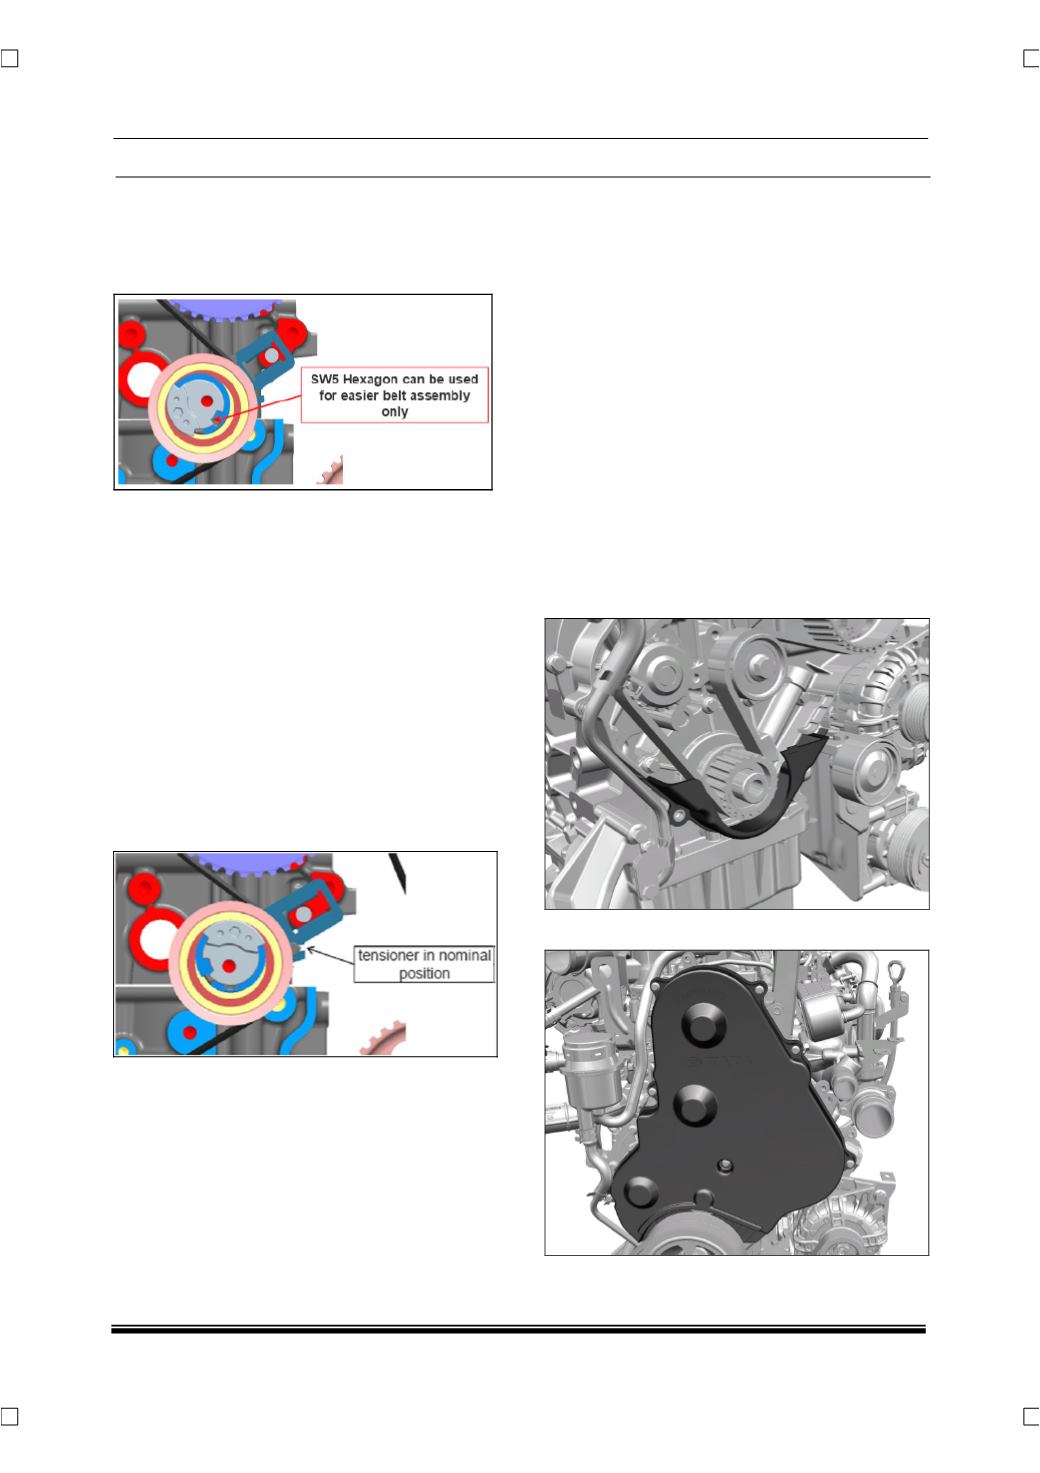
5. Before putting belt over water pump move the
tensioner working eccentric with pulley in left di-
rection(pointer will move in clockwise direction),
by using the small SW5 hexagon and rotating it
in clockwise direction
6. Once the belt is positioned onto the pulleys, belt
tensioning procedure can be started. The adjust-
ing washer has to be rotated in clockwise
direction by means of the Allan key (SW6) whilst
preventing the M8 nut from turning by means of
a tool. The aluminum eccentric with pointer will
start rotating during the setting of the adjusting
washer / eccentric. The adjusting washer has to
be rotated until the pointer reaches a position
about 10°to 15°from the nominal position in di-
rection of higher load (pointer on the right side of
the window).
7. Then the adjusting eccentricity has then to be
rotated counter-clockwise until the pointer is
aligned according to the attached picture “Nomi-
nal position” (pointer is aligned with the index
mark on the plate).
8. The M8 nut has to be tightened (recommenda-
tion according to the bolt supplier (approx.
3.46±0.3kgm, based on global friction value of
0,120, 03 and 10.9 bolt)) while simultaneously
preventing the adjusting washer from rotating by
holding it with an Allan key.
9. Tightened the camshaft gear to the specified
torque.
10. The locking tools are removed.
11. The crankshaft to be rotated 4 to 6 times (ensure
that cylinder 1 has reached its top dead centre
by rotating the crankshaft clockwise, and engine
is in its initial position).
12. Check the alignment between pointer and front
plate (permissible misalignment ±4°).
If the misalignment between pointer and back
plate is bigger than ±4°, then:
13. The M8 nut to be loosened to finger tight.
14. The adjusting eccentricity is turned counter-
clockwise until the pointer is at the mounting po-
sition again.
15. Then the steps 6 to 12 have to be repeated.
16. Reconfirm the engine timing.
NOTE:
Do not crimp or use sharp tool on timing belt.
17. Fix the bottom timing cover.
18. Assemble the timing cover front.
19. Fit the Cam angle sensor and electrical connec-
tions.