


 772 / 1006

HVAC
46
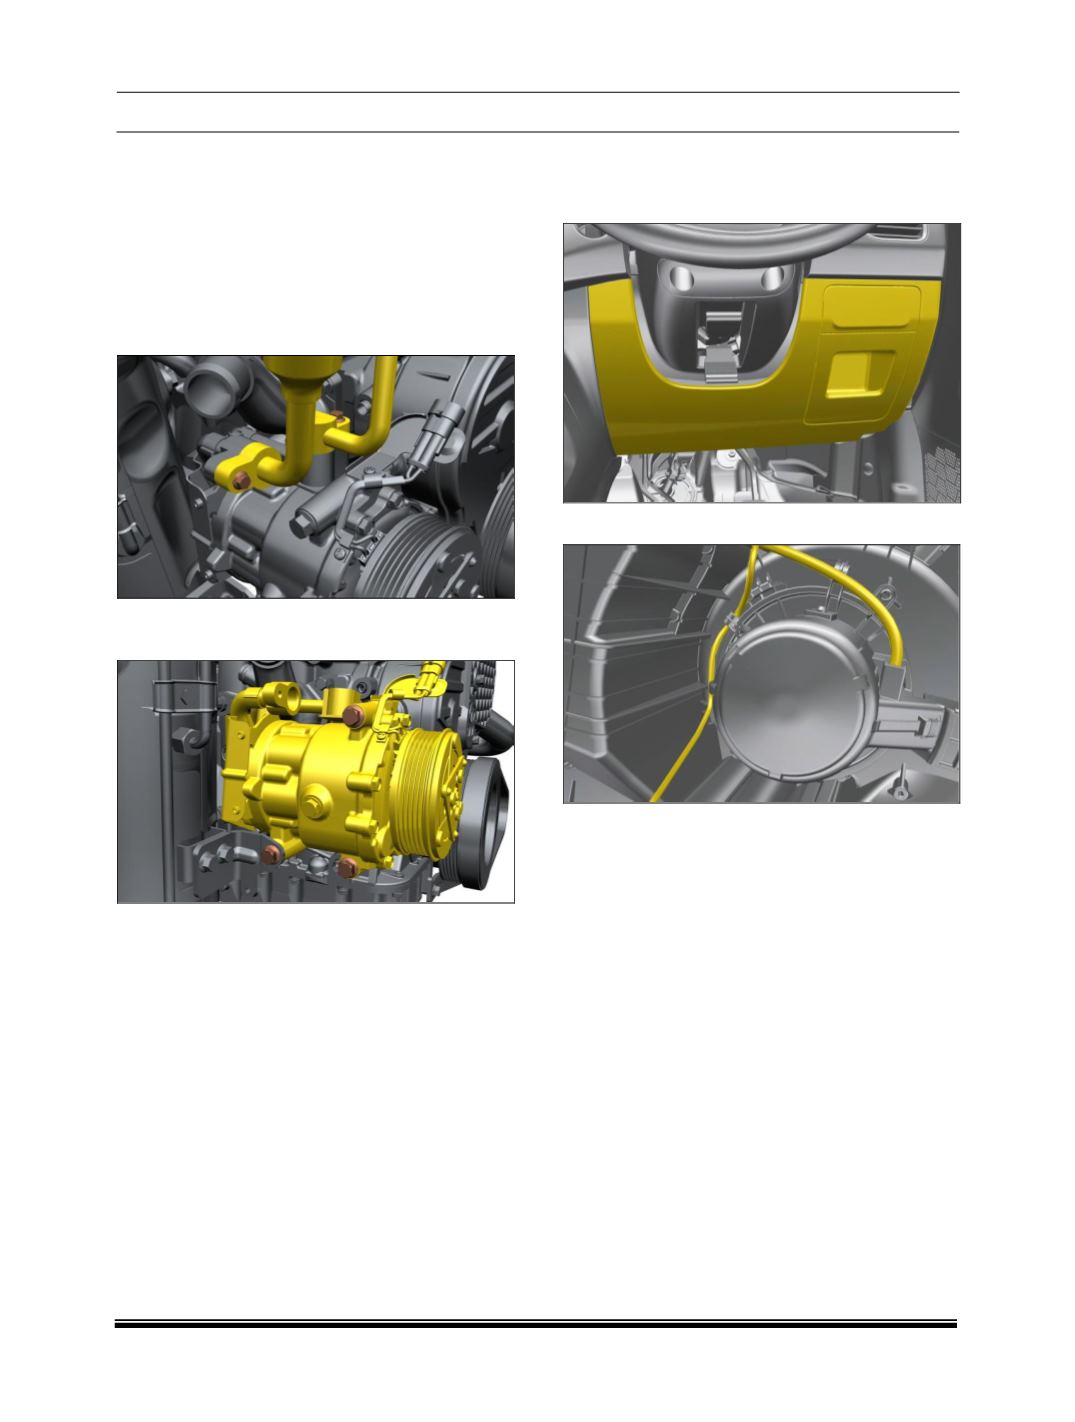
ii. COMPRESSOR REMOVAL AND ASSEMBLY
1. Discharge the refrigerant using standard recover-
ing equipment. Refer maintenance section.
2. Remove the AC Compressor belt; refer AC Com-
pressor belt removal procedure.
3. Disconnect Electrical connection to compressor.
4. Disconnect the Suction line and the discharge
line.
5. Loosen and remove the mounting bolts (1) and
remove Compressor.
FITMENT
For fitment, follow the reverse order of removal.
Tighten the following fasteners to the recommended
torque.
i) Compressor mounting.
ii) Refrigerant lines on compressor.
iii. BLOWER REMOVAL AND ASSEMBLY
1. Remove the driver lower panel located below
dashboard top panel.
2. Disconnect electrical connections.
3. Remove dashboard with cross car beam assem-
bly. (For procedure, refer dashboard removal with
cross car beam in body section)
4. Loosen and remove three mounting bolts and
separate the blower from the HVAC assembly.
FITMENT
For fitment, follow reverse procedure of removal.