


 574 / 1232

Automated Manual Transmission
46
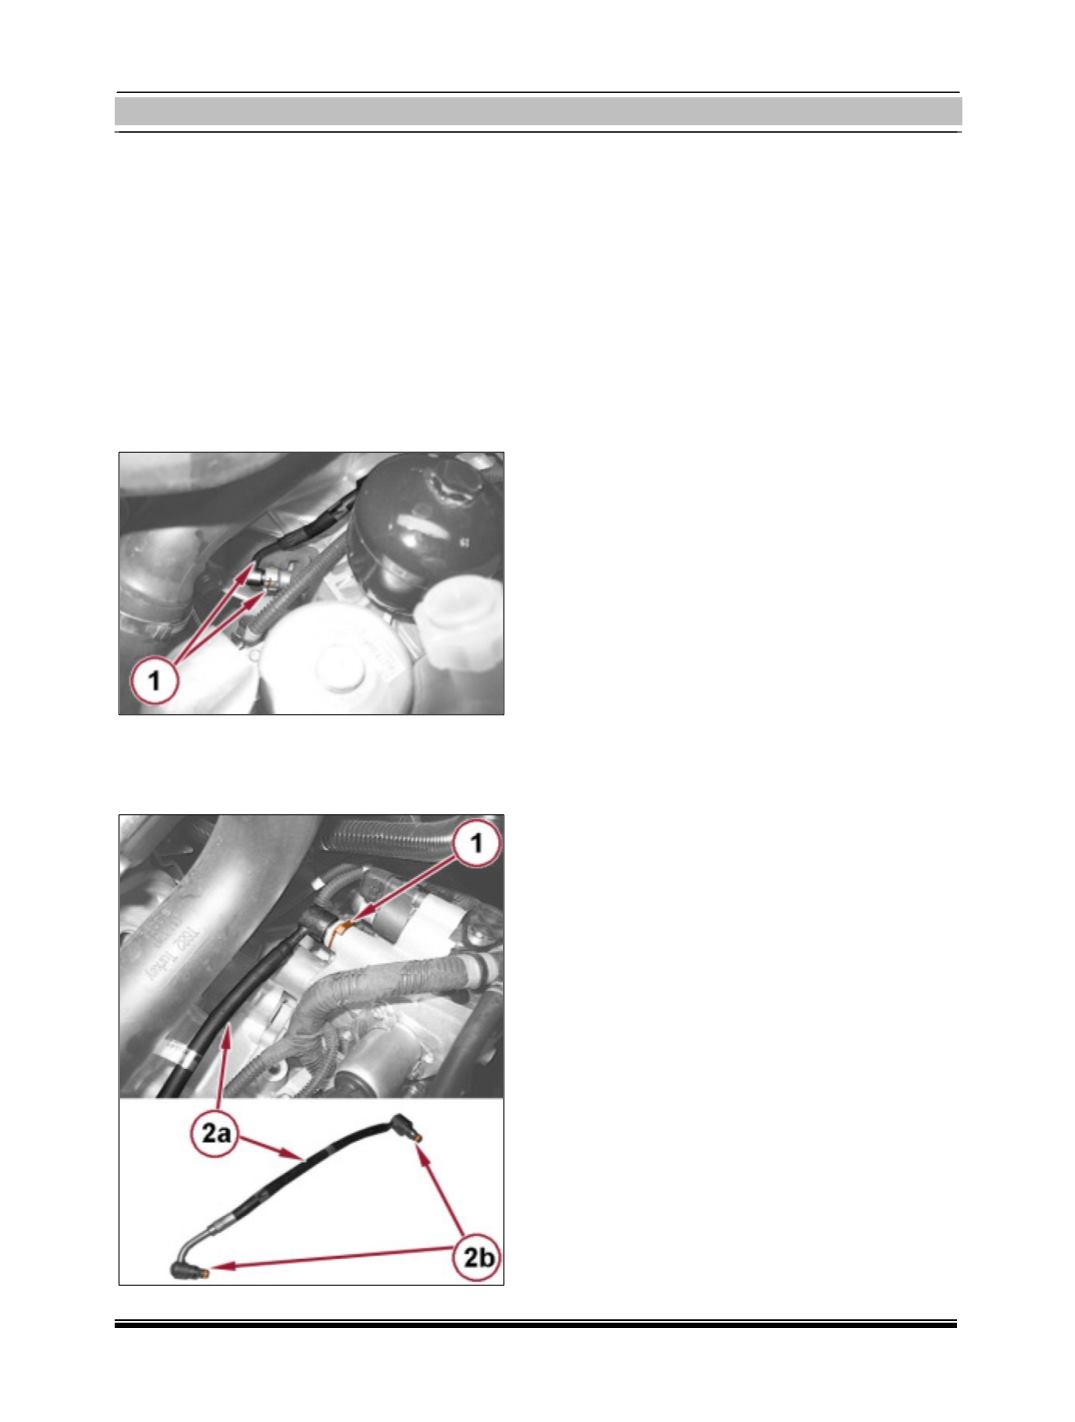
Pipe from Clutch Master Cylinder to Clutch
Release Actuator Removal:
1.
Connect the diagnosis equipment and car-
ry out the accumulator depressurization
procedure.
2.
Remove battery.
3.
Remove battery support/drip tray.
4.
Raise the clip and disconnect the pipe
from clutch master cylinder to clutch re-
lease actuator, actuator side.
5.
Raise the clip and disconnect the pipe
from clutch master cylinder to clutch re-
lease actuator, master cylinder side.
6.
Remove the pipe from clutch master cyl-
inder to clutch release actuator (2a)
complete with O-rings (2b).
Pipe from Clutch Master Cylinder To Clutch
Release Actuator Fitment:
1.
Place the pipe from clutch master cylinder
to clutch release actuator in its housing
complete with new O-rings and engage
the retaining clips.
2.
Refill the electro-hydraulic selection gear-
box hydraulic control system, with
reference to
3.
Check level of hydraulic system fluid for
gearbox with hydraulic selection and top
up, if necessary
4.
Fit battery support/drip tray.
5.
Fit battery.
6.
Connect the diagnosis equipment and car-
ry out the following operations:
Bleed air of hydraulic system for gearbox
with hydraulic selection
Clutch self-calibration enablement.
Grid self tuning - service.
New actuators (only if the hydraulic actu-
ation unit is being replaced).