


 502 / 1526

27
BRAKES
WHEEL CYLINDER SERVICING
OVERHAULINGTHEWHEEL CYLINDER
Wheel cylinder should be overhauled as per
recommended service schedule.
REMOVAL OF WHEEL CYLINDER (REAR)
When removing or servicing wheel cylinders, it is
necessary to drain the brake fluid from the system
and remove the brake shoes.
Attach a transparent (Vinyl) Fig. 28 bleed tube to
the bleed screw, having first removed its rubber dust
cover. Unscrew the bleed screw 1/2 to 3/4 turn and
pump out the fluid into a suitable container by
operating the brake pedal. Remove the bleed tube.
Remove the brake shoes as explained under
“Removal of Shoes”.
Remove the adaptor from the feed port along with
the gasket. Remove the wheel cylinder from the
wheel cylinder mounting bolts and take out the wheel
cylinder from the backplate. Fig. 29
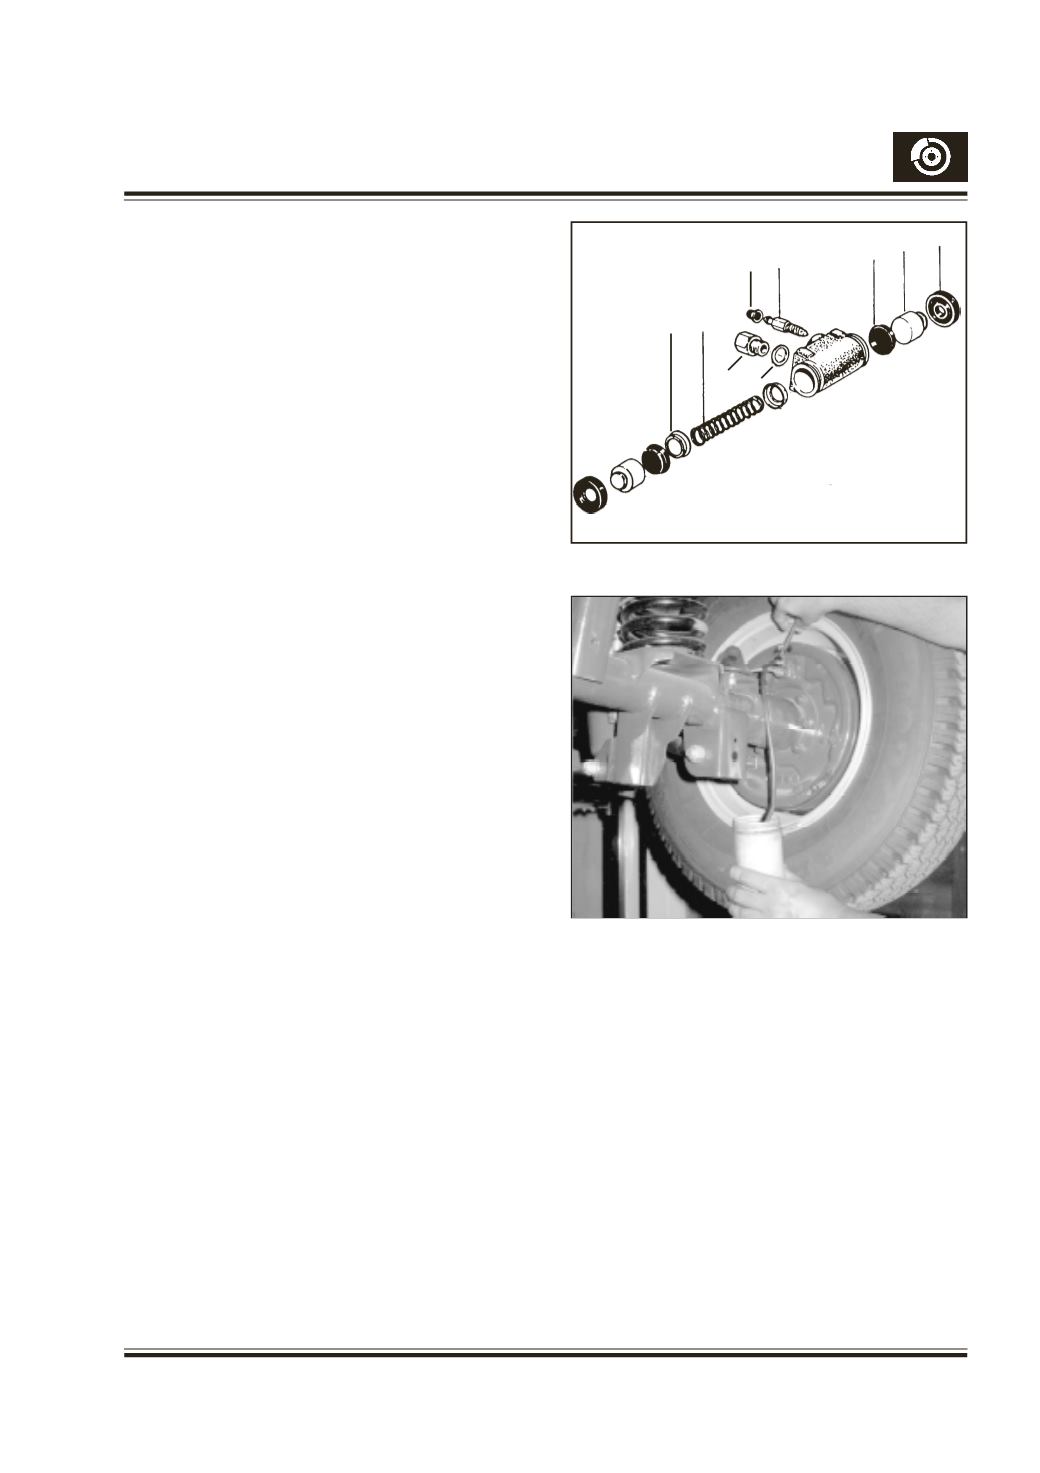
DISMANTLING OF WHEEL CYLINDER
(Fig.27)
Clean the wheel cylinder externally. Remove the dust
covers fitted on the wheel cylinder assembly and
the bleed screw. Push out the pistons, and springs.
Remove the seals from the pistons and clean all
the parts thoroughly in fresh brake fluid or alcohol
and place them on a clean sheet of paper.
NEVER CLEAN THE WHEEL CYLINDERS OR
INTERNAL PARTSWITH KEROSENE OR PETROL,
AS IT WILL LEAD TO CONTAMINATION AND
DAMAGING OF RUBBER PARTS.
EXAMINATION OF WHEEL CYLINDER
Examine the cylinder bore and pistons. If they are
not scored, corroded or ridged and are smooth to
touch, new seals can be fitted. If there is any doubt
about the condition of the bore, a new wheel cylinder
assembly must be installed.
Fig. 28
Fig. 27 Wheel cylinder assembly
1. Dust cover
2. Piston
3. Seal
4. Spring
4
5
3 2 1
9
6
7 8
5. Bleed screw
6. Seal retaine
7. Adaptor
8. Gasket
9. Dust cap