


 519 / 896

BRAKE SYSTEM
527
BRAKES
FRONT BRAKE BACK PLATE
Removal
1. Remove wheel(s) (Refer wheel removal procedure/
Wheels and tires group)
2. Attach a transparent (vinyl) bleed tube to the bleed
screw having first removing its rubber dust cap.
3. Unscrew the bleed screw 1/2 to 3/4 turn and pump
out the brake fluid in a suitable container by
operating the brake pedal. Remove the bleed tube.
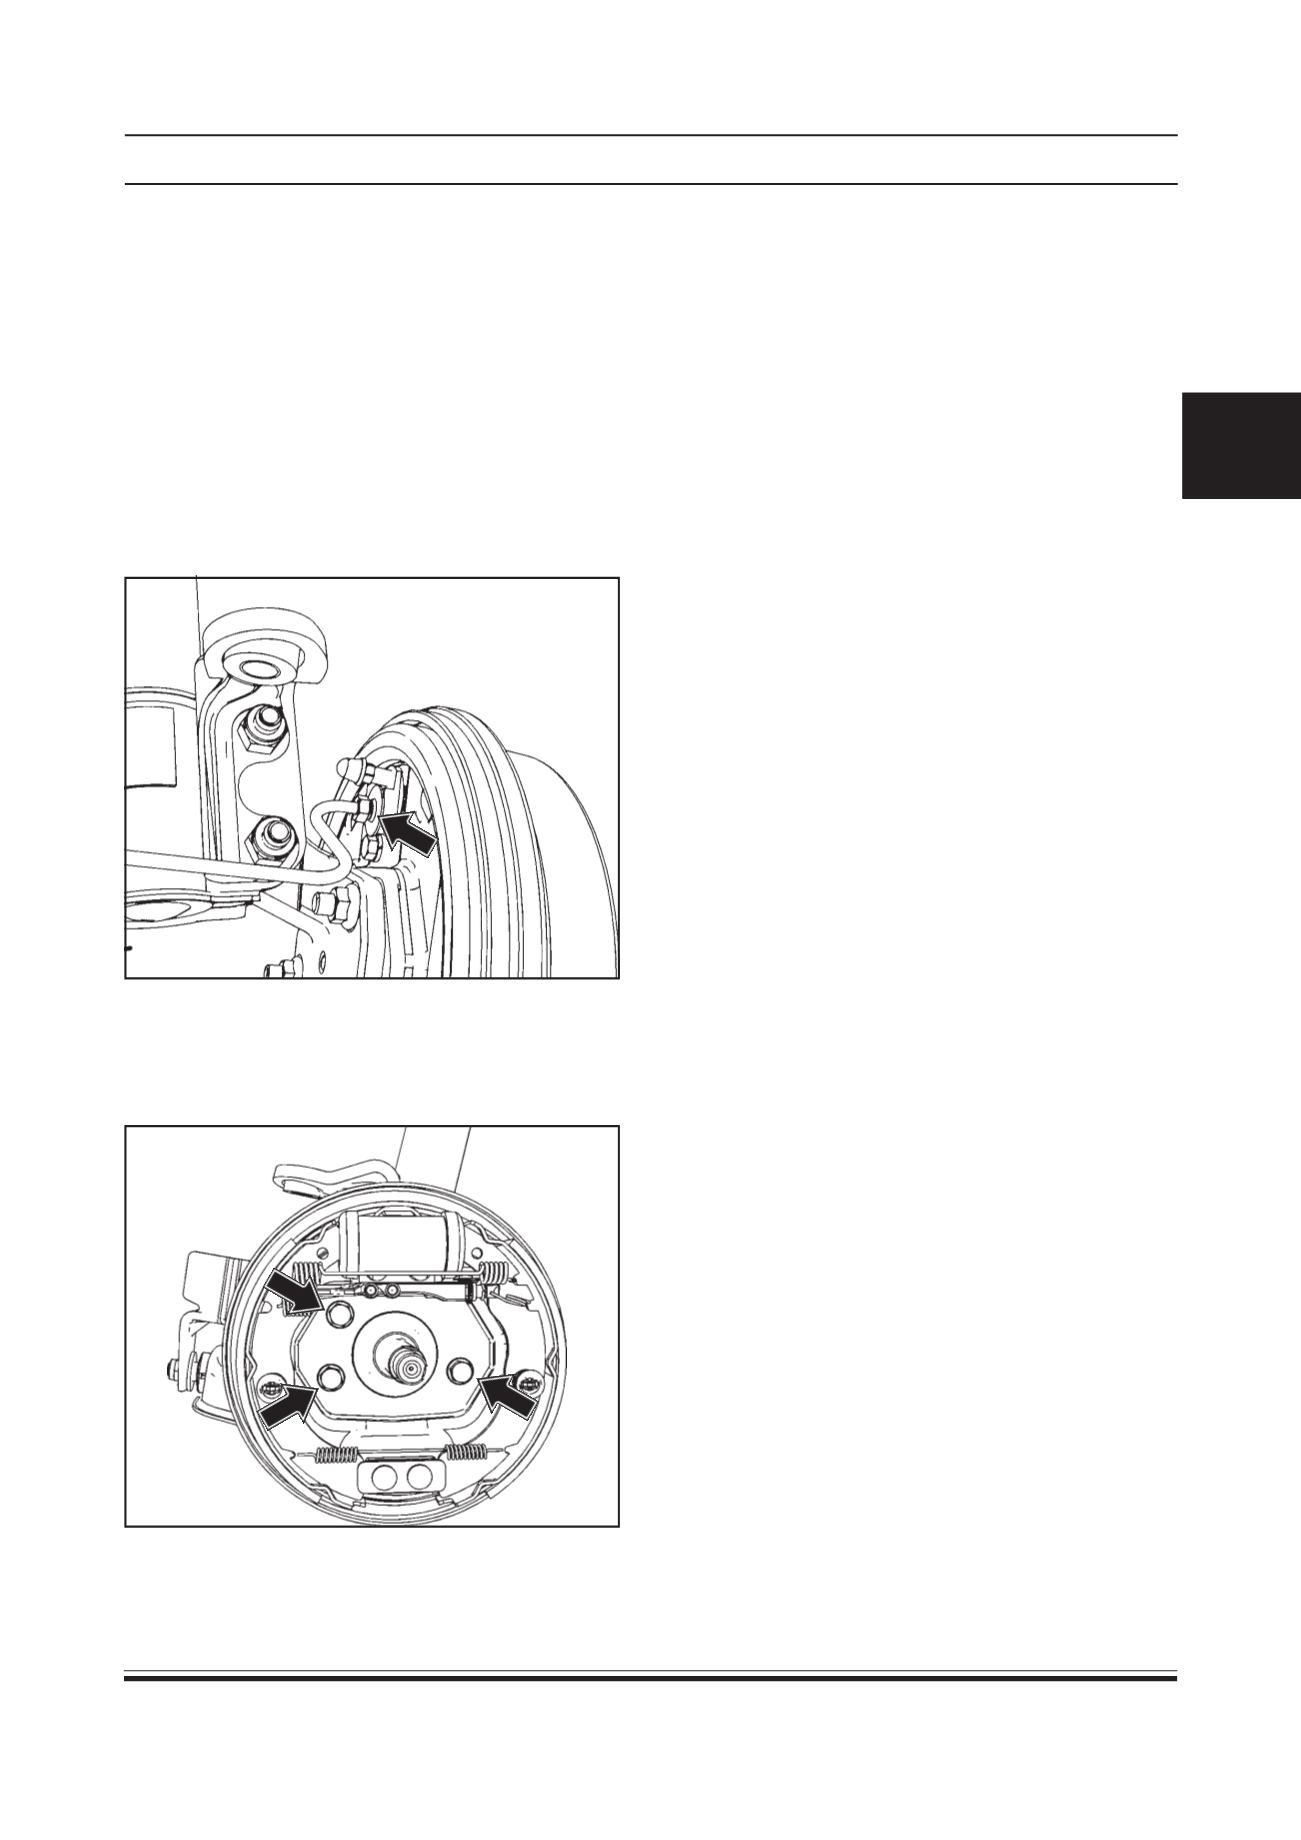
4. Disconnect the hydraulic brake line attached to
wheel cylinder.
5. Remove the brake drum using brake drum puller.
6. Remove three mounting bolts and take out brake
back plate along with brake shoes and wheel
cylinder.
7. Remove front brake shoes and wheel cylinder.
(Refer Front Brake Shoes and wheel cylinder
removal procedure) and remove brake back plate.
Before installation follow the procedure as given
below:
1. Clean the back plate with kerosene or diesel.
2. Lubricate the tips of the shoes, the shoe platforms
on the back plate and contact areas of the back
plate.
NOTE:
Keep the grease away from the shoe linings and all
hydraulic parts.
Installation
1. Install brake shoes and wheel cylinder on back
plate assembly. (Refer front brake shoes and wheel
cylinder installation procedure)
2. Mount back plate assembly on stub axle and tighten
three bolts to specified torque.
TIGHTENING TORQUE FOR BACK PLATE BOLTS =
2 - 2.5 Kg-m
3. Install brake drum (Refer Front brake drum
installation procedure).
4. Connect brake hydraulic line to wheel cylinder
assembly.
5. Perform brake bleeding. (Refer bleeding of
hydraulic system)
6. Mount wheel (s) and tighten wheel mounting bolts
to specified torque.
TIGHTENING TORQUE FOR WHEEL MOUNTING
BOLTS = 8 - 8.3 Kg-m
7. Remove supports and lower vehicle.