


 466 / 1575

FRONT SUSPENSION
17
FRONT
SUSPENSION
Ball Joint Axial Play
0.1 mm max.
Ball Joint Radial Play
0.2 mm max.
NOTE
If the lower wishbone bushes are found to be
damaged or worn out replace the lower wishbone
assembly. Individual bushes are not serviceable.
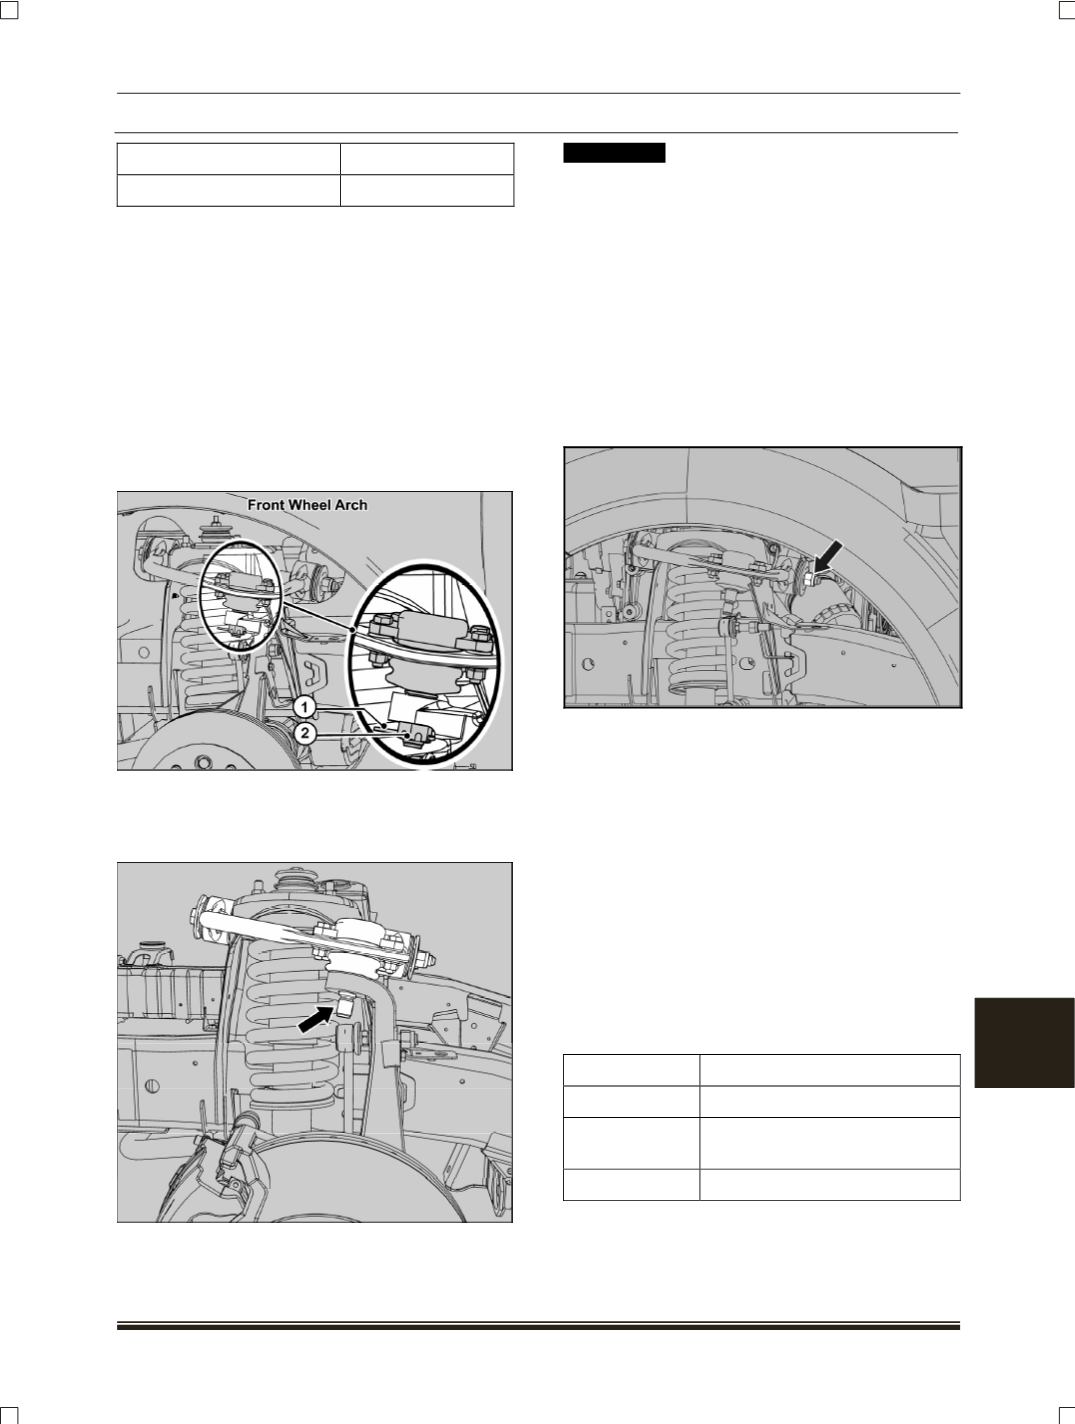
D. UPPER WISHBONE
REMOVAL
1. Remove front wheels.
2. Remove inner wheel ach liner.
3. Take out the split pin
(1)
and remove the castle
nut (2).
4. Disconnect the link assembly from the knuckle.
5. Support the knuckle and disconnect the ball
joint from the knuckle.
!! WARNING
When the knuckle is disconnected from the
upper wishbone the knuckle may fall outwards
towards the technician. Hence supporting it is
very essential. If proper care is not taken it
might cause injury and in case of 4X4 vehicles
it might damage drive shaft rubber boot.
The upper wishbone might spring upwards
when released from the knuckle, hence special
care should be taken.
6. Loosen and remove the upper wishbone Nyloc
nut and remove the mounting bolt along with
the washer.
NOTE
Discard the NYLOC NUT and use the new one at
the time of assembly.
7. Remove the upper wishbone assembly along
with the ball joint.
FITMENT
1. Slide the mounting bolt of upper wishbone
through the chassis and lock the same with the
Nyloc nut. Do not apply the torque just tighten
it.
NOTE
If required, add the shims to fill the gap.
Insert the shims as given in the table;
Gap
Shim Fitment
Gap < 1 mm
No shim required
Gap > 1 mm
Insert shim on the rear pivot
side
Gap > 2 mm
Insert shim on both sides.