


 436 / 745

BRAKES
33
15. ON VEHICLE REPAIRS
A. CALIPER ASSEMBLY WITH CARRIER
REMOVAL
1. Apply parking brake & keep the gear shift lever
in neutral position.
2. Jack up the front of the vehicle and remove
wheels.
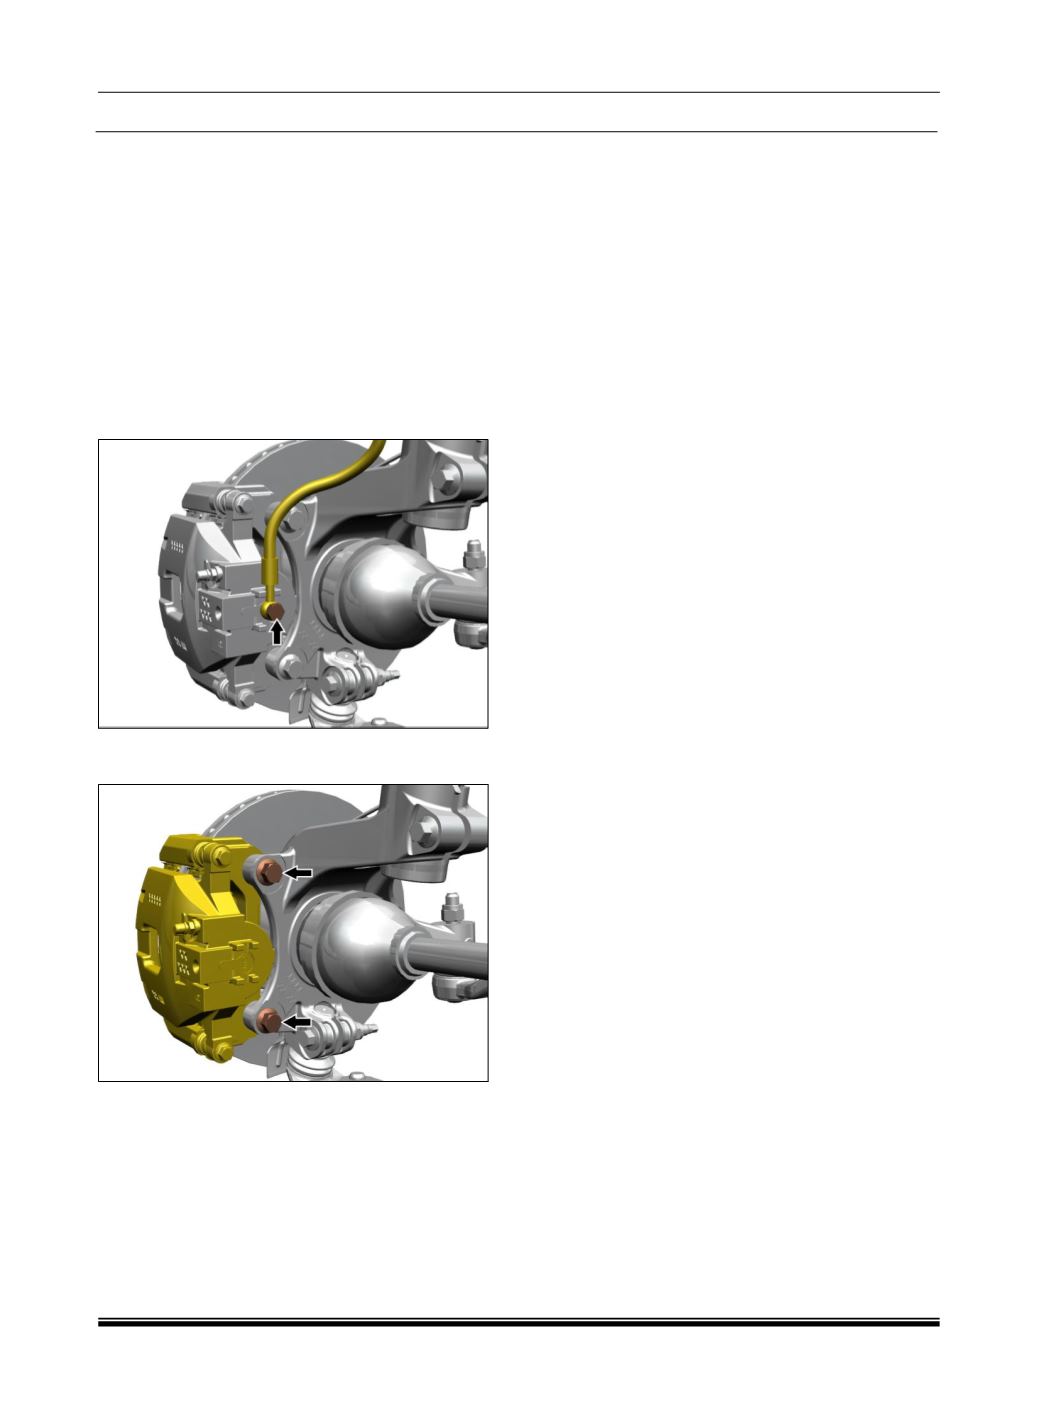
3. Remove hose from caliper body by taking out
the banjo bolt and collect the brake fluid from
caliper in a clean container. Block the brake
hose using a dust cap to prevent loss of brake
fluid and prevent contamination and keep the
pipe in the vertically up-straight position.
4. Loosen and remove the mounting bolts of
caliper assembly.
5. Remove the caliper assembly along with the
carrier from the brake disc.
NOTE
If only the caliper housing has to be removed.
Remove the upper & lower sliding bolt and
take out the caliper housing.
FITMENT
For fitment follow the reverse procedure of
removal.
B. BRAKE DISC REMOVAL
FRONT BRAKE DISC REMOVAL
For front brake disc removal refer Front Axle
section.
DISC INSPECTION
Before assembling the caliper back to the carrier,
the disc should be inspected.
The disc should be cleaned with dry cloth, oil
traces to be wiped out completely.
The disc should be free from score marks. If
scored, replace with new one.
NOTE
Minimum thickness of front disc = 22mm
After fitment, the run out of the disc should be
measured.
(For procedure refer disc run-out
measurement procedure.)
The run out should be
less than 0.060 mm otherwise pedal pulsation will
be felt during brake application.
NOTE
Before assembly clean the mating faces of the
hub and brake disc.
FITMENT
For fitment follow reverse procedure of removal.