


 434 / 745

BRAKES
31
7. Now put the lever in 1
st
notch & check the
wheel rotation, if it is free tighten the
adjustment nut till wheel gets locked.
8. Ensure that on releasing parking brake lever
both rear wheels are free.
9. Tighten the lock nut which holds the spherical
adjuster nut.
10.Operate the parking brake few times to ensure
proper operation.
11.Lower the rear axle and remove the chokes
from the rear wheel.
(Note: Incase with 1
st
notch setting, if wheels are
not free in lever released condition make setting
on 2
nd
notch.)
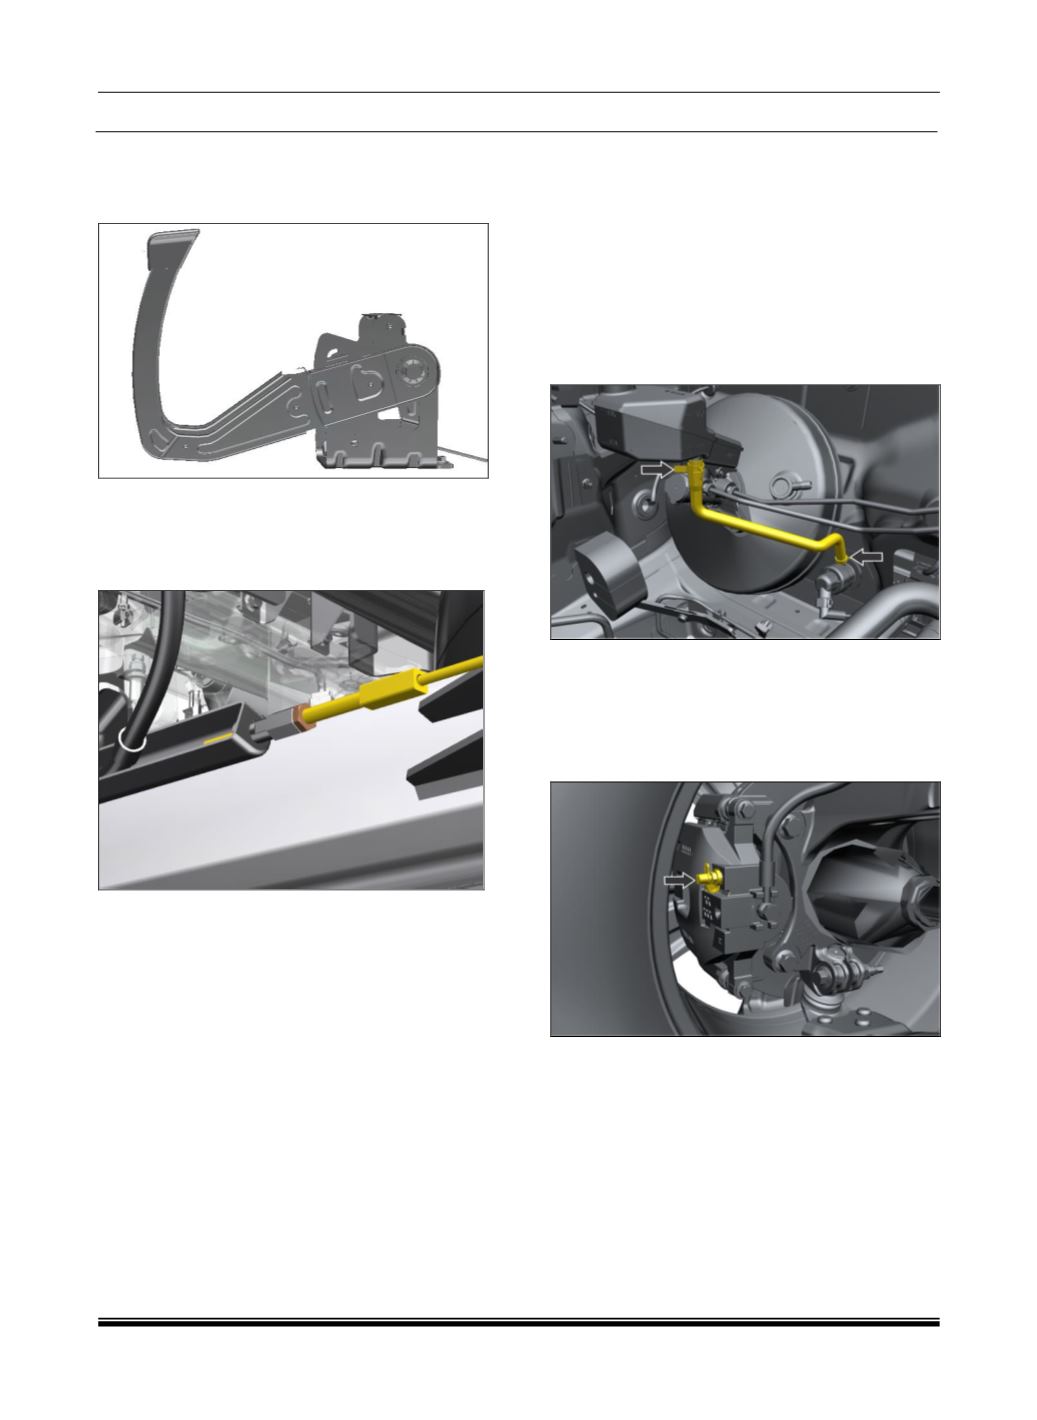
E. BRAKE FLUID DRAINING PROCEDURE
1. Open the bonnet.
2. In case of Manual Transmission, remove the
spring band clamp at the CMC end and hold
the CMC to reservoir connecting hose in
vertically upward position to avoid any further
loss of fluid and plug the openings with
suitable cap.
3. In case of Auto Transmission reservoir doesn’t
have clutch port.
4. Open the bleed screw of front caliper
(LHS),
connect the bleed tube to the bleed screw and
place the other end of bleed tube in the
container. Now drain the brake fluid from the
hydraulic circuit by pressing the brake pedal
repeatedly through its full stroke.
NOTE
Do not reuse the same drained fluid at the time of
bleeding.
Follow the same procedure of draining for other
three brakes in the sequence given below:
Front caliper
(RHS)
Rear Drum Brake
(LHS)
Rear Drum Brake
(RHS)