


 502 / 516

BODY
58
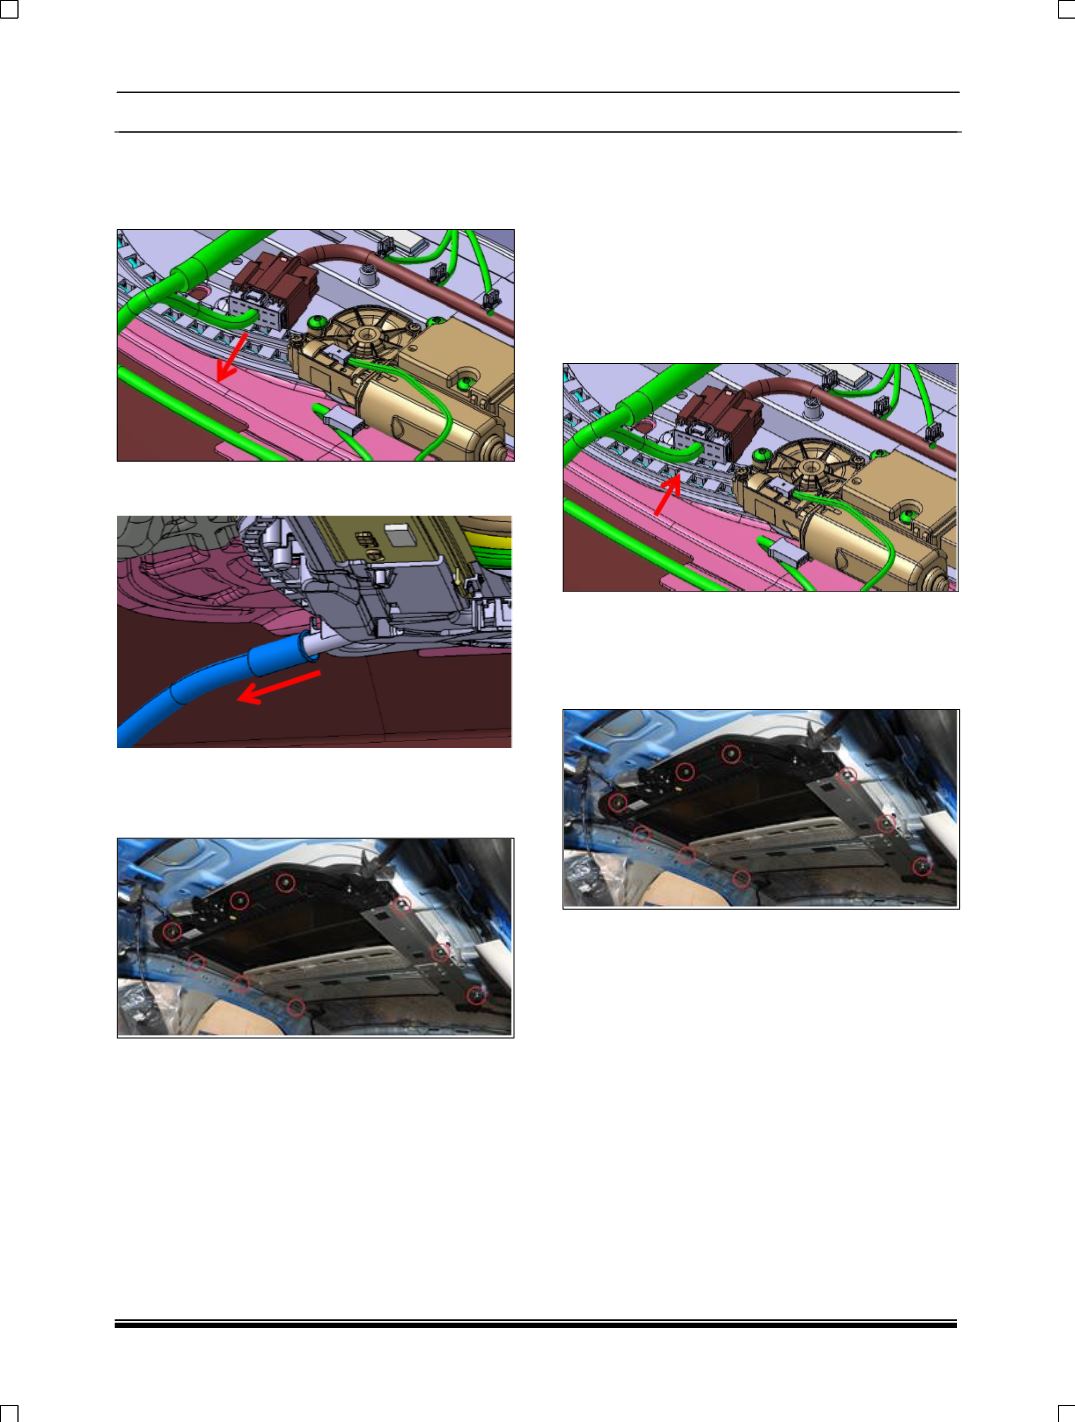
11. Unplug all the wiring harness connected to
sunroof. Pull the connector in shown direction.
Remove all the cables routed and clipped on to
the sunroof.
12. Unplug all the drain hoses from 4 corners of
the sunroof. Pull the hose in shown direction
13. Loosen all the mounting screws.
14. Remove all 10Nos. M6 Screws with washer
and give support to Sunroof and take it out.
NOTE
Due to the weight of the sunroof assembly it is
recommended that you use Jacks to support the
sunroof assembly to avoid Twisting of guide rails
during handling.
D. SUNROOF FITMENT
NOTE
Due to the weight of the sunroof assembly it is
recommended that you use Jacks to support the
sunroof assembly to avoid Twisting of guide rails
during handling.
1. Position the sunroof onto the mounting
location. Push the connector in shown
direction.
2. Attach all screws with washer. Do not tighten
until the Guide rail aligned with the factory
mounting points.
3. Once all fasteners are aligned and then start
tightening securely.
4. Maintain tightening torque of 7±10% N-m
5. Plug all the wiring harness to the sunroof,
Route all the cables and clip it on to the
sunroof.
6. Plug all the drain hoses to all 4 corners of the
sunroof.
7. Fix Beeding.
8. Fix A, B and C Pillar.
9. Fix All Grab Handles.
10. Connect electrical connection on microphone
and sunroof switch.
11. Tighten 2 mounting screws on Roof console
Housing.
12. Connect electrical connection on Roof Lamp
and Tighten Roof Lamp.
13. Fix Sun visors.
14. Connect Battery –Ve Terminal.